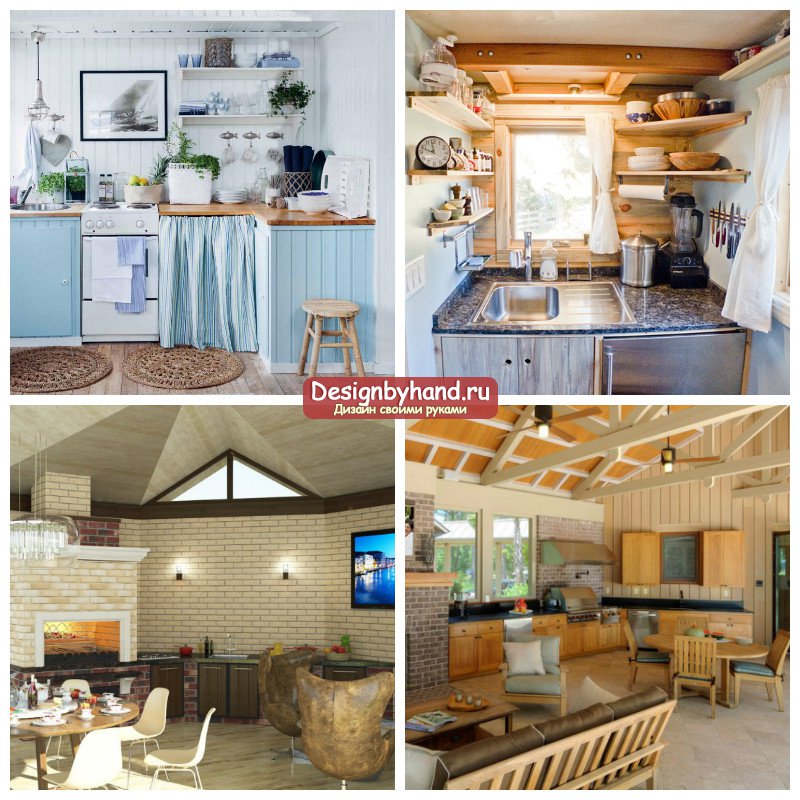
Need for availability summer kitchen in the country in most cases there is no doubt, with the possible exception of big size a plot on which to build a house, and simply nowhere. Indeed, such a building adds a fair amount of comfort to us on suburban area, especially if you give it the additional function of a dining terrace, gazebos for friendly and family gatherings and a comfortable area for cooking on an open fire with a barbecue or barbecue.
Summer kitchens in the country: photo
The main difference is that, despite the decoration, various materials in the decoration, the formation of walls, roofs, flooring, the main function should be cooking and storing food stocks, so the whole room should be built around this, and already additional options, such as a dining area with upholstered furniture and a large table, decorative fireplace, near which you can sit, a zone for children's games and so on - all these are optional acquisitions.
So, if in the project you do not see a convenient food preparation area, conveniently and ergonomically placed devices and utensils, then such a building can hardly be classified as a kitchen one.
There can be many reasons why in suburban construction we will need. One of them is fire safety requirements if you live in an area without centralized gasification and use compressed gas cylinders for cooking.
In this case, it is imperative not only to remove the kitchen outside the residential building, but also to make it as ventilated as possible in case of a sudden gas leak.
The second reason is that country houses in many ways not designed to withstand the significant positive temperatures that are so frequent in the summer months, working indoors on such days becomes a real test of strength.
And in a separate building, you can come up with not only a ventilation system or completely open walls, but also choose Construction Materials so that the air inside the room remains cool, even in the most intense heat. This, by the way, is also useful for high-quality storage of all food supplies, which, according to the norms, cannot be stored in the refrigerator. These qualities of materials can and should be paid attention to when choosing one or another summer kitchen in the country, projects, photos which you liked.
Summer kitchen at the cottage projects
User-friendly views summer kitchen in the country, projects which we will look at in this section, each has its own advantage and its own functional purpose, which will suit one or another owner. Some of them are complex and will require you to involve professional builders, and for those for whom it is not a problem, simple designs of open spaces with one supporting wall will come in handy.
First of all, you should decide whether your brand new kitchen will adjoin the house, like, that is, have a common foundation and roof with the building, or whether it will stand absolutely apart, maybe even at a sufficient distance from the residential building.
The second option is good for large plots, where such a building can become a real landscape center, next to it there will be a barbecue area, a gazebo. Swimming pool, playground, that is, places for the whole family to relax.
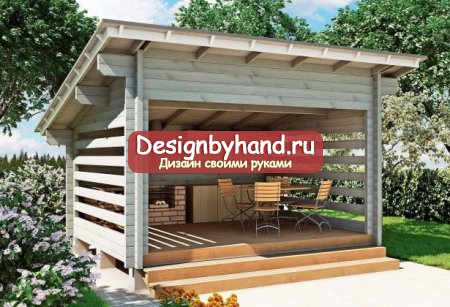
The second choice you have to make is to design it fully enclosed, fully open, or a combination of both. Benefits closed type you can call the best thermal insulation, as well as the ability to use the premises not only in summer, but also until late autumn, and if there is heating, also in winter.
On the other hand, most dachas are not intended for year-round use and a capital, closed building will cost much more to build, and these functions will be absolutely useless.
Also, the cost of the project will be largely influenced by your desire to make an oven or hearth inside for cooking on an open fire. Most often summer kitchen in the country with barbecue, photo which you may have seen, includes a brick multifunctional oven, the design is quite practical, convenient and gives you many new culinary possibilities.
But its weight is so great that it will be necessary to think over a serious foundation, and building it and strengthening the existing one is a significant part of the construction budget.

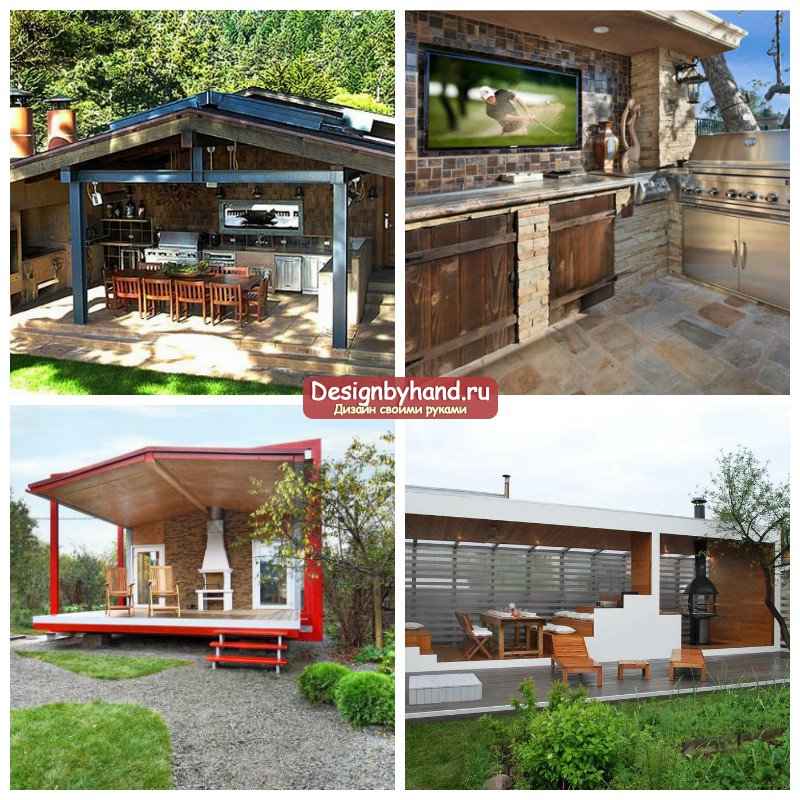
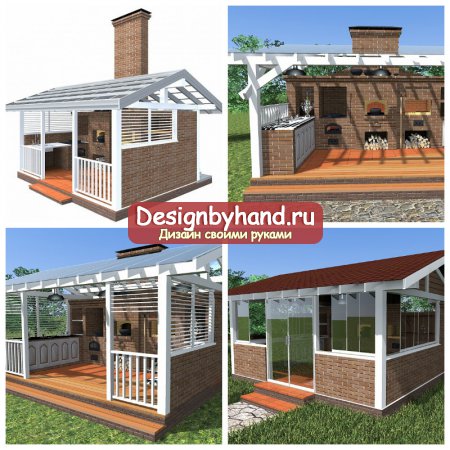
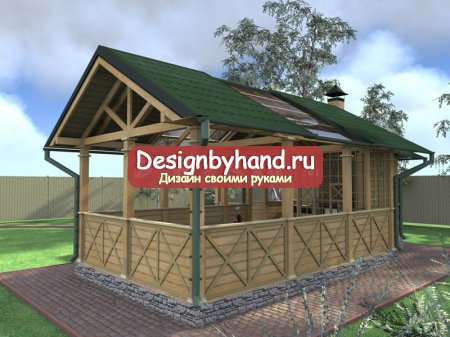
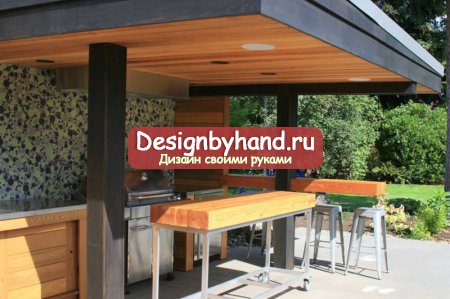
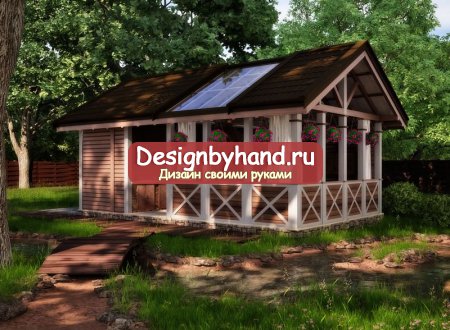
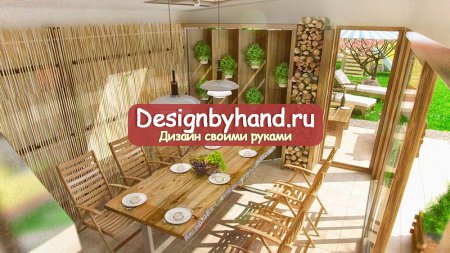
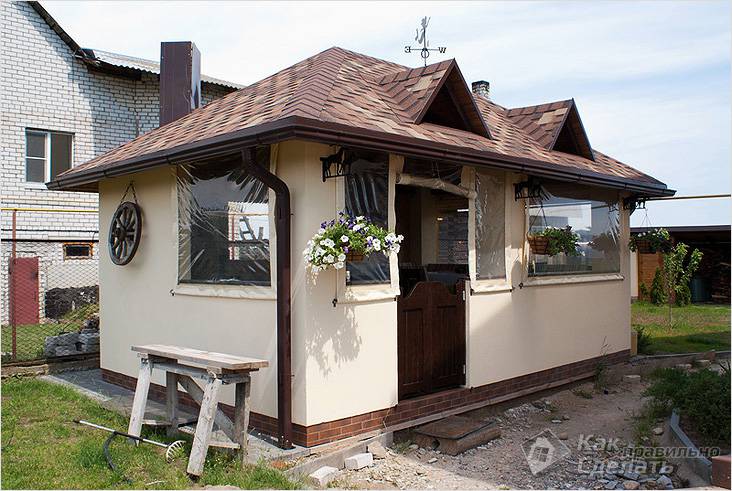
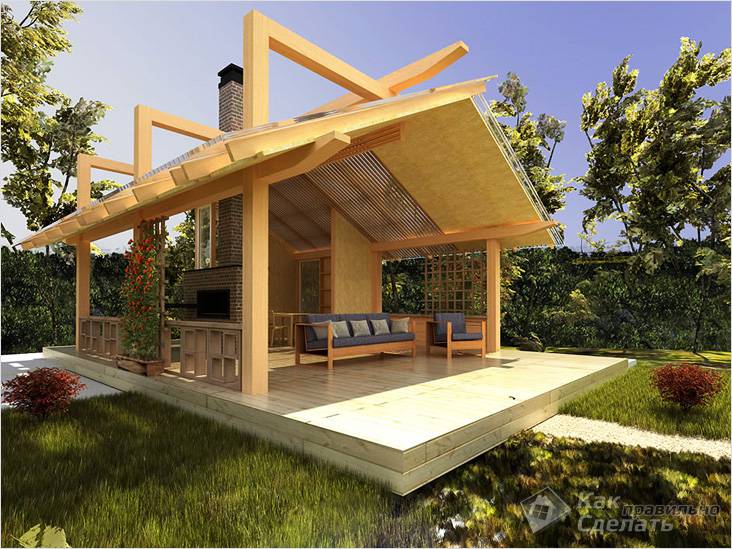
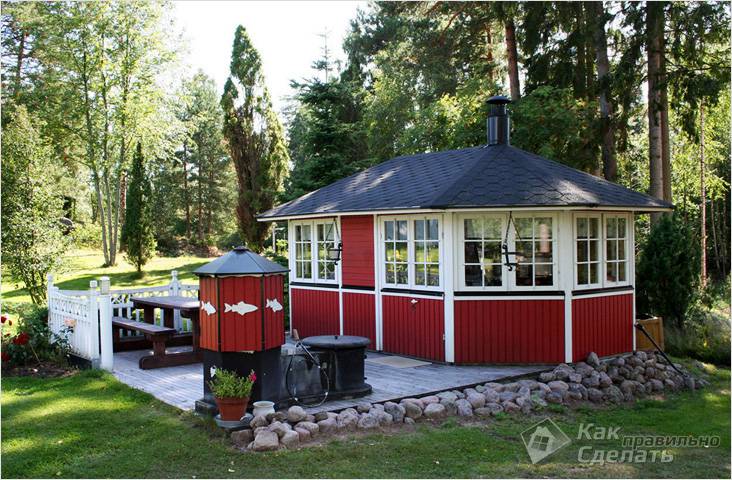
Let's take a look at one of the interesting summer kitchen projects in the country with a barbecue. In the photo you can see a building with a solid supporting main wall, along which there will be all the communications needed for cooking, and on the rest, framed by short brick walls, there will be a dining area and gazebos for receiving guests and country dinners.
The presented model is developed in three versions at once, depending on your preferences and the choice that we have already mentioned above.
The walls can be completely open to let in the maximum amount of light and fresh air, and can be complemented by thick wooden or plastic blinds that will provide the necessary shading. The third option is glazed walls, inside which you will get a closed room, suitable for use even in the cold season.
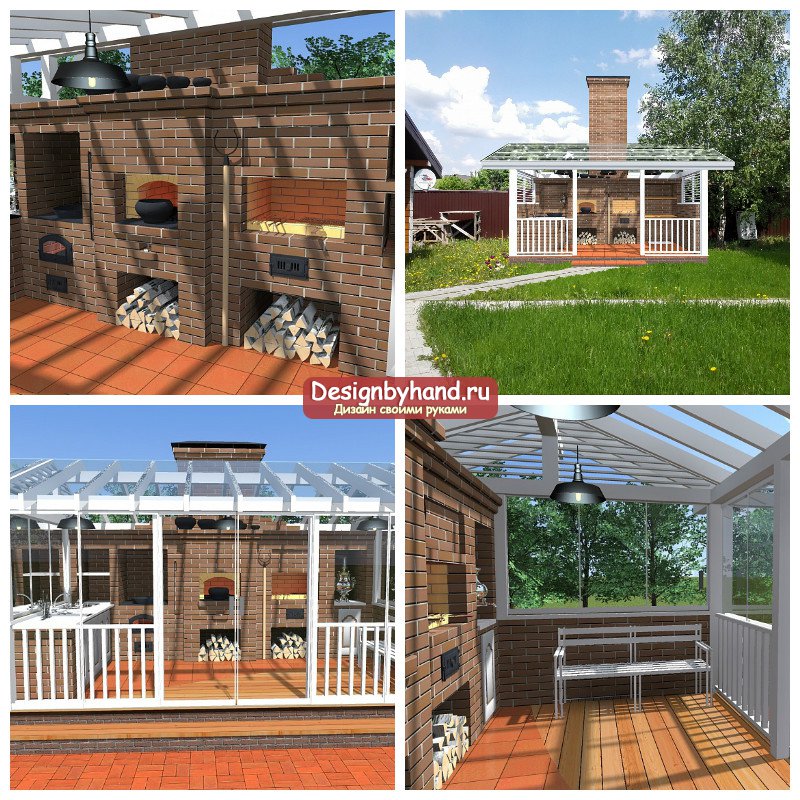
The beauty of this layout is that in the same usable area that is occupied, say, you get a place for full-fledged cooking with excellent brick oven where you can cook real culinary masterpieces. In addition, such a stove can also be used as a heating device, if you use its compartments designed for this.
Do-it-yourself summer kitchen in the country
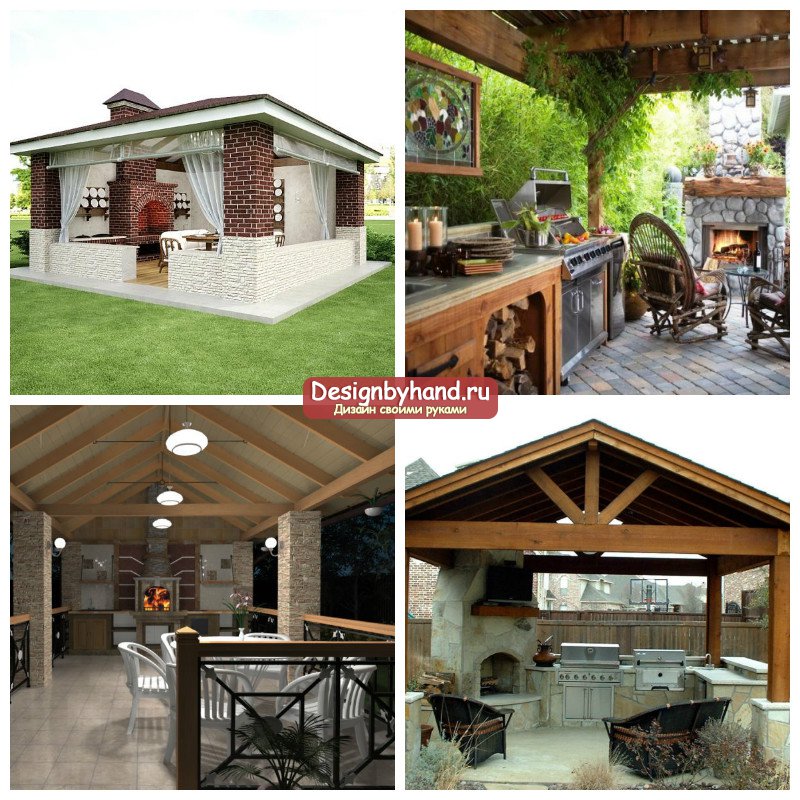
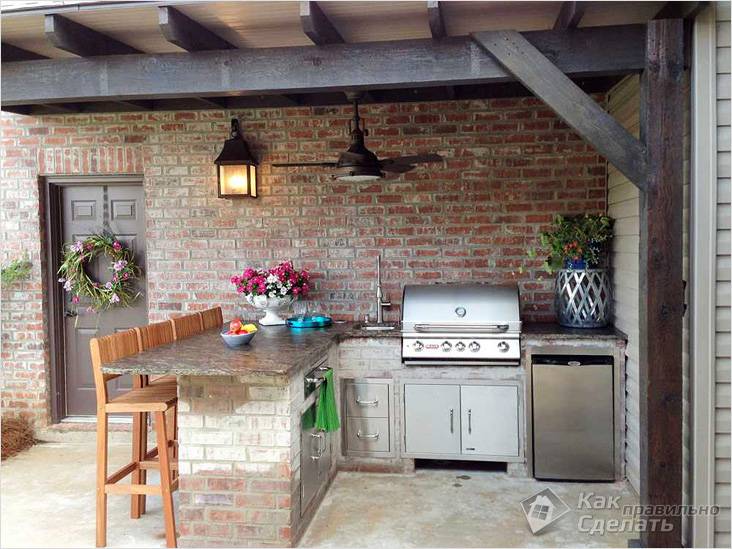
You shouldn't think that summer kitchen in the country with their own hands- this is exclusively our invention and there is no such thing in the whole world. In fact, in countries with any climate, it is very common to find just such models that allow you to cook in small closed patios, backyards of houses, and, regardless of whether the summer is hot or not. The point is in the pleasant process of cooking, especially dishes on a grill with coals - barbecue. Only for her alone it is already possible to install kitchen appliances under.
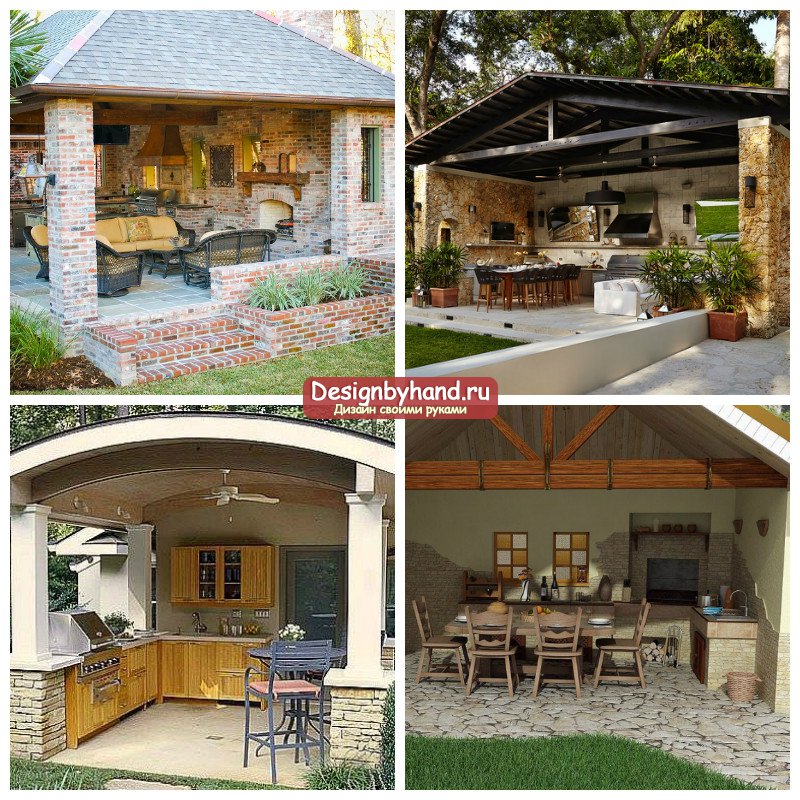
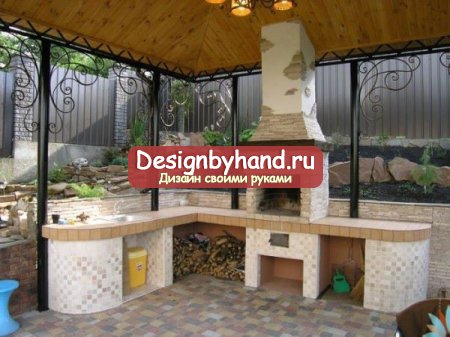
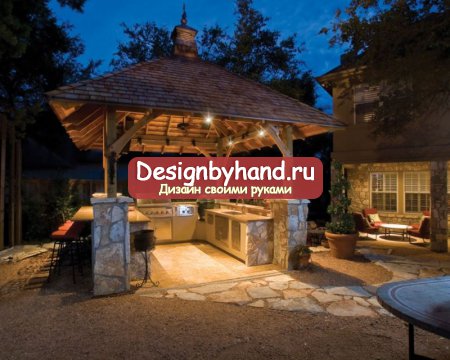
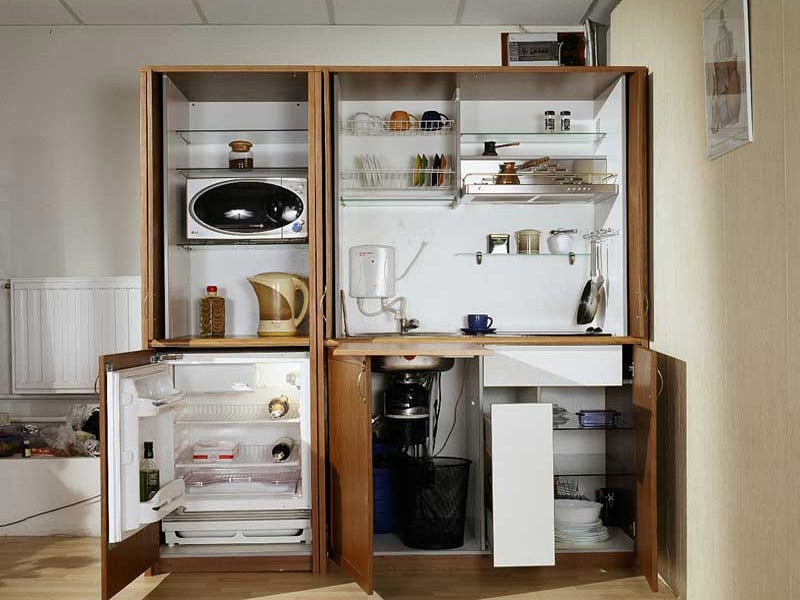
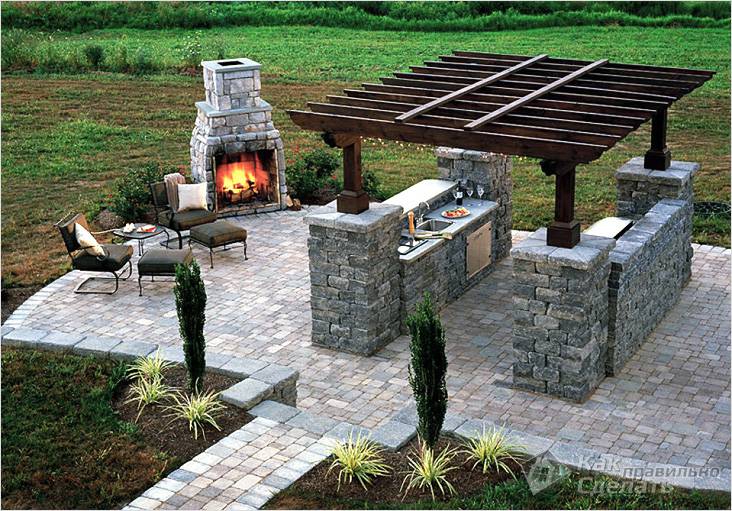
Purpose of the examples shown summer kitchen with barbecue in the country, projects which you see above, to prove that it is possible to organize an exit kitchen in a very compact way and for this only the most necessary is enough. The list of must-have items here includes a barbecue oven with a closing lid that you can use as needed, as well as a regular stove that turns on when it just doesn't make sense to waste coals. In addition, of course, you cannot do without a sink with water, cupboards for dishes and a work surface that is comfortable and wide, on which you can prepare everything for cooking. Optionally, we place our favorite electric kettle, multicooker and microwave oven, without them there is nowhere in the modern food preparation area. How can you not do without a refrigerator, even if it is not large, which we are used to in city apartments, but compact, where you can safely hide all the food (let's not forget that store food where mice and cats can get to it) must be done with extreme care and caution).
Summer kitchen in the country with barbecue
Buying a barbecue oven is usually quite expensive, besides, we are more familiar with a brazier, on which you can fry meat and vegetables with the same success. That's just the difference between the previous options and summer kitchen in the country with barbecue in the fact that this open fire is necessary the right approach. A special metal hood is placed above it, which, firstly, does not allow soot and odors to spread, and secondly, protects the interior from the dangers of open fire.
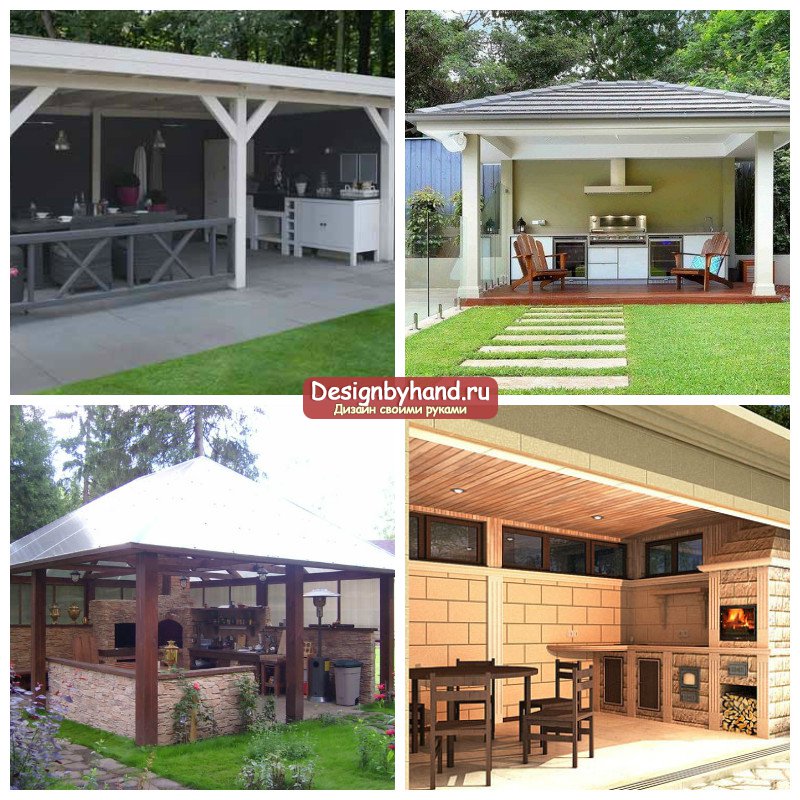
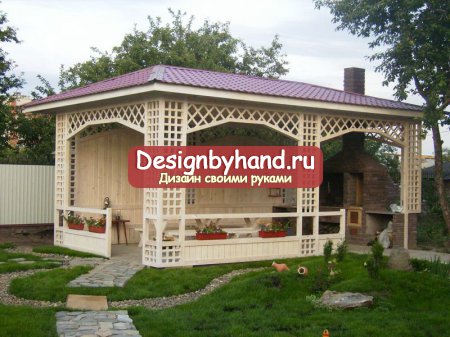
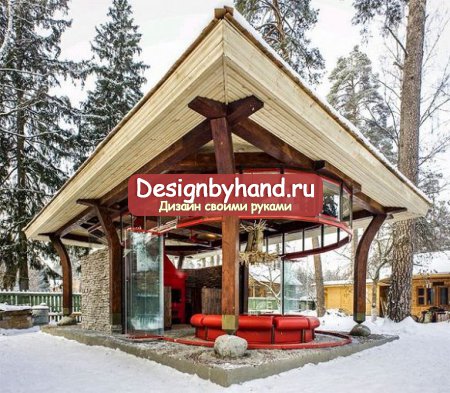
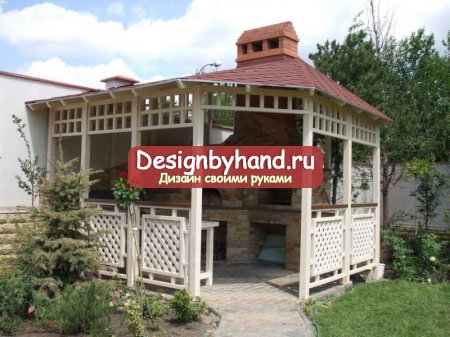
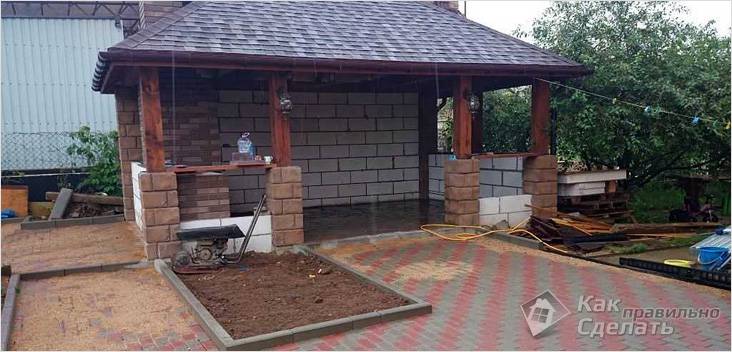
Examples summer kitchen in the country, projects with barbecue can be both the most common and quite original, with ideas that can greatly simplify and improve their use. So, for example, in one of the photos you can see a project in which the building area is divided into two parts of unequal size. On one is a cooking zone and a wood-burning barbecue, and in the second, separated by a main wall, there is a recreation area and a dining room, moreover, these zones will not be visible from each other, which can create comfortable privacy. This one is clearly recognized as very convenient and practical, as it combines the advantages of both an open and a closed kitchen layout.
Closed summer kitchen in the country
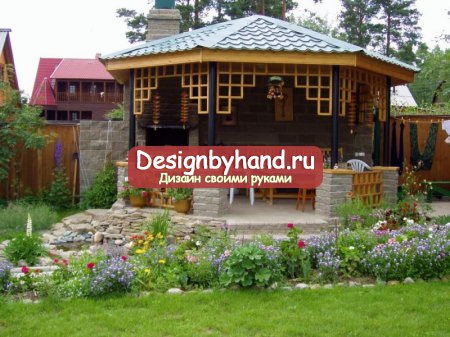
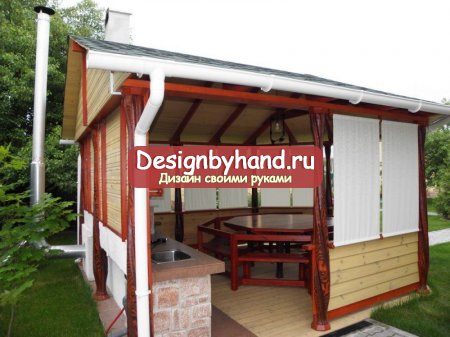
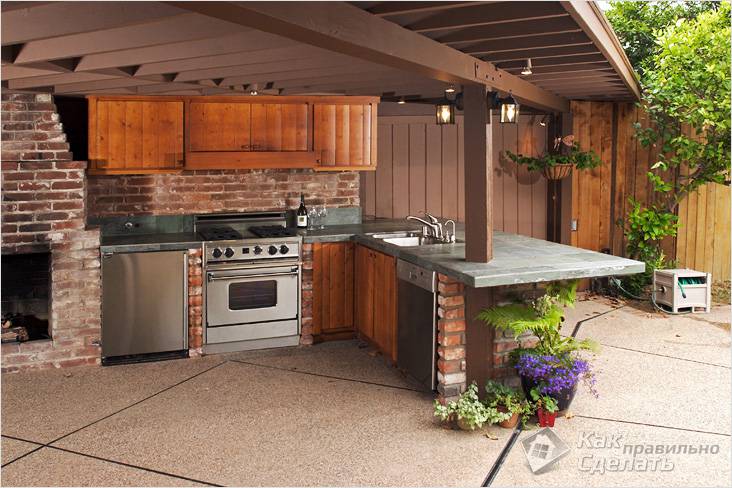
The last section will be devoted to sample models closed summer kitchen in the country, which is the progenitor of all other projects. Here all the conditions and requirements that are put forward for the building are met - it is compact, cool, it perfectly fits under the roof all the main kitchen devices. Yes, you can’t put a brazier under the roof, but is it so important when you can comfortably cook in the rain, and on cool summer evenings, and no less dank autumn mornings.
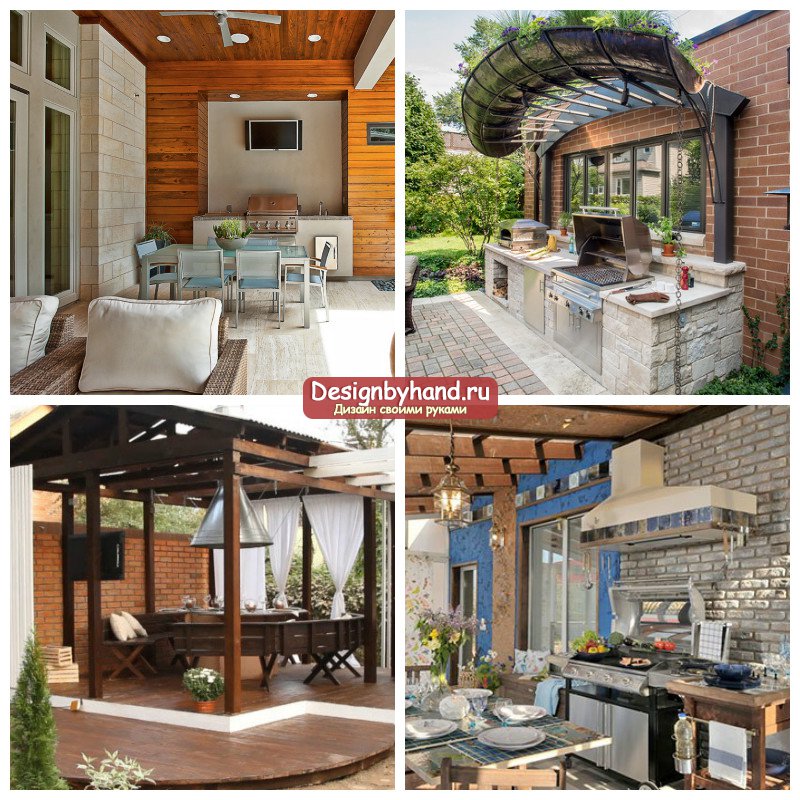
The interior of such a room should be made in a minimalist style, so as not to emphasize once again its small size. Use light, clean colors in the finishes and materials that will be easy to care for, as dust will accumulate here a little more than in the usual case.
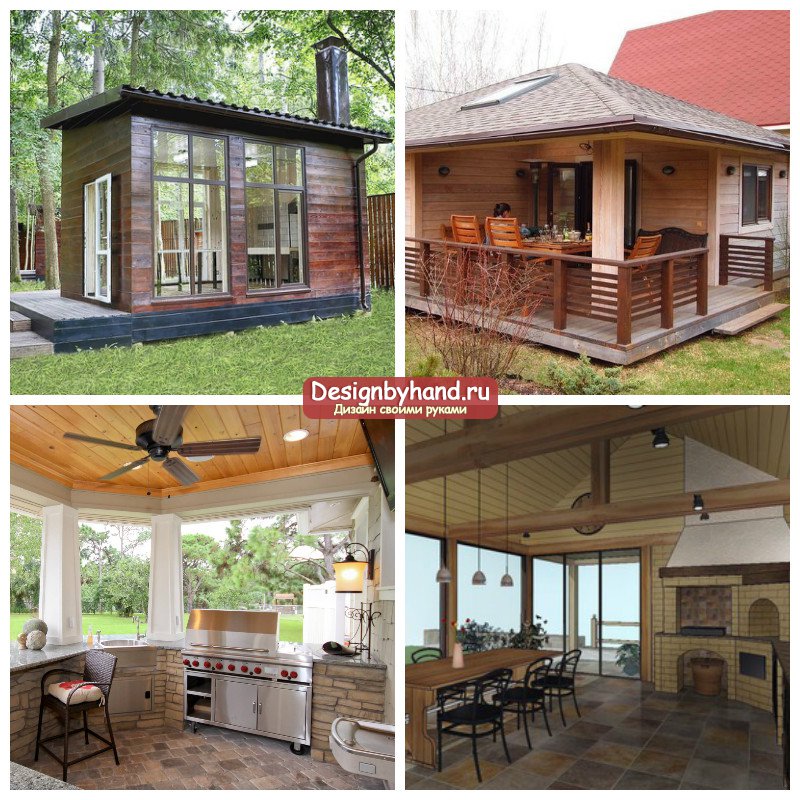
In addition, there are also combined options, when a closed room is located next to an open veranda, on which chairs and a table are placed. Between them, you can make not only a door, but also sliding window, rising up or to the sides, and these two rooms, if desired, will visually merge into one.


![]()


We are VKontakte
Do it yourself for a summer residence
Equipment and inventory
Ideas for giving by mail
By clicking on the button you consent to the processing of your personal data
Country recipes
Horseradish for the winter - homemade recipes
It is no secret that the uncontrolled growth of horseradish on the site is the scourge of any gardener, but do not despair! Today's selection of horseradish preservation recipes will surely appeal to spicy lovers and you will be happy to […]
Pickled radish for the winter, have you tried this?
Radish is a very unpretentious and very healthy vegetable that can be grown almost all summer. Due to the fact that the radish crop ripens quickly, it can be grown every 3 weeks, and with a weekly […]
How to pickle ginger
Spicy, sweet, salty and colorful, pickled ginger tastes fantastic. However, prices in shops and sushi bars are quite high. Therefore, in this article we will learn how to easily and inexpensively […]
How to pickle hot and bell peppers for the winter
There is an opinion that home canning is a rather laborious process that requires special equipment, time and patience. This is common with many foods, but not with pickled peppers. This article offers 2 pickling recipes […]
Soaked apples recipe at home
Urination, like salting and pickling, primarily has important functions of preserving the crop for the winter. Therefore, pickled apples at home are practically a brand. Nothing like this […]
Roasted sweet peppers for the winter
Roasted sweet peppers prepared for the winter require little or no special canning equipment and require very little effort to prepare. But the result justifies all the trouble. The fried pepper appetizer is incredibly tasty. It can […]
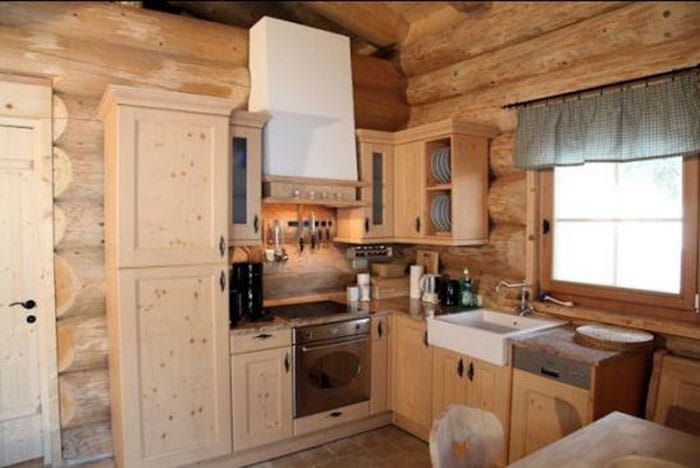
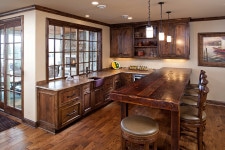
From wood, you can build as a small cottage on suburban area, and a luxurious mansion in the style of a log hut. And it doesn't matter what size your property is, because a thoughtful design will help turn it into a real family nest with a hearth and a peaceful atmosphere that sets you up for relaxation. Therefore, before embarking on the design of the kitchen in wooden house, we recommend to study the photo finished projects, choose materials, a suitable interior style and familiarize yourself with the nuances of design.
For construction, glued beams, rounded or chopped logs can be used. There are several general rules, which should be considered when operating a kitchen in a wooden house:
- All buildings shrink, so for interior decoration it is advisable to wait at least six months for a new building, and for repairs you should not use materials that easily form cracks (for example, decorative plaster).
Important! Shrinkage of the house directly depends on the type of wood used and its natural moisture content. Buildings made of glued lamellas sag the least, so any finish, including plaster and wallpaper, is suitable for a kitchen made of timber. But the walls made of logs can "lead".
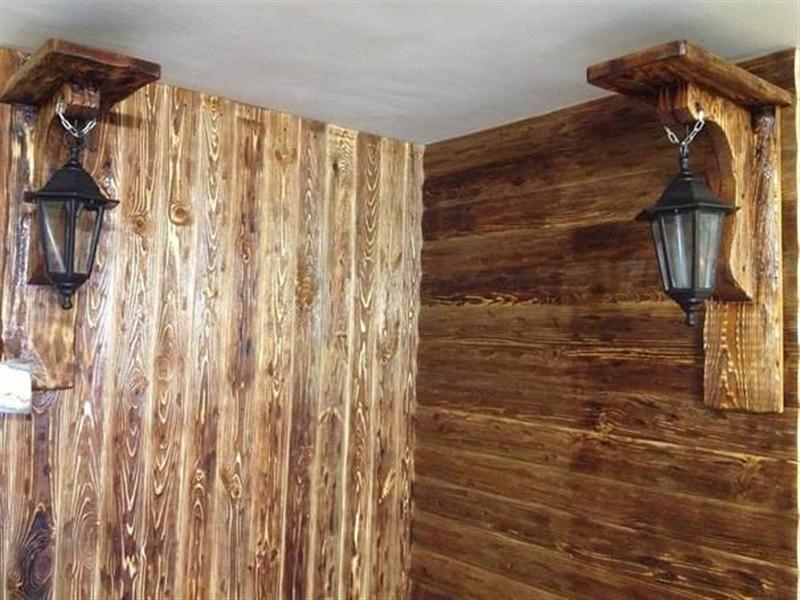
Log walls look harmonious in a rustic interior
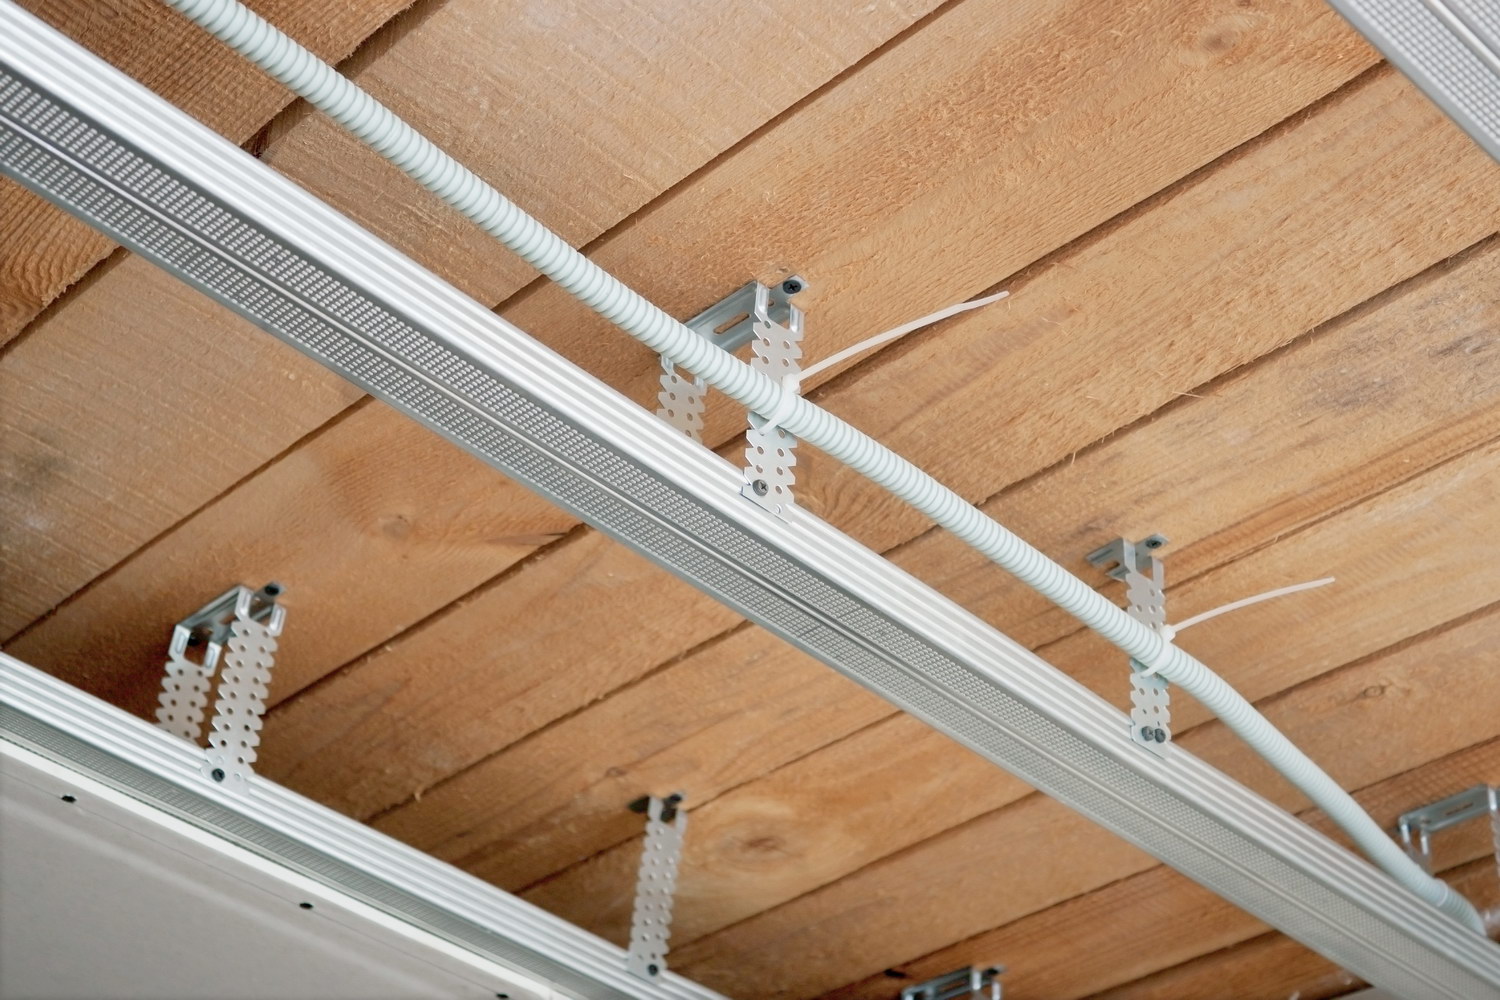
- This nuance is also important for laying engineering communications, otherwise the matter may turn into broken wiring and pipe breaks. In houses made of wood, it is recommended to lay communications open way or hide the pipeline in special boxes, and not mount them inside the walls. Therefore, when developing a design, attention should be paid to the masking of these building elements.
For an open mounting method, you can buy retro-style wiring that will not stand out against the background of a wooden finish:
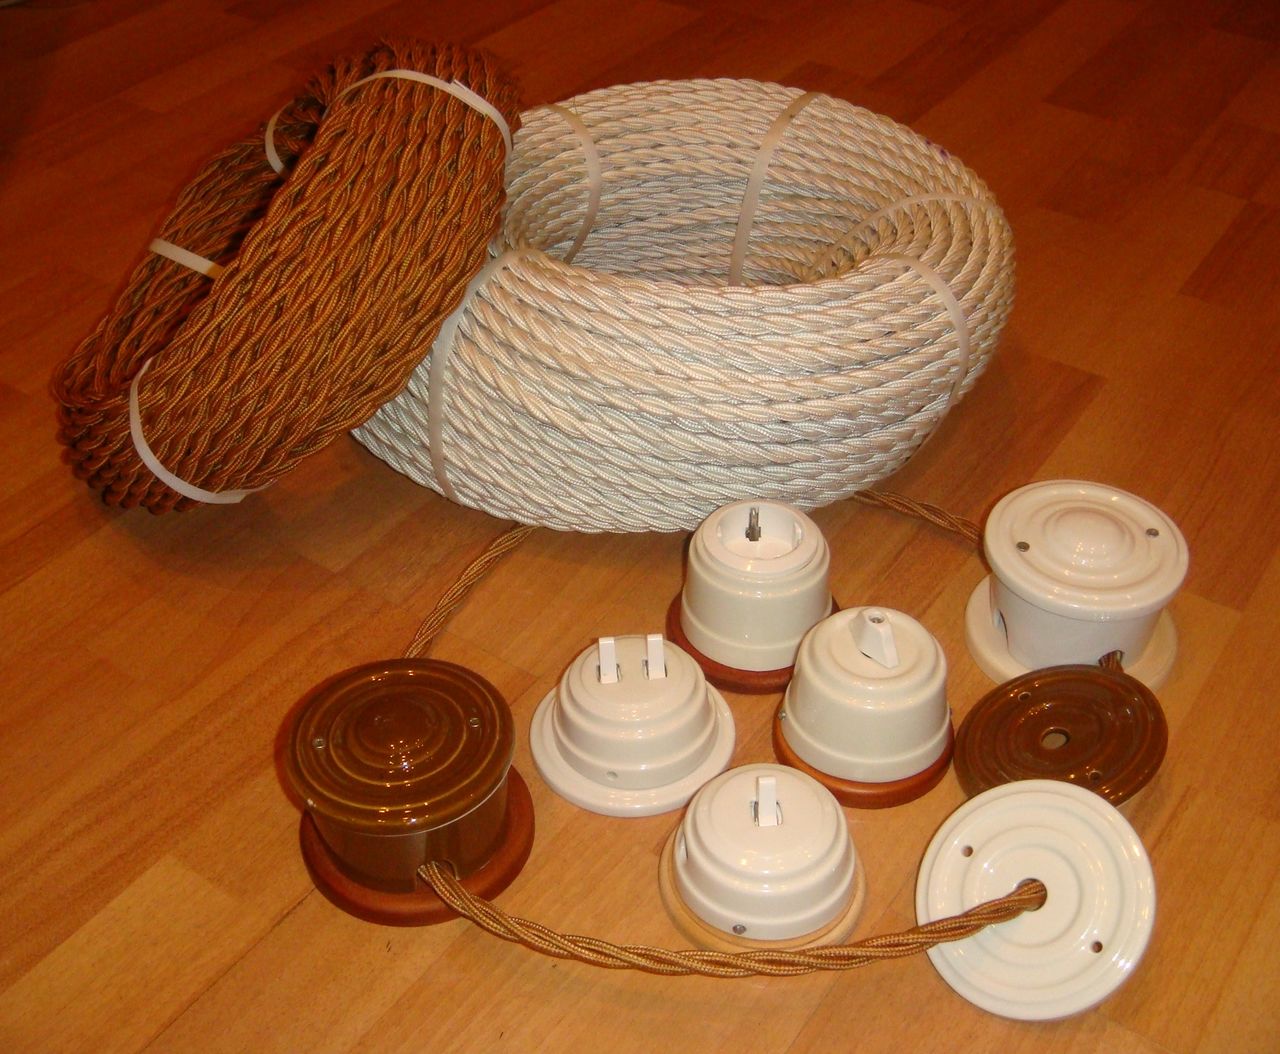
Posting in retro style
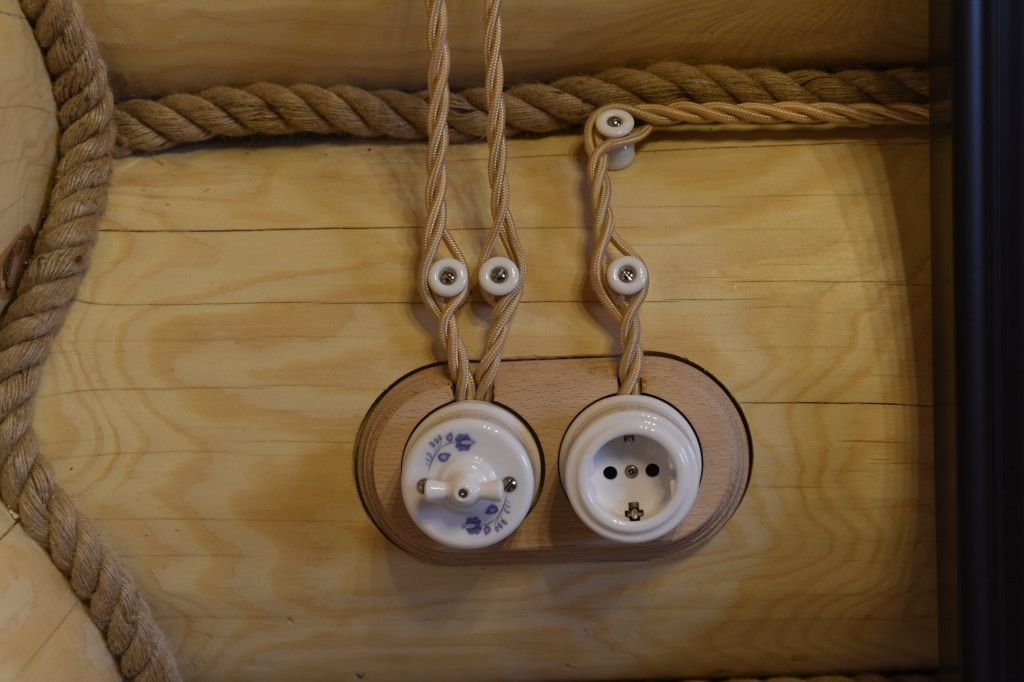
Retro style wiring
- Finishing work should be carried out only after the walls have completely dried, otherwise a fungus may settle in the house. True, this nuance is more important for the owners of the kitchen in the log house, because in the production of glued laminated timber, the wood is dried to the recommended 10%.
- Wood is a fire hazardous material, so when installing a stove, refrigerator, oven and other heated appliances, keep a distance. Ideally, treat the areas of the floor and walls adjacent to the appliances with flame retardants.
Important! If the house will have a stove or a fireplace, insulation of the floor and adjacent walls is a must!
The stone is in harmony with the tree and will prevent fire from heating or an accidental spark:
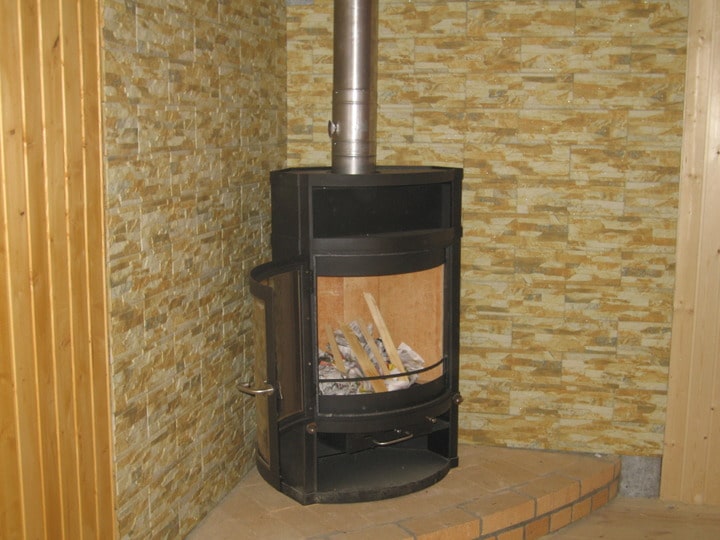
Stone insulated oven
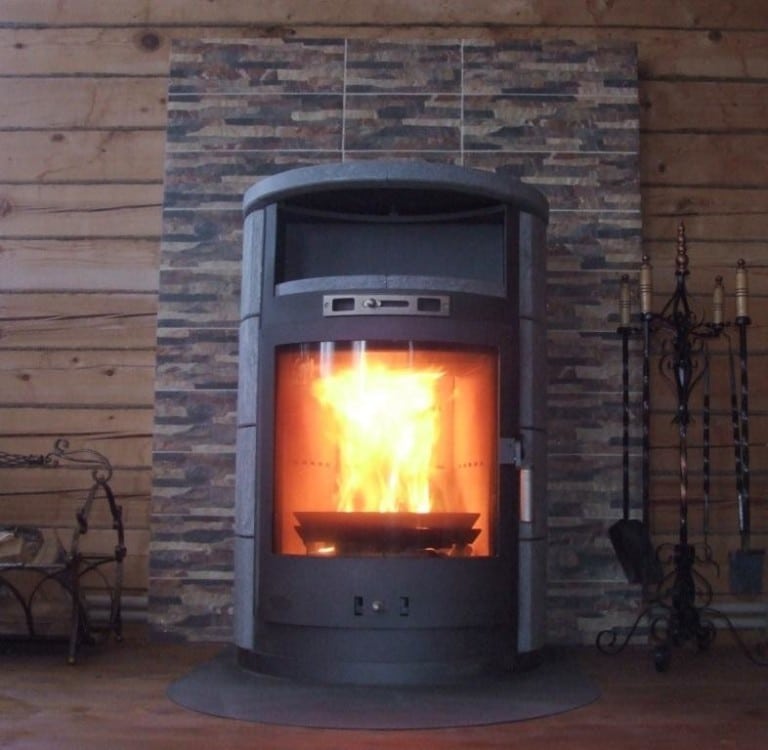
Stone insulated fireplace
If you take into account these nuances at the planning stage, the interior of the kitchen will delight you for many years without needing alterations and new repairs.
Interior finishing options
In a house made of timber or logs, a design with a wooden finish will look most organic. Natural materials fit perfectly into the concept of sustainable housing and give the interior an attractive look. appearance. But do not forget about their susceptibility to moisture and temperature changes - everyday phenomena of the kitchen microclimate.
Finishing options for the kitchen in a wooden house:
Painting
The easiest and most budgetary way to protect and decorate walls, floors and ceilings is to apply varnish or paint. The main condition for high-quality finishing is the correct preparation of surfaces. To do this, the tree must be cleaned of resin and dirt, sanded and treated with anti-fungal impregnation (places with metal fasteners - anti-corrosion primer).
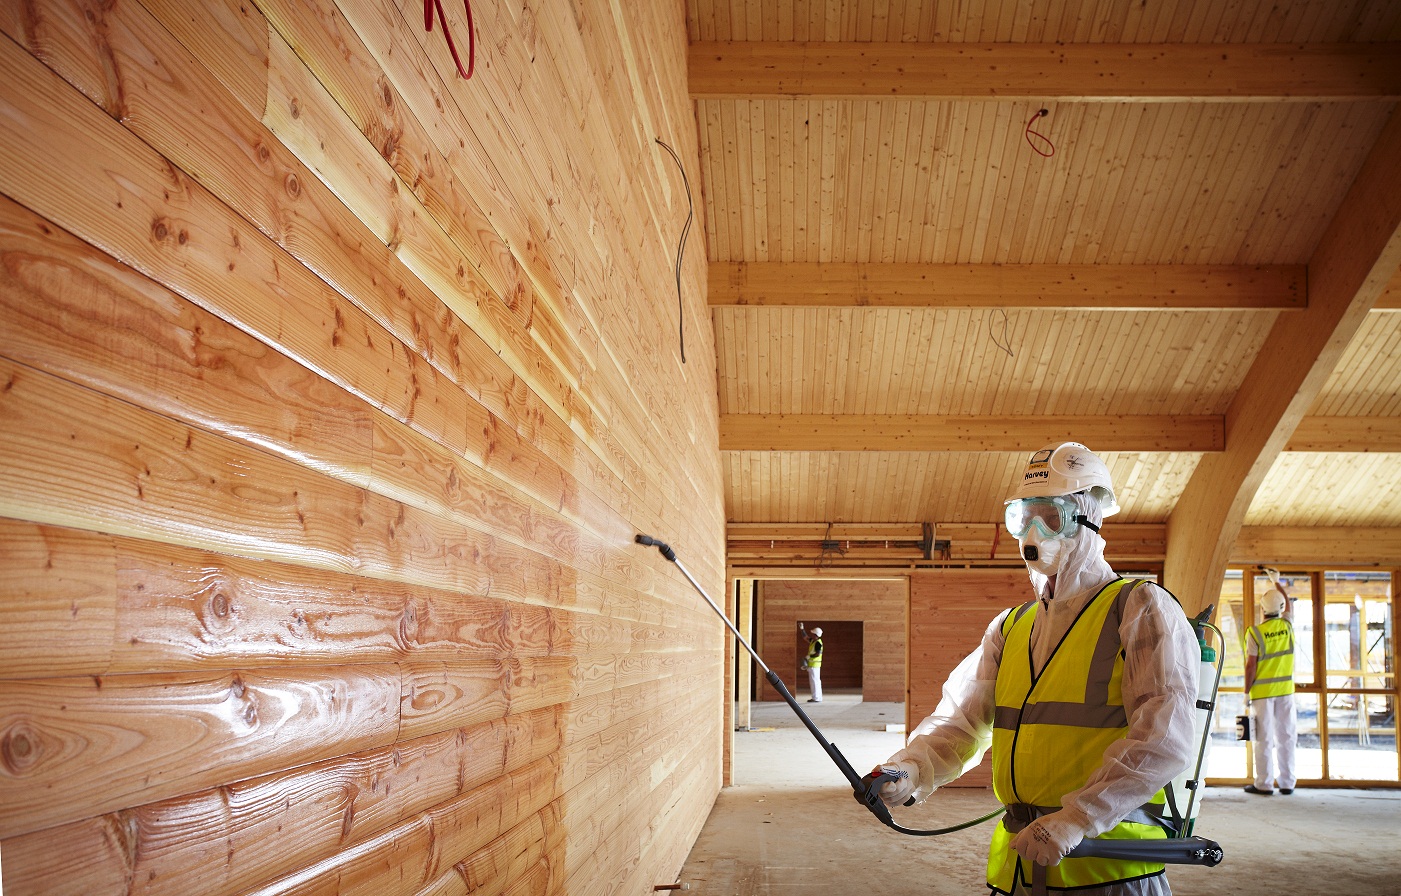
It is most convenient to process large areas from a special sprayer
After drying, the surfaces are opened with varnish, oil or acrylic paint in 2-3 layers. To preserve the natural color of wood, use transparent, rather than matte, impregnations and varnishes. If there are stains or other “traces of time” on the surfaces, you can choose tinted or tinted paints and varnishes.
![]()
Lacquer with a light tinting effect will emphasize the structure of the tree
Multiple colors can be used to create unique design
Important! Treating wood with an antiseptic is a mandatory step for any finishing works regardless of the type of coverage.
Drywall plus decorative material
If the house is no longer new, and its internal surfaces look unattractive or just need to be leveled, you can sheathe the walls and ceiling with drywall installed on a crate made of metal profiles or wooden slats. And then paste over with wallpaper, paint, tile or apply decorative plaster.
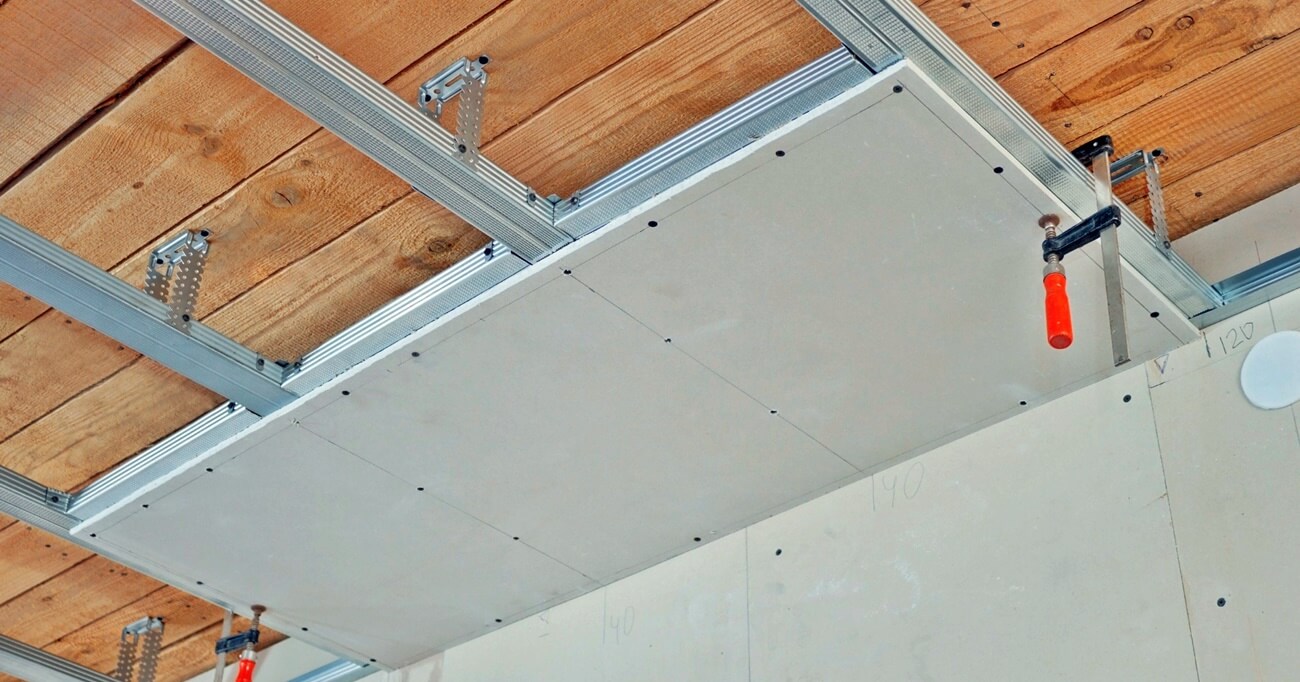
Drywall can be used to finish both walls and ceilings
On a note! With the help of plasterboard sheathing, it is easy to hide engineering communications and heat-insulating material.
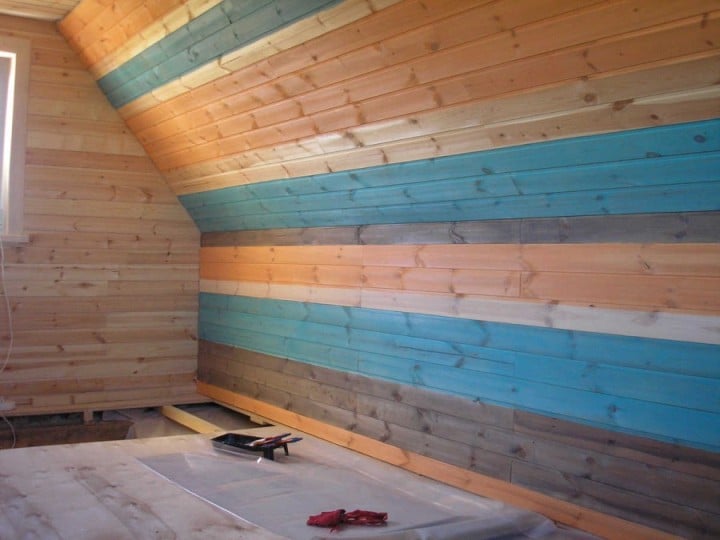
Wall and ceiling panels
If the task is not only to restore the evenness of the surfaces, but also to preserve the wooden interior, it is best to use MDF panels or lining. These materials can also be attached to the crate, so there will be no problems with masking communications and insulation. But, unlike drywall, they are self-sufficient in terms of decor and do not require further processing.
Planks can be laid horizontally, vertically, diagonally or a combination of all three.
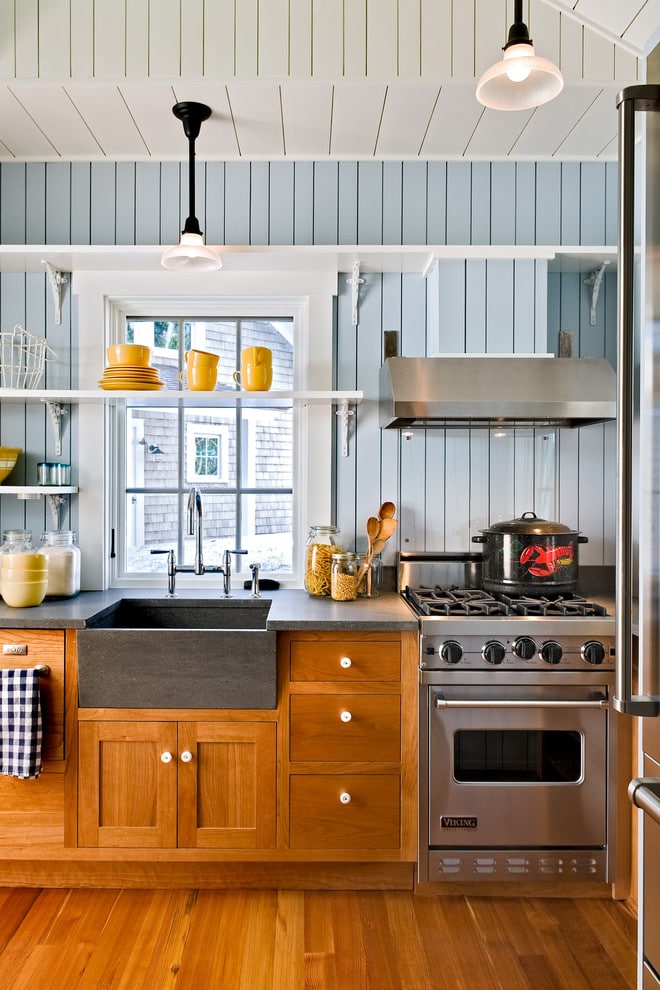
An accent wall made of painted lining will enliven the interior
Horizontal laying will visually expand the small space of the room.
Interesting solution for wall decoration
The combination of "pure" wood and painted planks looks very stylish.
On a note! For budget repairs, you can replace wooden planks with PVC panels. They are inexpensive, easy to install (cut with any sharp knife and do not require end processing), easy to care for and quite plausibly imitate the pattern of wood. True, such a choice can violate the eco-friendly design concept.
wood and stone
In spacious kitchens, where there is no need to save every centimeter of free space, you can completely or partially sheathe the walls with beams or boards. The block house looks especially impressive - it resembles a log masonry in the spirit of a village hut, but unlike an ordinary log house, it excludes the appearance of various cracks. In addition, the material provides excellent thermal insulation, and it is quite easy to lay it, thanks to the tongue-and-groove fasteners.

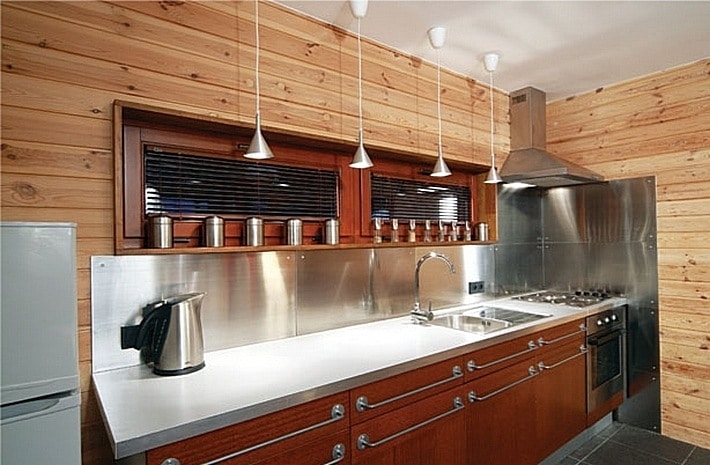
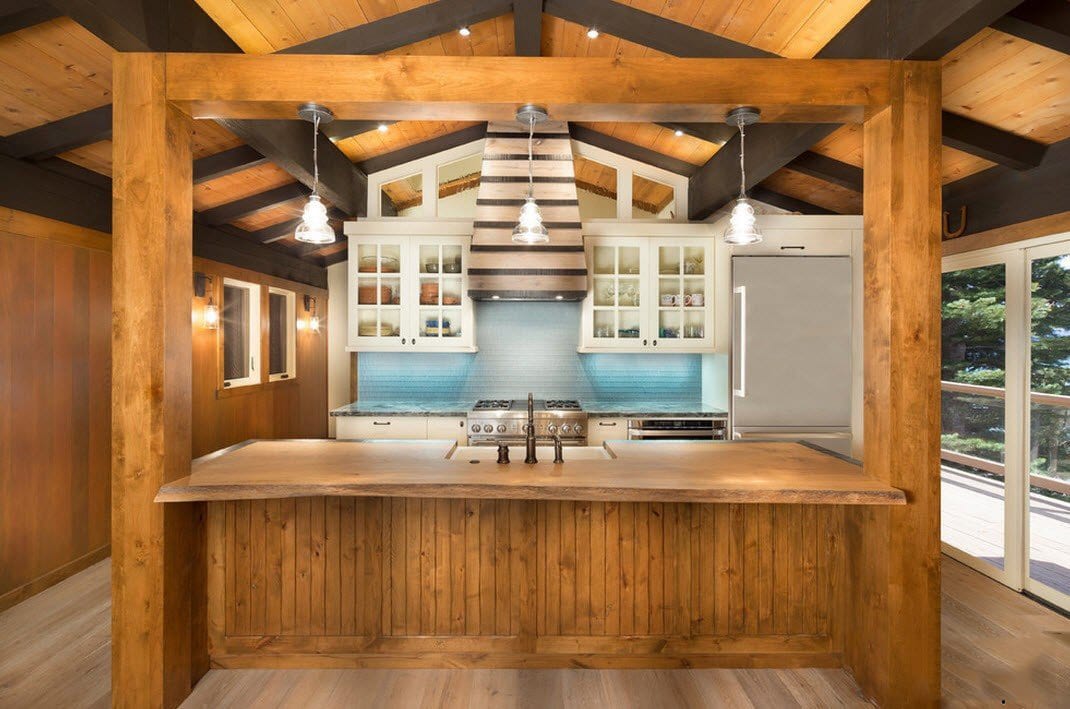
The photo shows an example of a successful interior design, where wood perfectly coexists with modern technology.
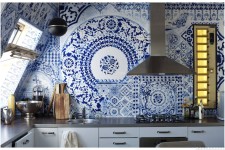
On the working apron and near the heat-heating devices, you can use a fragmentary lining with natural, artificial stone or its imitation. Looks good mosaic, tiles with Petrikovsky motifs, painted under Gzhel.
Photo ideas for apron design:
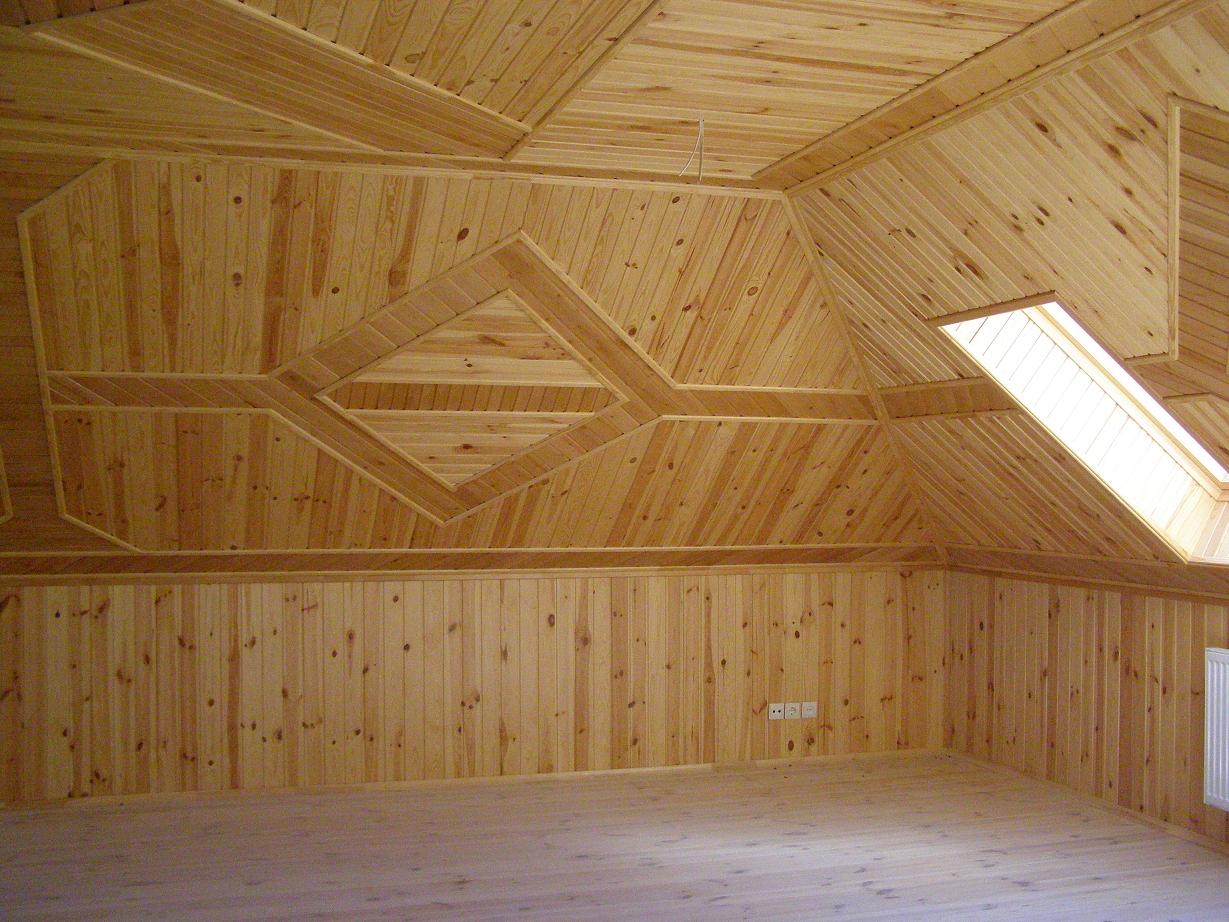
Floor and ceiling materials
For the floor in a wooden house, planed boards with a thickness of 40 mm or more, parquet or stone-like tiles are best suited. Of the budget options - already a traditional laminate.
But you will have to work hard with the ceiling, because there will be wiring, which, according to fire safety requirements, should be laid either in an open way (which will not fit into every interior) or hidden in a corrugated pipe. Therefore, the best solution for the ceiling will be the same lining, panels or drywall - materials on the frame, behind which it is so convenient to hide all non-aesthetic elements. And how to do it beautifully - look at the photo:
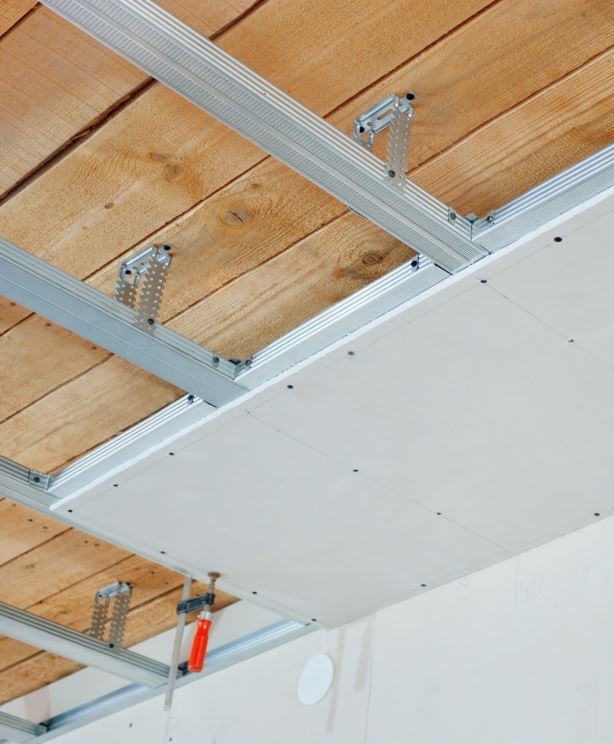
Mounting false ceiling under drywall
![]()
Advice! A kitchen in a house made of glued laminated timber can be decorated in any interior style using a variety of materials, but in a log house it is better to leave the surfaces open, protecting them with impregnations and paints and varnishes.
Kitchen combined with living room or dining room
What hostess does not dream of a large kitchen, where, in addition to a working set, there is a place for a spacious dining table, and for a comfortable seating area with a cozy sofa, and for a "true friend" - a TV? If a separate dining room is the lot of multi-room mansions, then it is quite possible to equip a cozy kitchen-living room even in a small wooden house, you just have to “forget” to put up an interior wall. And you can set visual or quite tangible boundaries for different functional areas using simple design techniques.
5 ways to delimit space:
bar counter
This is probably the most versatile element for zoning the interior of a combined kitchen-living room. Moreover, it is not necessary to limit narrow tabletop, so popular in apartment projects. In a spacious wooden house, an “island” kitchen design with a voluminous bar counter will be much more functional. Its long part facing the living room will serve as a table with high chairs, on the kitchen side you can install a sink, stove or cutting surface, and on the sides - multifunctional drawers or an open minibar. Various design options are presented in the photo of the interior of the kitchen in a wooden house made of timber.
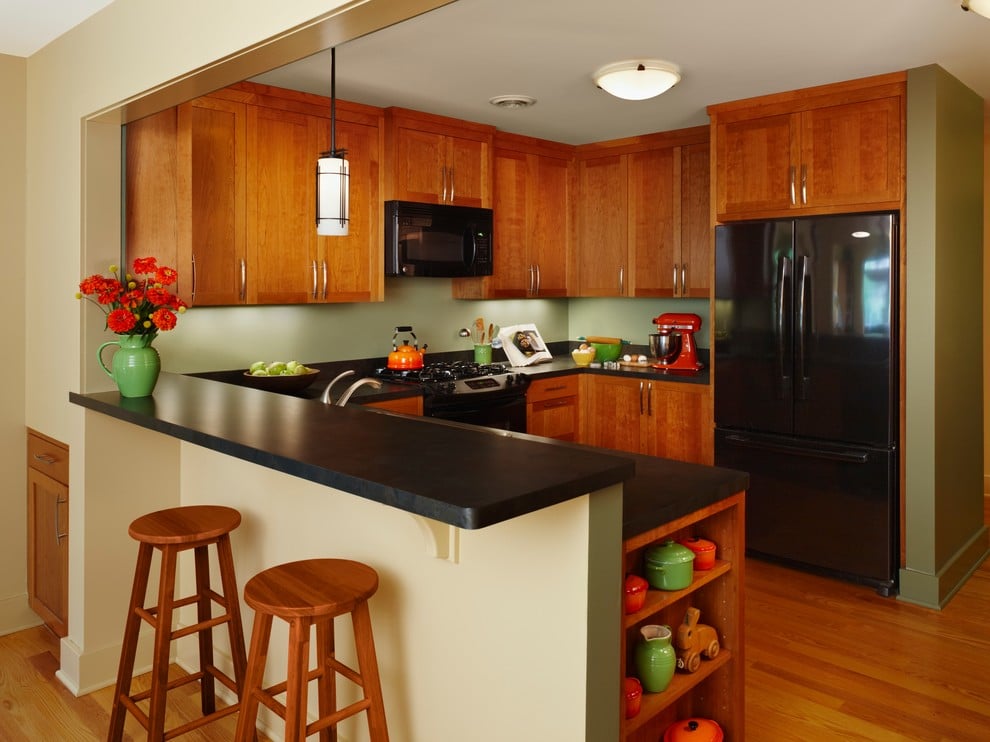
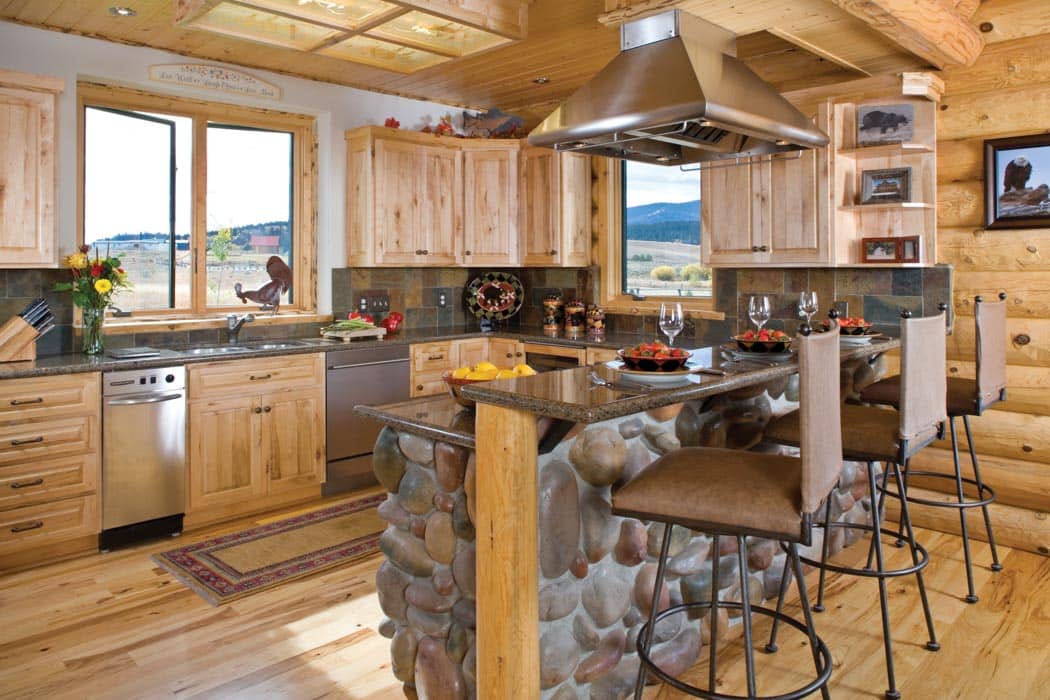
In the photo - an example of decorating a bar counter with natural stone
Furniture partitions
Another win-win solution is the use of furniture on the "borders" of various zones. It can be a cupboard, a dining table, a sofa, an open shelving unit or a massive cabinet of a kitchen “island” – it all depends on your imagination and the chosen interior style. For inspiration, we offer several photos of a kitchen design in a wooden house with various furniture partitions:

Height gradation
By using finishing materials you can change the level of the ceiling in one of the zones or raise the floor by equipping the podium. This method is good only if the initial height of the premises is conducive to experimentation - low ceilings will not decorate any design.
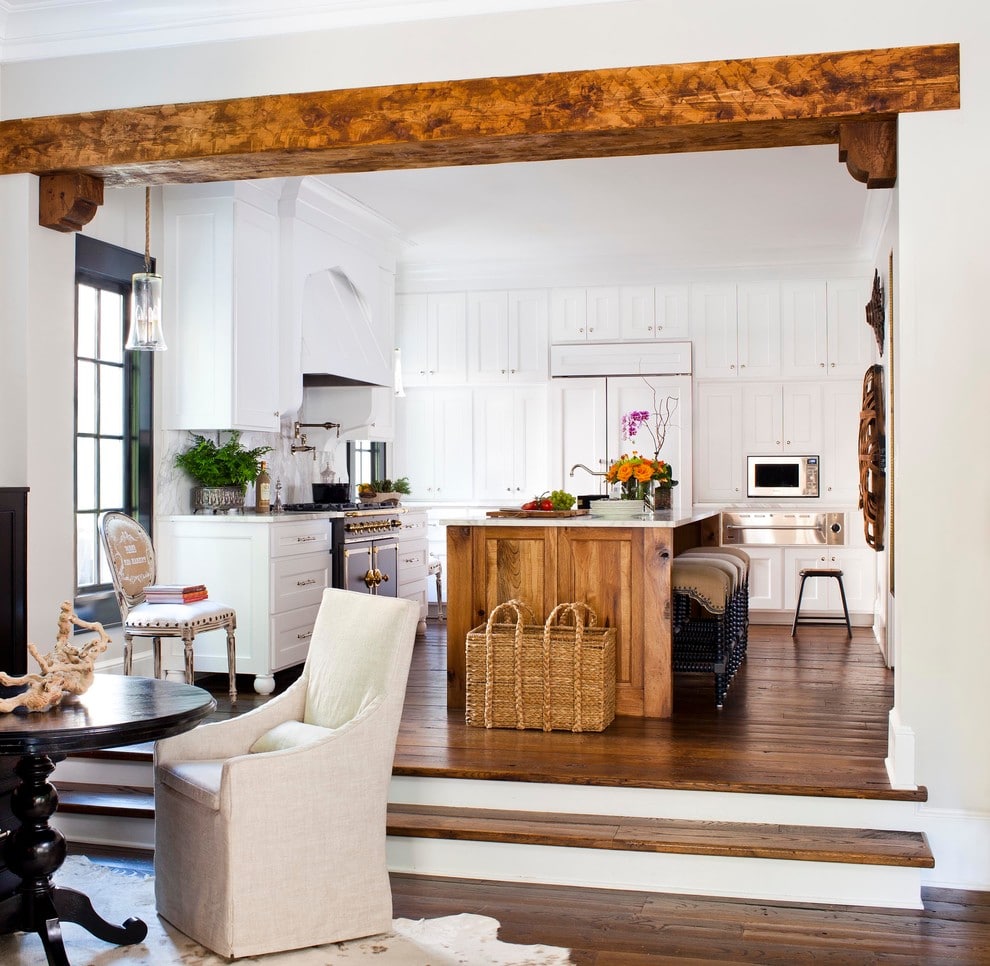
The photo shows an example of zone separation using a podium and a ceiling beam.
You can use cheats. For example, instead of a podium, decorate the dining or living room area with a long pile carpet, and above the working wall instead two-level ceiling attach several beams from the remains of a beam or slab - a semicircular extreme cut of a log.
Contrasting floor finish visually divides the room into two separate zones
On a note! Instead of beams, flat wooden moldings can be used.
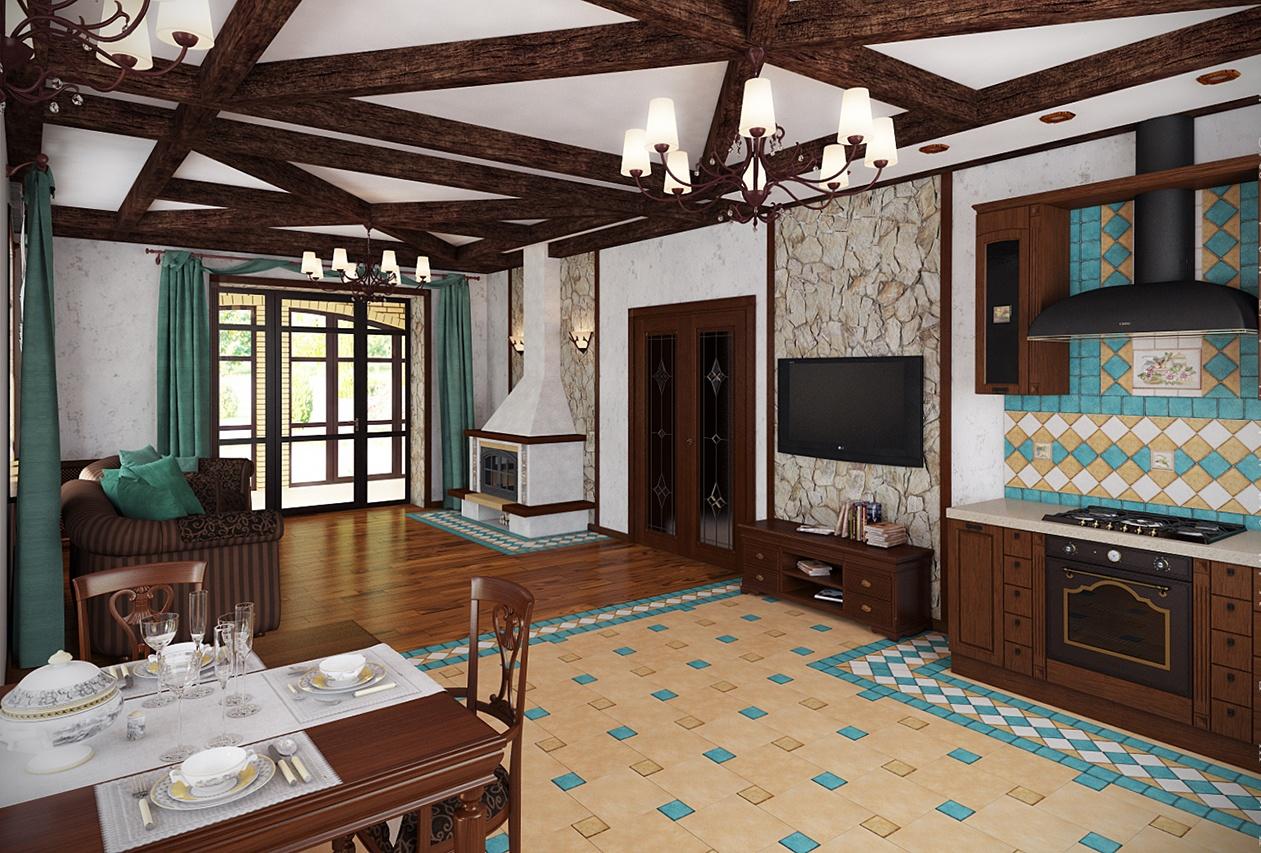
Color and light
If you do not want to build tangible "boundaries", you can zone the space of the kitchen-living room with the help of various finishing materials and the design of the surfaces of walls, ceilings and floors in different shades. And also provide a separate backlight for each functional area. For example, for working area it can be Spotlights or spots of directional light, for a dining table - a chic chandelier, for a sofa - a cozy floor lamp or sconce on the wall.
Photo examples of zoning the combined space with light:

Important! The color of finishing materials within the same room should be chosen in such a way that they complement each other. That is, it can be shades of the same color of varying degrees of intensity or tone, adjacent in the spectrum. If you want to play on contrasts, you should come up with some unifying element - an ornament, molding, partial decoration with a stone or the same tree, so that the interior looks harmonious.
Use of textiles
In the interior of the kitchen-living room in a wooden house, it is appropriate to use fabric partitions. Spectacular textile draperies give the atmosphere of the room a homely feel, and, if necessary, provide privacy. Models of curtains depend on the interior style - these can be weightless curtains made of tulle or organza, sliding Japanese panels, checkered or floral curtains on tiebacks.
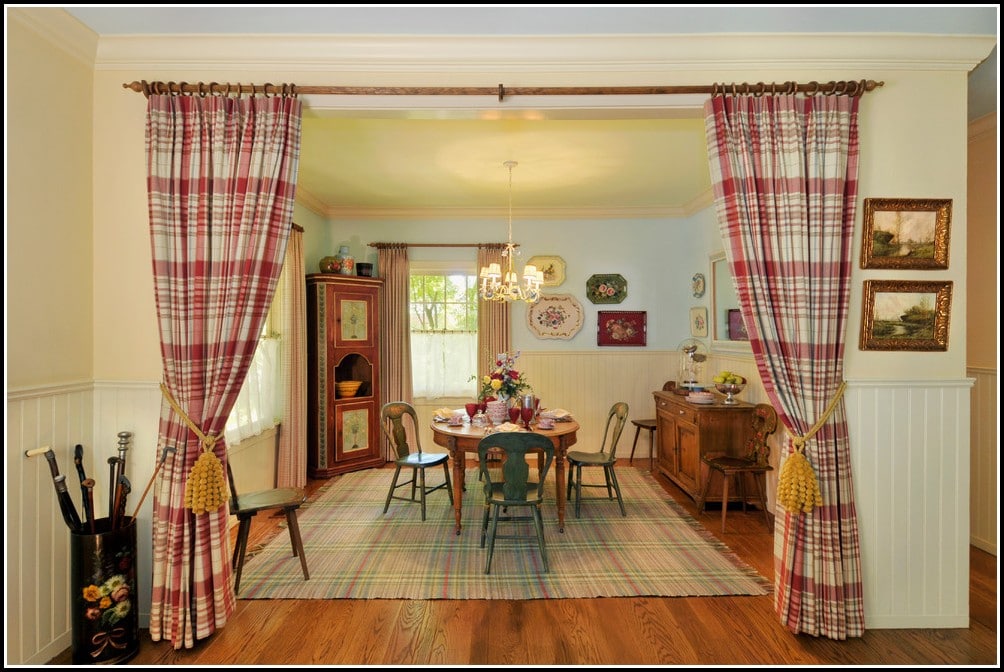
Curtains can be a spectacular alternative to door leafs
Important! It is better to choose textiles for the kitchen not from natural fabrics, but from mixed ones - with the addition of artificial fibers. These curtains are easier to care for and last longer.
Design of a small kitchen in the country
In a house on a summer cottage, intended mainly for weekends, there is no need to equip a large kitchen, because most of the townspeople in nature prefer dishes cooked on the grill or barbecue. But you shouldn’t “lock” the kitchen into a small room - it’s better to leave a small corner or one of the walls in the living room for it and think over practical design on the basis of only the most necessary in cooking.
- Do not use massive finishes to highlight the kitchen area. No matter how beautiful a natural stone or block house looks, it will look bulky and out of place in a small room.
- Do not overdo it with the amount of furniture. For a kitchen corner in a country house, there are enough open racks for dishes and a pair of roomy cabinets under a wide worktop, which will accommodate both a small sink bowl and a cutting board.

Design of a small kitchen corner in Provencal style
- Several pieces of furniture or the whole kitchen set you can do it yourself and decorate using decoupage or painting techniques - handmade decor is very relevant for decorating wooden houses.
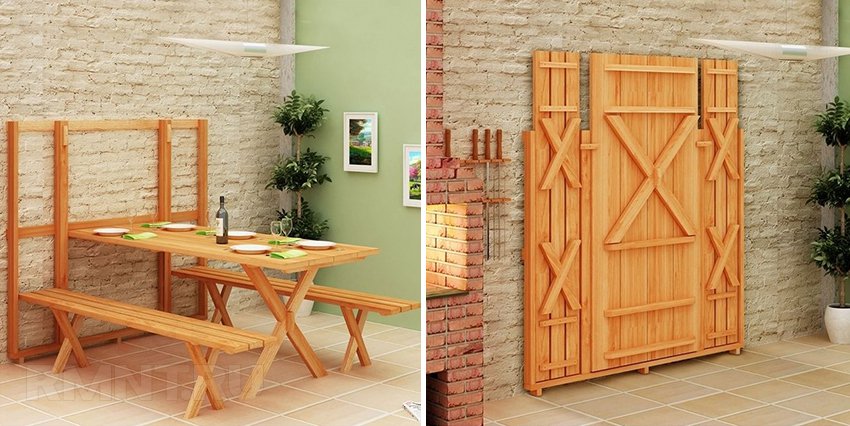
- Use transforming furniture elements - a cabinet with a roll-out board, a sliding table, a rack on wheels, if necessary, will help to cope with the lack of space.
- Consider the number and dimensions of household appliances - not everything that makes life easier for us in an apartment will be in demand in the country. For example, a single-chamber refrigerator can be purchased, up to a meter high - this is quite enough to store food for a day or two. If you are not going to bake cakes and pies in the country, install instead of a standard stove hob for one/two burners. But you should think about the dishwasher, because the narrow model takes up very little space and will help the hostess enjoy her vacation instead of cleaning after a family dinner.
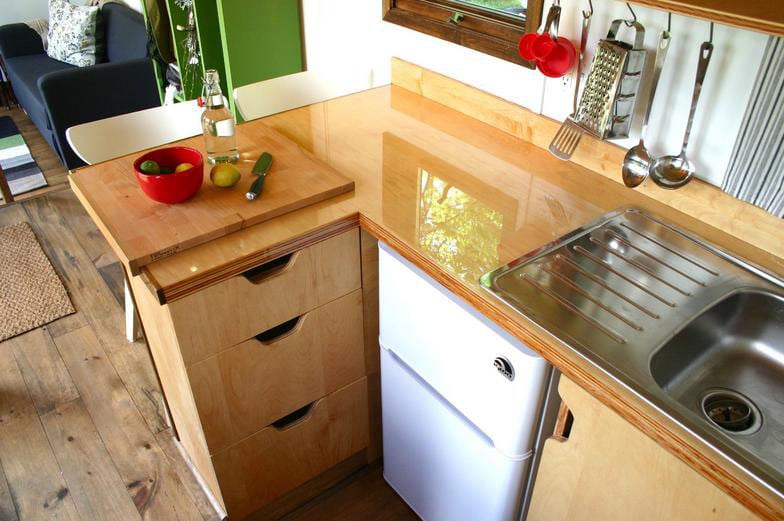
In the photo - the design of a kitchenette with a small refrigerator
Kitchenette for the most necessary items
Compact and functional design
On a note! Even a small room in a country house should have its own style. A well-thought-out design will help organize all the elements and create a cozy interior.
Kitchen interior style in a wooden house
In order to choose the right furniture, accessories, type and color of materials for walls, ceiling and floor, it is important to decide on the interior style of the future kitchen. Theoretically, a wooden house is no different from others, and with a strong desire, you can embody any design in it - even trendy high-tech, luxurious baroque or fancy pop art. But does it make sense to hide natural material under a multi-layered finish, if there are many great solutions for its stylish and effective presentation?
Eco-style for nature lovers
Ecological design is the first thing that is associated with the arrangement wooden house from glued beams or log cabins. This style most naturally fits into the atmosphere of both the dacha and country house, and the main item of expenditure - natural materials for decoration - is already present. A photo gallery and a few recommendations will help you visualize how good the kitchen design in a wooden house is.
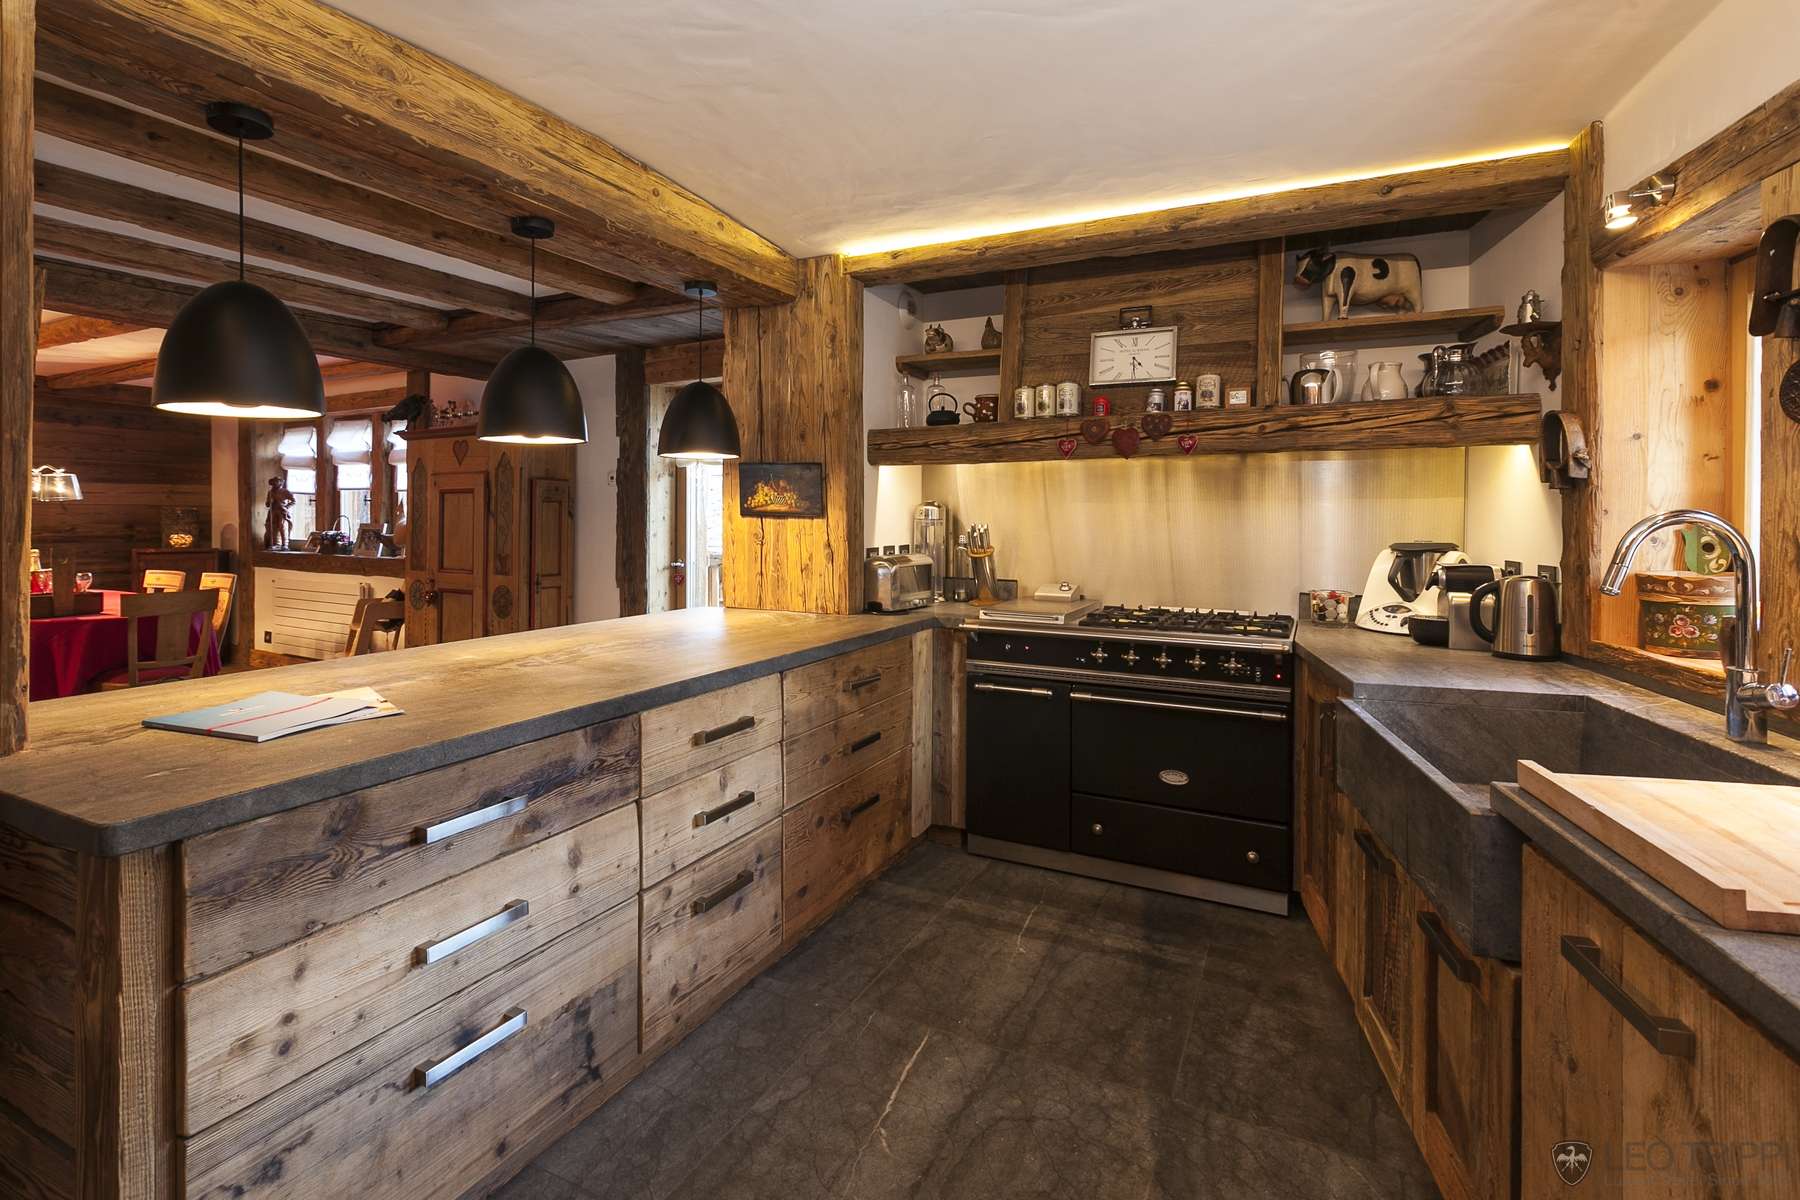
Stone sink, rough solid wood furniture - characteristic features of eco-design
Finishing natural stone harmonizes with wood

Basic principles of eco-design:
- The color scheme of the interior is exclusively natural calm tones: brown, terracotta, beige, green, soft yellow, sky blue.
- In addition to wood paneling, you can use wallpaper made from plant materials (for example, bamboo, jute), work apron - trim ceramic tiles or natural stone, put cork, boards, porcelain stoneware or parquet on the floor.
- Complex combinations are not welcome - the finish can be diversified with a play of textures, and not due to unusual shapes or colorful patterns.
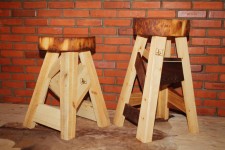
- Furniture can be the biggest expense, as natural wood furnishings are recommended for eco style. But you can dilute the interior with home-made stools and countertops made of saw cuts, wicker rattan chairs, shelving, cabinets or plank cabinets.
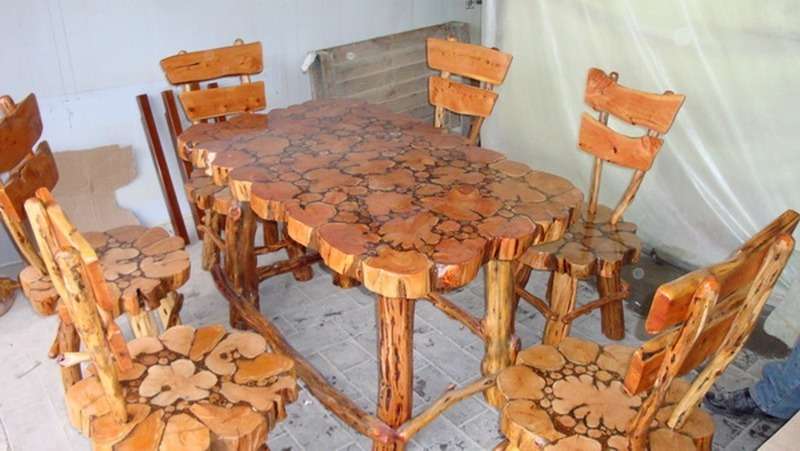
Dining group in the tradition of eco-style
- An abundance of vegetation - for eco-design, living plants will be the best accessories (you can even arrange a green wall in the dining area). But you can also replace it with dried flowers, interesting compositions from branches, bunches of onions, peppers, spice paintings.
Eco-motives in decoration:
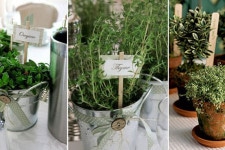
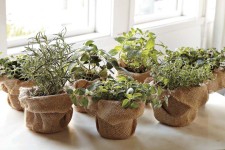

On a note! The ecological design of the kitchen can be decorated with crafts or do-it-yourself decor from pebbles, baked clay, wicker vines, reeds, burlap, straws.
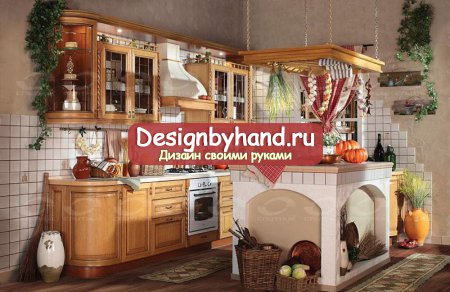
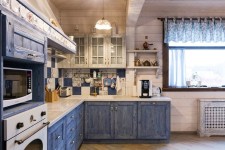
Country and its ethnic variations
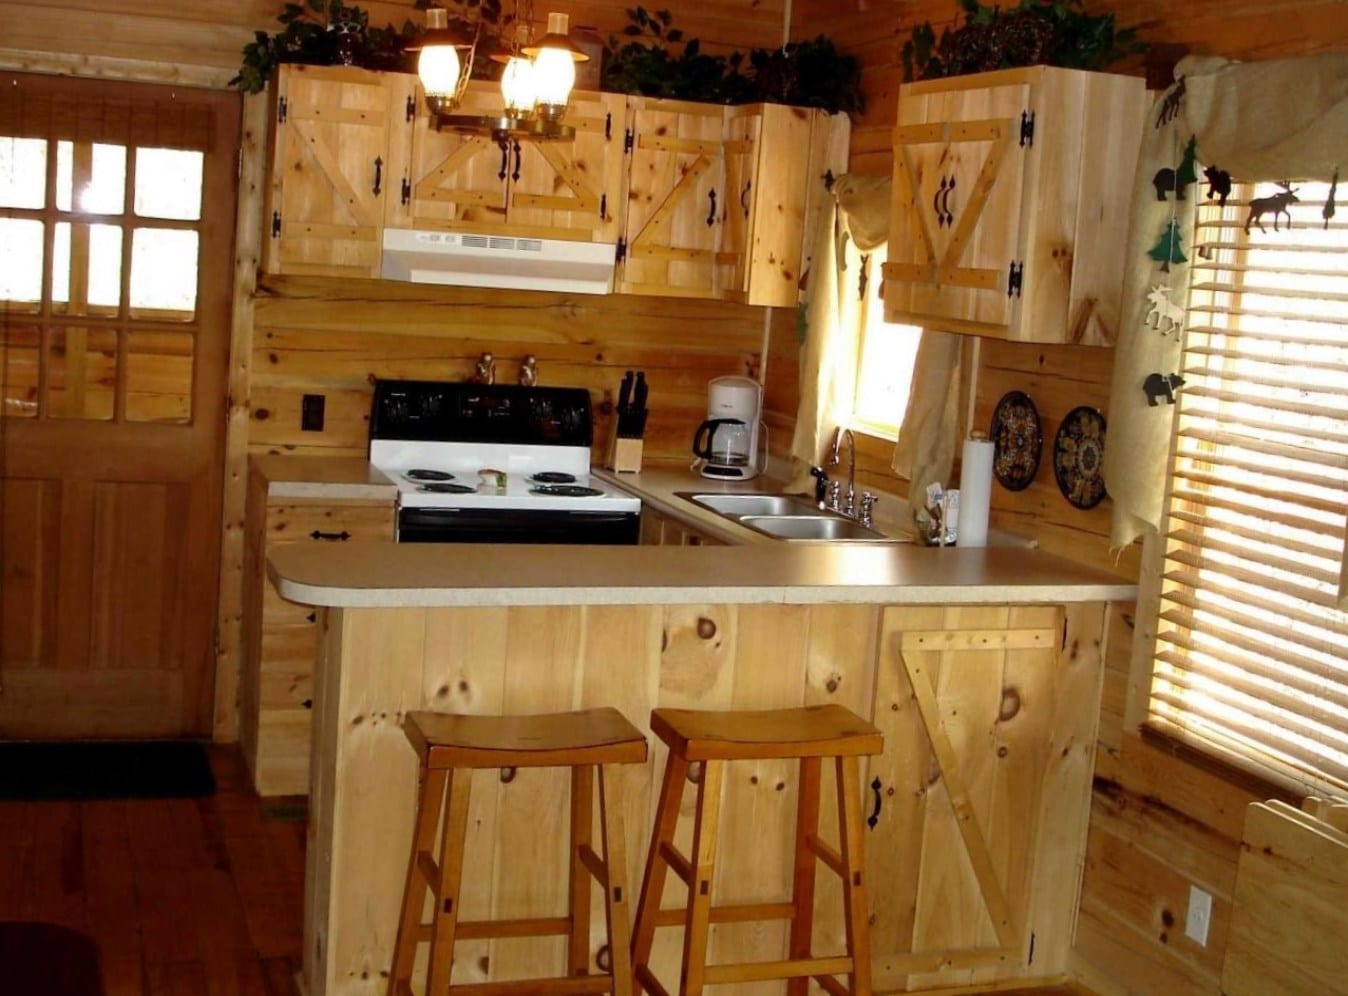
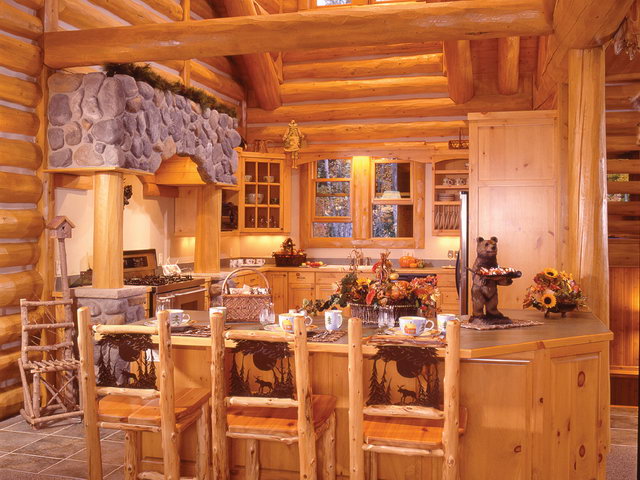
Rustic style is great for a kitchen in a wooden house - it is unusually cozy, homely and welcomes the abundance of wood, rough forms of furniture and dishes as decoration. In this style, even flaws in the finish, the same cracks on the log walls, will become a thematic highlight that harmoniously complements the interior.

Another important advantage of country music is the many ethnic varieties, among which it is easy to choose a direction that matches your ideas about cozy country cuisine:
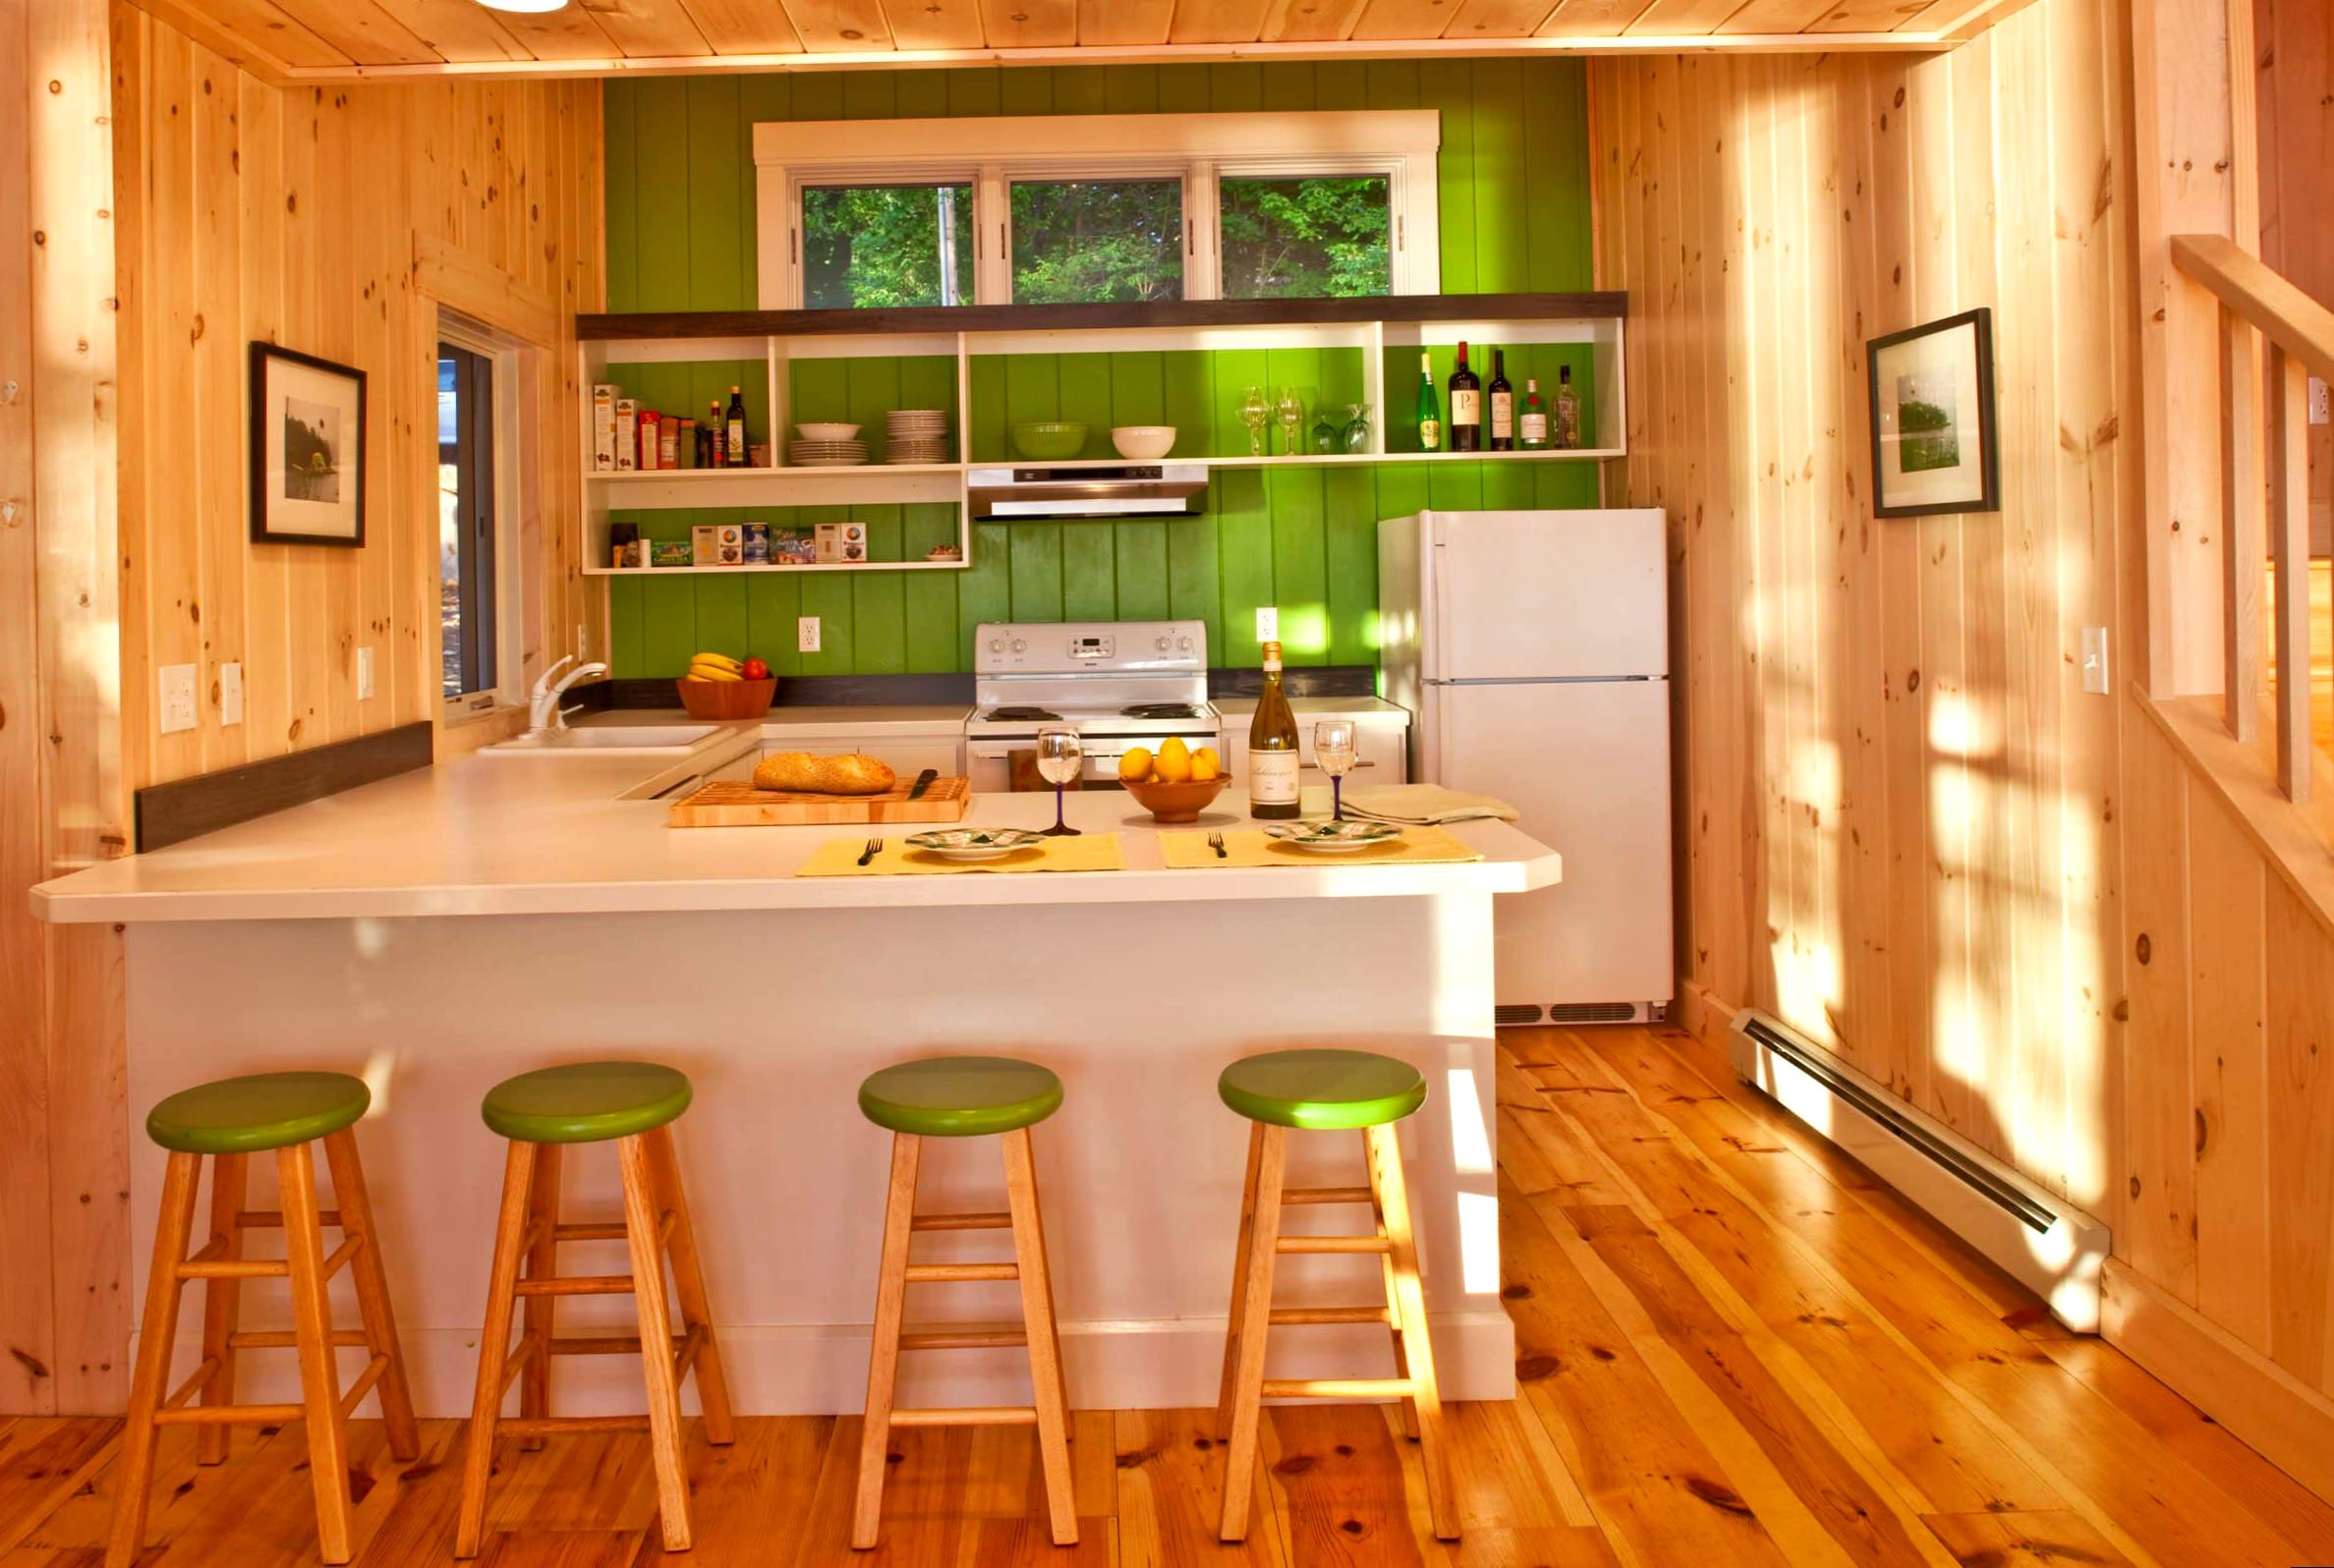
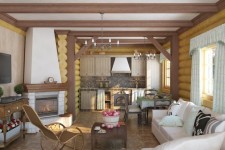
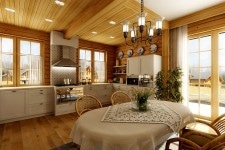
- American style
Great option for a large kitchen country house combined with the living room and dining room. Such an interior is arranged according to the principles of ergonomics, so that the hostess has everything at hand, but at the same time the room remains spacious and comfortable. The color of the finish is selected in light colors, although tree inclusions are also acceptable. Furniture should be comfortable, appliances should be modern and functional.
Spacious room with the obligatory "island":
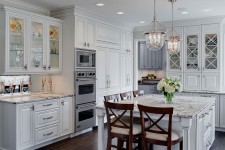

On a note! American style is good because it does not have strict rules for design. The main task of design is a comfortable kitchen filled with air and light.
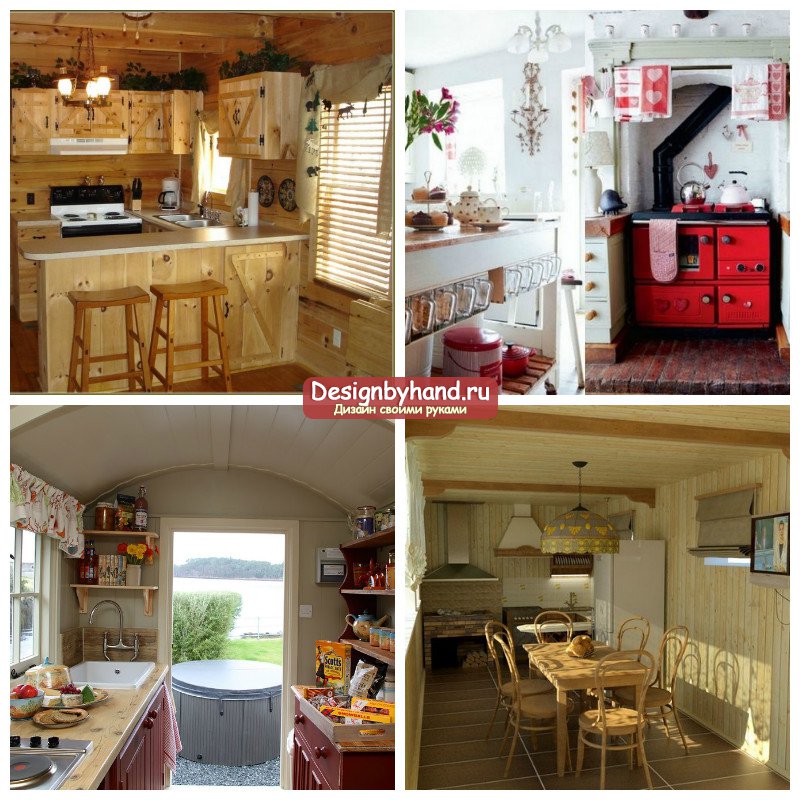
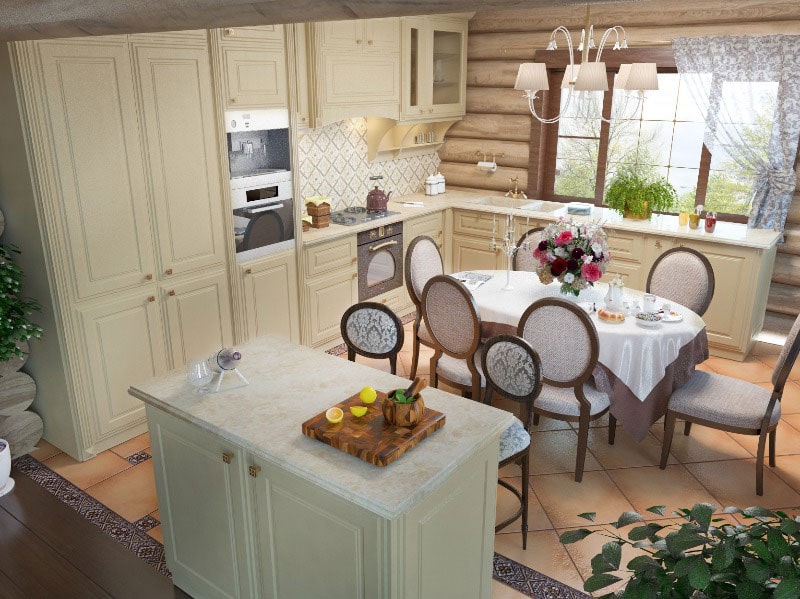
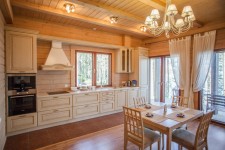
- french provence
Suitable for decorating a small room in a country house, as well as a kitchen-living room in a large wooden house. The main range for the interior is chosen mainly in light colors - white, cream, gray, and is diluted with a large amount of blue, purple, red, yellow or turquoise textiles. Elegant wooden furniture can be supplemented with wrought iron and wicker elements, doors can be replaced or decorated with textile curtains, and “French” frames can be used for windows. For more ideas on arranging a Provence-style kitchen in a wooden house, see the photo selection of interiors:
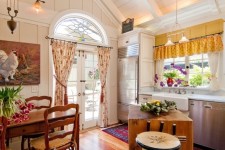
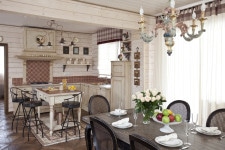
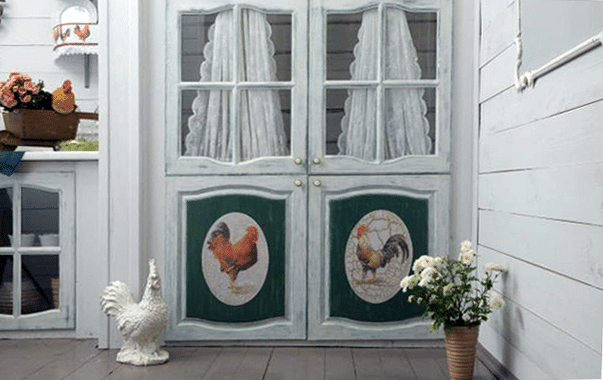
Images and figurines of roosters - feature Provence
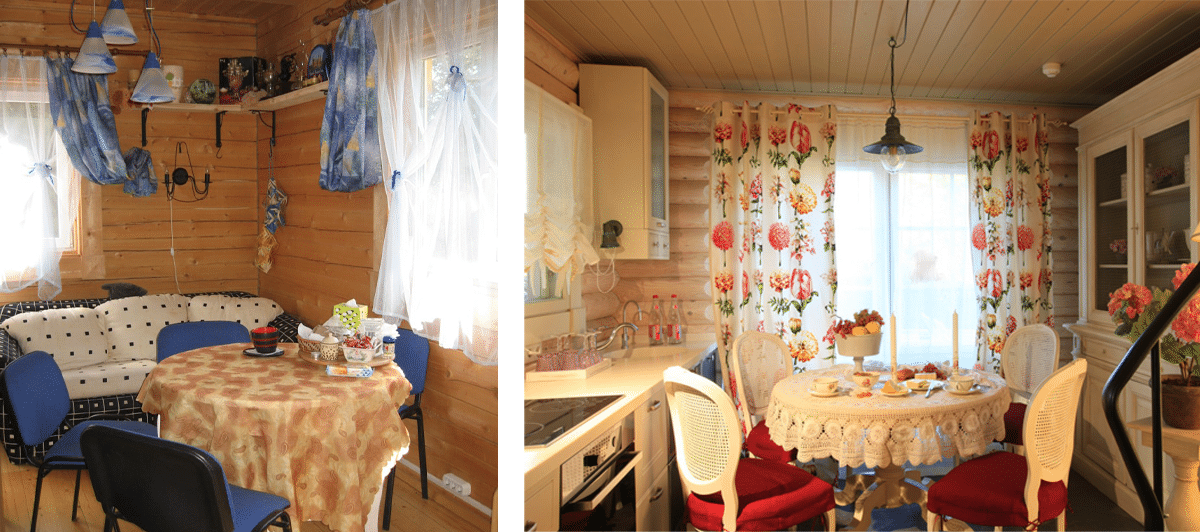
In the photo - an example of Provence in a log house
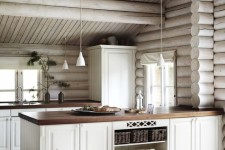
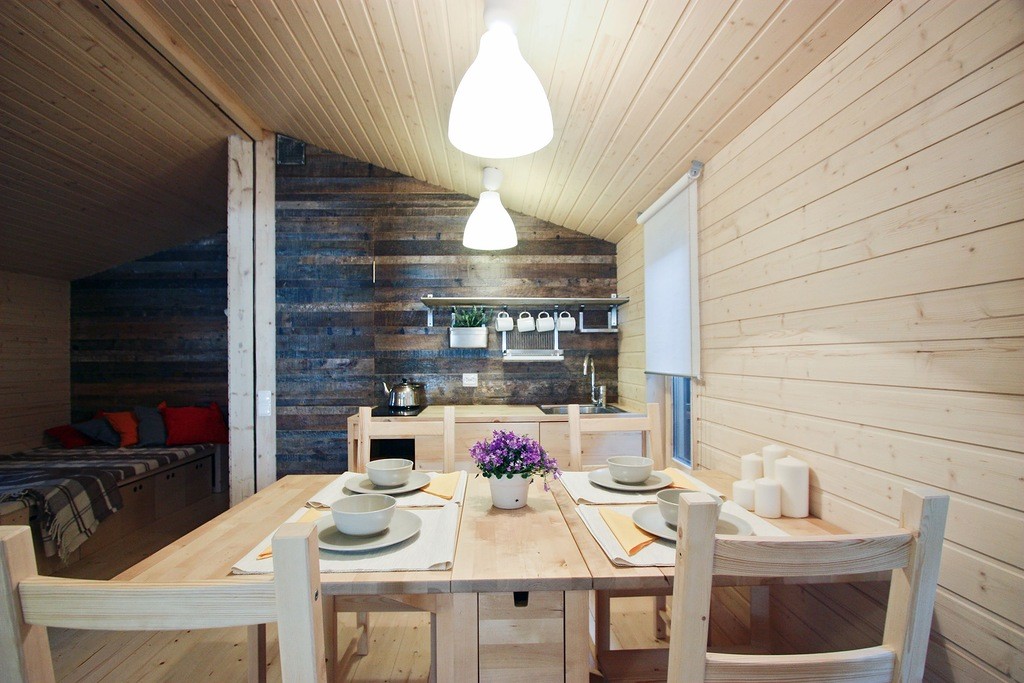
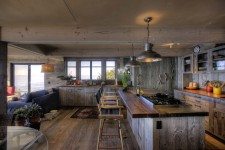
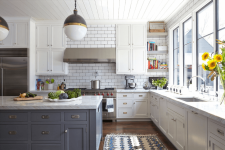
- scandinavian interior
The most concise and modern of all varieties of country music. wood finish here it is adjacent to white brick or plaster, the windows remain as open as possible (even without curtains), the kitchen is furnished according to the principle of minimalism, but comfortable armchairs, wide chairs and a sofa are selected for the recreation area, which can easily accommodate the whole family.
In the fresh air, not only the appetite is stronger, but food is digested much better. In warm weather, you do not want to sit indoors at all. Preservation for the winter is also easier to do outside. In the article we will tell you how to build a summer kitchen in a summer house with your own hands, we will demonstrate diagrams, drawings, photo and video instructions.
Choose a type
All types of summer kitchens can be classified into two categories:
- open;
- closed.
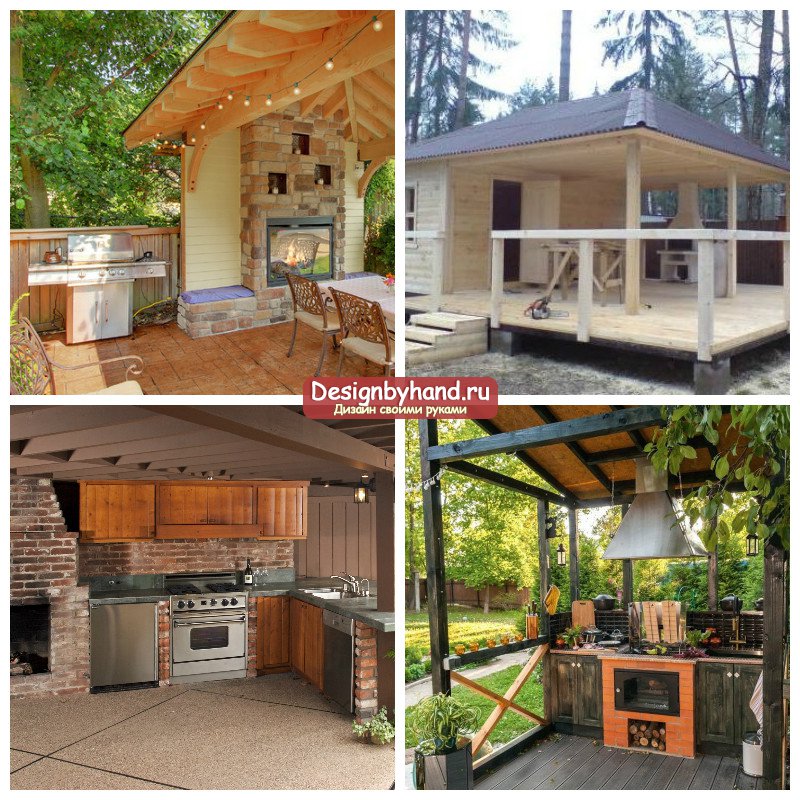
Closed kitchens are like a small house-like structure that often lacks much insulation. The advantage of this solution will be protection from insects, the best protection from the weather, as well as from the wind. An open kitchen option on one or more sides can be protected with a fabric, wood or other wall. The advantage of such a solution will be greater unity with nature. Among the open types of buildings, there are options:
- With barbecue. In this case, you have the advantage of cooking your favorite dish on an open fire. Barbecue will be available in any weather. If you additionally mount the oven, then you can please your friends with pizza.
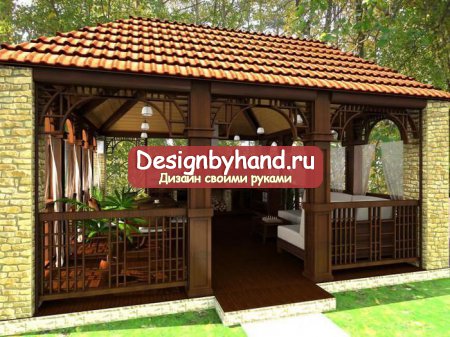
- With gazebo or pergola. Nice to sit among the greenery. This is exactly the solution in which the entire structure will eventually be shrouded in grapes, ivy or other climbing plants.
- Canopy adjoining the house. The easiest way to build. Requires the least investment. But there is a downside. When cooking, all fumes and smoke will go towards the house. This can lead to damage to walls or other finishing material.
Stages of preparation
Once you have chosen one of the possible options, it's time to create a small project.
- We choose a location. It is good when it is possible to place the kitchen in a cozy garden, where there is a pleasant atmosphere of tranquility. At this stage, it is necessary to take into account the proximity of the location of various communications. They will definitely be needed. Electrical appliances will require wiring. When cooking, you can’t do without water and after it you need to put it somewhere. Do not place the building close to driveways and roads. Then your meal will not be spoiled by unpleasant odors. If there is a toilet outside, then it is better to leave it as far away as possible.
- We stop at the material for construction. If a closed kitchen is planned, then you can approach it as a frame building, in which case you will need wood. A good option would be a building made of foam blocks or bricks. The open one will most likely be made of wood, or one or two of its walls will be made of the material that was listed earlier.
- Decide on the roof. Soft tiles will look great on an open building, but this is a rather expensive solution, although it cannot be ruled out, because the roof area will be small. A good option would be metal tile or corrugated board. Perhaps, while waiting for your turn, you have sheets of slate or ondulin - they will also work.
- The project should also take into account what equipment is planned to be purchased for the summer kitchen.
Foundation
The summer kitchen is usually conceived as a lightweight structure. This means that the foundation can immediately act as a floor, and, perhaps, pouring is not required at all.
- First you need to clear the selected area of all debris and vegetation.
- A small layer of top soil is removed.
- One of the corners of the future building is indicated with a wooden peg or a metal rod. Next, three more elements are installed. To correctly position them, it is necessary to measure the diagonals for identity. A fishing line or strong twine is stretched between them, which will serve as a guide.
If the building will consist of a canopy, then after these steps you can proceed as follows:
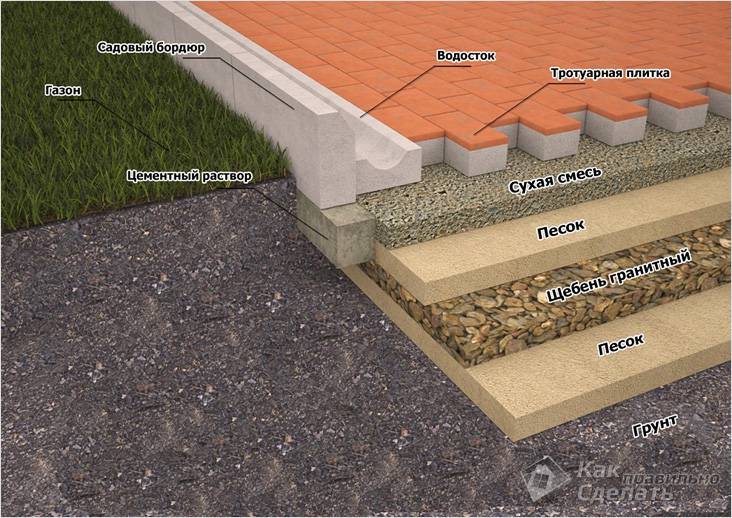
- The entire perimeter of the marked area is dug to a depth of 30 cm.
- The bottom is leveled and compacted.
- Sand is poured inside with a layer of 10-15 cm. It is also leveled and well rammed.
- The remaining space is filled with screenings and the final leveling is performed.
- Further, on our “pie”, which has been prepared, paving or other tiles, which are intended for the street, are laid. This can be done on a dry cement mortar, which, after spilling with water, will fix the entire base well.
- Pits are dug at four corners, their depth should be at least 50 cm. Formwork is installed inside. A crate is made from the reinforcement, which will be the basis reinforced concrete structure. It is placed inside and filled with a solution. With the help of a vibrator, the entire mixture is rammed. While the concrete has not yet hardened, two metal plates are inserted into the middle, to which we can fix wooden poles that will support the walls and roof.
This version of the base will be relevant in the case when the soil is sufficiently dense. In cases where ground water may come very close to the surface or displacements of the upper layer are noticed, a more stable base must be provided. Also, if you plan to build a stove or barbecue on such a foundation, then you will need to lay separate concrete supports for them.
In order to make a foundation slab, we will need to follow the first three steps from the previous instructions. Next, we take on the following:
- We prepare 8 pieces of reinforcing bars. Four of them should be 10 cm shorter than one of the sides of the future structure, 4 others 10 cm shorter than the other. If the building is square, then they will all be the same size.
- We lay four of them in the form of our future structure and fix them together. Further, every 40 cm we tie longitudinal and transverse jumpers. In the same way we prepare the second grid. We connect the two gratings with jumpers to such a height that the future plate rises above the surface by at least 5 cm.
- We lower the entire structure into the middle of the dug hole, install the formwork and fill it with concrete. We ram with a vibrator. We level with slats and let it stand for several weeks.
- In fresh concrete around the perimeter, in increments of a meter, metal plates can be placed to the width of the future beam for the walls. Or it can be done only in the corners.

It is very important that the floor is above the ground. This will prevent rainwater from seeping in. It is also good to make a slight slope of the floor so that the precipitation that is carried by the wind can flow freely into the drain or simply through the door.
In the case when it is planned to build a closed kitchen made of brick or foam block, this version of the foundation may be enough. Also for these needs, you can build a tape shallow or columnar foundation. In this case, such a large-scale excavation is not carried out.
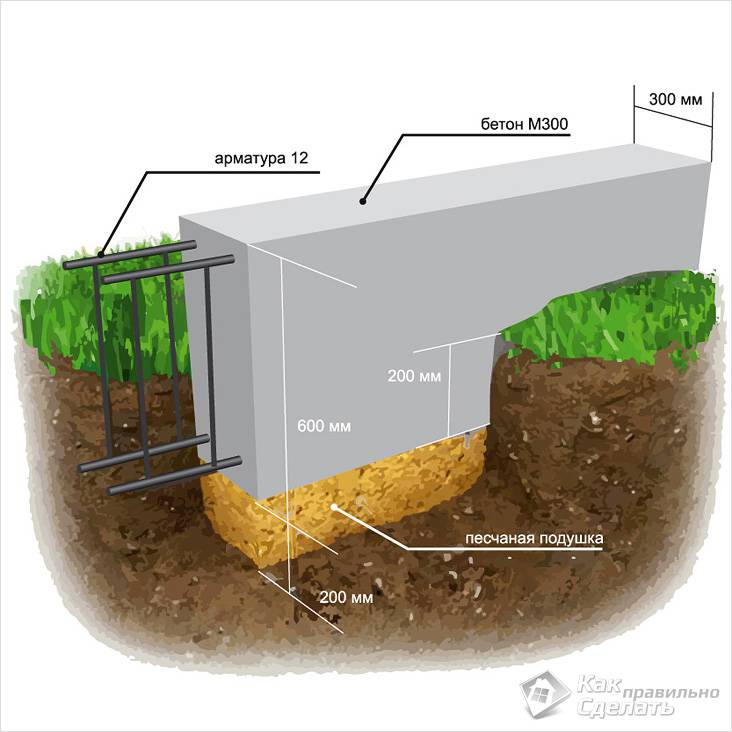
- A trench is dug to a depth of 50 cm around the entire perimeter of the future kitchen. The width will depend on the thickness of the walls. In any case, the foundation should be 10–15 cm wider.
- A layer of sand is poured to the bottom, which is leveled and spilled with water.
- A metal base-lattice is made according to the principle, as in the previous instructions. She fits into the trench.
- The formwork is installed with the expectation that the future foundation rises 20–30 cm above the ground.
- Pour the cement mortar, ram and level it. Let stand 2-3 weeks.

The supply of all communications must be carried out in parallel with the laying of the foundation, so that later you do not have to hammer holes in it or dig under it. So that the pipes are not clogged with mortar, they must be closed in advance with a cloth and plastic oilcloth.
open kitchen
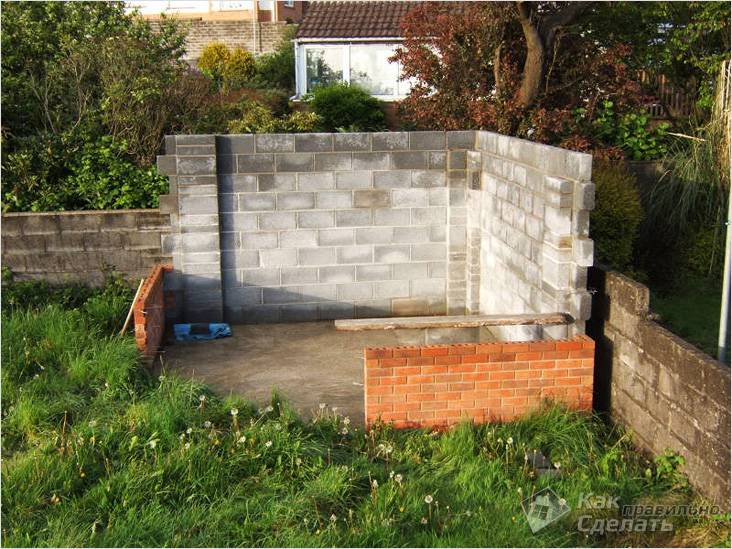
This option can be built most quickly. We have already laid the foundation and the anchorage for the supports. If you are planning for the kitchen to be closed on one or both sides with walls made of brick or other material, then the first step is to start building these partitions.
- At the corners of future walls, we dig into the ground a metal square pipe or a profile measuring 50 × 50 mm. Let's level it up. We do this so that the planks are close to the masonry. They will serve as our guide.
- We stretch the line between them. We raise it to the height of the first row of bricks to be laid. Let's level it up.
- We prepare a cement-sand mortar in a ratio of 1: 3. This will be sufficient for our purposes.
- We produce masonry, focusing on a stretched fishing line, and also periodically recheck ourselves with a level.
- As soon as the first row is completed, we raise the fishing line for the next and so on until the very end.
- In order to make the structure more stable, a reinforcing mesh can be laid in the seams.
If you do not plan on having walls of this nature, then the process will be much easier.
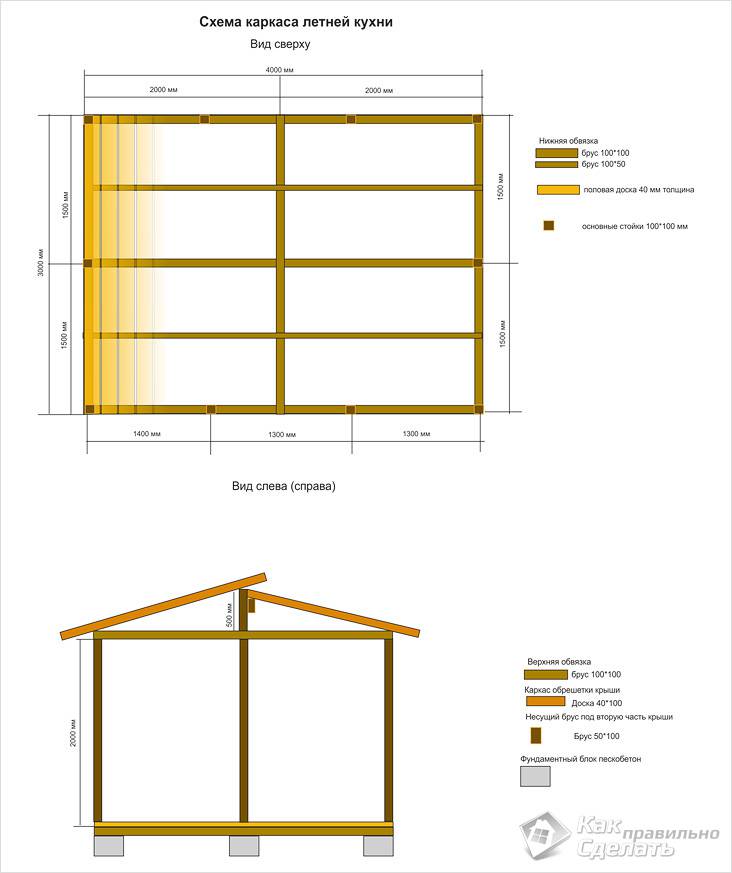
- To the metal plates that we laid during the manufacture of the foundation, we fasten the beam, which will serve as a support. When the whole structure is of great length, then it is necessary to foresee the need to install 3-4 pillars on one side. Their length should be equal to the height of our building, and the dimensions of the sides should be 15 × 15 cm or 15 × 10 cm.
- We expose them by level so that they are strictly vertical. The bars of one wall should be longer so that we can organize the roof slope.
- We immediately strengthen our columns with the help of the upper strapping. It can be made from the same logs. We fix it with metal corners.
- To give greater stability to the entire structure, you can install two jibs near each column. They can be fixed to the support with self-tapping screws, and to the base - with an anchor bolt.
- We mount beams for our future roof. To better hold them in the places where they adjoin the harness, it is better to perform gashes. We fix with metal corners.
- We make a crate for flooring, as recommended by the manufacturer. We lay roofing material.
- To create more comfort, one side (or more) can be sewn up with a wooden clapboard or block house. On the other - to make a wooden lattice. You can equip supports for climbing green plants.
In the case when it is planned to build a pergola, nothing more needs to be done after laying the ceiling beams. They can be covered with stain or varnish. Further, the plants themselves will do their job, creating a shadow when they are fully grown.
closed kitchen
At the design stage, it may have been decided to build walls from foam blocks or bricks, then this can be done according to the principle with the installation of vertical landmarks, which was mentioned above. The thickness of the walls may not be too large. In some cases, laying in half a brick is allowed. But always consider the weight of the future roof. In the future, the outside of the building can be sheathed with siding or a block house. For interior decoration, a block house, lining or other material that will be resistant to frost is also suitable, because it is unlikely that someone will constantly heat the room in winter.
A bar is laid on the walls, which will act as a Mauerlat. Its size can be 10 × 15 cm. It is fixed with anchor bolts or studs, which must be walled up during the construction of walls. Under it, it is imperative to lay waterproofing in the form of roofing material or bikrost. A truss system is installed on the logs. It can be both for gable and for shed roof(for this option, it will be enough to make one wall higher than the other, then beams are simply installed between them). A crate is mounted on the beams and the roofing is laid. FROM inside the ceiling is stitched.
![]()
You can go simpler and stop at the wireframe version. For it, we need bars of the same size as for the vertical posts from the instructions for the open kitchen. From them we make the foundation. We lay them around the perimeter of our foundation on two layers of roofing material or bicrost, which will serve as waterproofing. We make a dressing between them. To do this, on the edge of each log there is a recess half the depth and a width equal to the width of the log. Checking diagonals. We fix them together with self-tapping screws and internal metal corners. Next, we fix it to pre-prepared plates or anchors to the foundation.
We mount the corner support pillars from the same timber. In increments of 60 cm, we install additional vertical supports from a board measuring 10 × 5 cm. For greater rigidity, we fasten the jibs for each main support. We carry out the upper trim and install the truss system for the future roof. We do this by analogy with the option of an open kitchen.
finish line
Even if our kitchen is planned to have a barbecue or stove, this does not exclude the presence of a gas or electric stove, which is much more convenient to use. It is necessary to take care of the installation of a sink, a mixer, as well as a stand for dishes on which it will dry. It would be nice if there is a locker in which you can hide cutlery, as well as pots. You need to take care of the dining table, as well as comfortable furniture on which you can relax. For greater comfort, it is better to carry out the main and decorative lighting.
For an open kitchen project, it is best to ensure that all lighting fixtures are preferably IP68 rated. In this case, you do not have to worry about any elements being damaged by rainwater.
Don't approach your summer kitchen project casually. Let it in some sense be a design decision. After all, it will serve not only as a place for eating, but also as a recreation area with family and friends.
Author: Yuliya Yurevich As a rule, the summer theme is raised only in summer or at least in the warm season. Few people pay attention to it in the winter, but in vain. A truly beloved dacha can become a cozy and fabulous family residence even in the coldest season. Agree, the trees under the lush cap of snow look charming, and walking along the narrow paths creaking from frost brings us a lot of pleasure. And it seems that there is nothing better country house in winter, when you can come to the kitchen to make winter tea with spices, mulled wine or even your favorite soup. Each of us has the right to a "safe haven" away from city life, work and other affairs. By the way, given the fact that summer is the peak of the summer season, in this perspective, “off season” can be useful for internal alterations and ennoblement, because in spring and summer, external summer cottage objects will require our participation: backyard, porch, flower beds, lawn and much more other. Let's look at how to update the country kitchen with your own hands.
country kitchen walls
First of all, you should pay attention to the decoration of the walls. Surely they do not represent any aesthetic value at all, but are simply covered with clapboard, which has lost its shape over time. good view, or in the worst case, generally unknown and impartial material. There can be a lot of suggestions for alterations, but let's look at a budget and easy-to-implement option - wallpapering. Choose wallpaper with a pattern, however, if your kitchen is not too large, it is better to stop at a smaller picture. For little country kitchen the most rational choice light wallpaper cool shade with a medium pattern or texture. So, light green, heavenly, gray, steel will contribute to a visual increase in space. As an alternative, consider kitchen panels PVC, which is easy and quick to install, is also considered an inexpensive material. In addition, you can choose the color and texture, such as green marble. Still a good fit country walls is their coloration. It is easy to decorate a monophonic, evenly painted wall surface using themed stencils or a simpler and brighter way - decorative wall stickers.
1 / 3
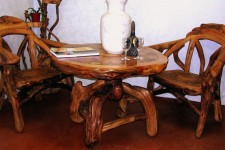
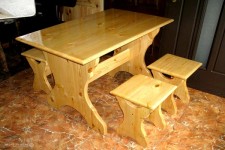
We create kitchen garden furniture
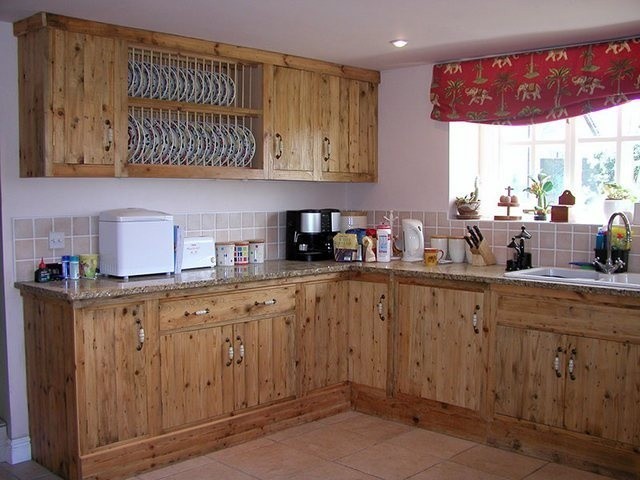
Usually the hosts country cottages prefer to relax among a cozy, homely atmosphere, which is largely formed by the chosen design style. Few people choose minimalism or hi-tech for a summer house, on the contrary, the majority prefer country, Provence, Scandinavian, Mediterranean style, as well as eco-style. Regarding the choice of material for kitchen furniture, experts advise to exclude an array of wood in the event that you do not live all year round in the country. Otherwise, temperature changes will deform expensive wood, so soon you will have to change the situation again. In order to avoid such problems, it is better to choose kitchens from MDF covered with veneer for a summer residence.
1 / 4

In a city apartment, we are used to seeing the top and bottom row of kitchen cabinets, which are fraught with a lot of household utensils. In the country kitchen, it is not at all necessary to create capacious storage facilities for household appliances, because, as a rule, there is no need for them here. In this case, open upper shelves will look good, on which you can place colored dishes, beautiful cups, stylish containers for storing bulk products. It is important to understand that now everything will be in sight, and this will give a new mood to your now homely kitchen. If the country kitchen does not yet have a bottom row of kitchen cabinets, they can be replaced with a different design. The main plus is savings and ease of implementation. You need to cover the entire space below the main countertop and sink with a beautiful textured fabric. Choosing textiles, you largely determine the image of the future kitchen, besides, the chosen concept can also be seen in curtains, chair covers, and kitchen towels. The proposal to close the extra unsightly space with a curtain is a well-known and very popular method for decorating a country kitchen. This organization of space is praised for its convenience: now everything is at hand, you do not even need to open the locker door to take the next item.
Renovating an old kitchen
The second option that you may encounter is the presence of old kitchen furniture that was inherited by your dacha from the main place of residence. As a rule, these are designs that have already gone out of fashion, and are also significantly battered by time. There is only one way out - to update the facades! To do this, you need to pick up a special paint in a hardware store that suits your type of surface. If this seems complicated and unacceptable, you can consider pasting the facades with special self-adhesive paper, which can be stylized as wood or simply in bright colors. The final touch, which will definitely allow you to look at old furniture in a new way, is the replacement of fittings. Buy stylish handles for the doors, and you yourself will be surprised at the changes.
1 / 7
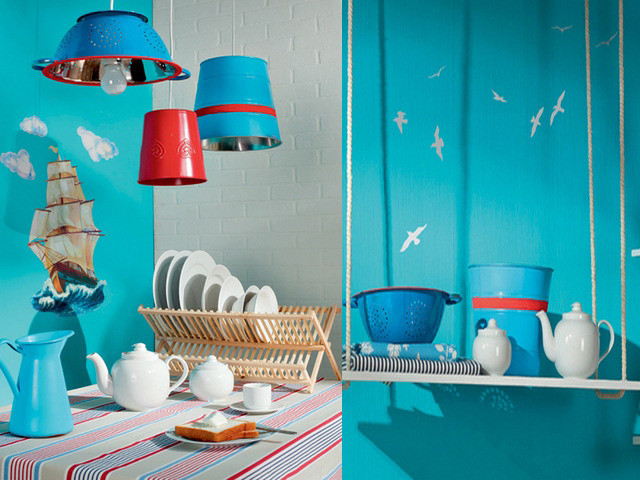
Emphasis on textiles
Do not ignore the magical power of transformation with the help of textiles. Perhaps there is no faster and more efficient way to create a new look. Pay attention to the current situation. What have you stopped noticing? What is long overdue for replacement? First, decide on a stylistic concept, let it be a Mediterranean dacha dominated by white and sea, or maybe it's a typical French country kitchen where lavender and rosemary will grow? Deciding on the style is important so that later there is no mixing. Evaluate existing curtains: maybe they need to be replaced for a long time? What color is the tablecloth on your table? If you have already started updating textiles, do it everywhere. Do not forget about comfortable pillows for stools or chair covers. For this, you do not need to have special sewing skills, moreover, today there is a wide selection in the store. Consider getting some cozy and cuddly blankets that you can use to cover your sometimes lengthy kitchen get-togethers. Consider a small kitchen rug that can be placed under your feet, especially while washing dishes.
1 / 4
If such a task seems too difficult, try something else. Take the usual coarse burlap and use a stencil to write words with paint that will mean something to you. Further, such a canvas can be easily placed in a frame and the accessory can be hung in the interior - however, it is desirable that such a picture be of a large size. With your own hands you can make a lyrical elegant lampshade. The principle of creation is simple. You need an openwork knitted white napkin, which you need to stick using PVA glue on a regular pre-inflated balloon. After drying, the ball is removed, and the design remains static and very picturesque. Wooden things will look good in the country interior. You can get inspired to create wooden accessories by reading the following text.