The theme of butterflies in the interior has been popular for not only several decades, but for centuries. They have always been a symbol of joy, carelessness, a positive attitude to life, romance and love. Adherents of mysticism, on the contrary, saw in them a hint of otherworldly forces, subtle worlds, bearers of ancient magic. One way or another, this is a hot topic for interior decor, and making butterflies with your own hands is not at all difficult. In this article, we will look at many methods and materials from which you can choose the most preferable.
- Butterfly in quilling technique
- Materials for creation
- Mini video lesson
- Butterflies from book pages
- We will need
- Instructions for creating
- Butterflies within
- Butterflies under glass
- Double cardboard butterflies
- Butterflies, circles and flowers
- Felt butterflies
- From photos
- From the atlas
- At the front door
- On the ceiling
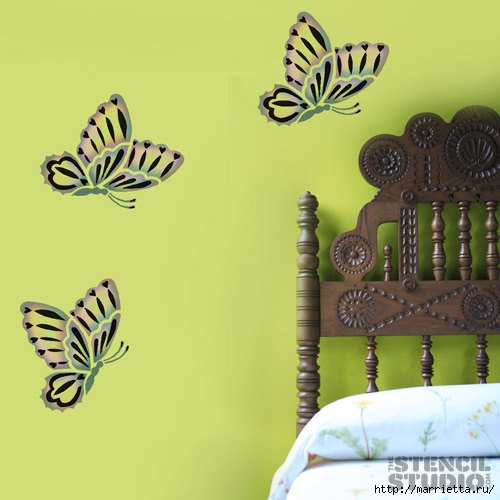
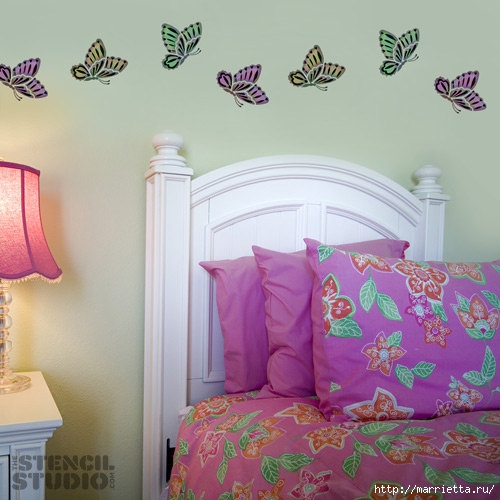
- Over the bed
- Butterfly pillows
- Prints
- Canopy with butterflies
"Paper Butterflies"
Paper is one of the most common materials for hand-made in general, and for making such a simple shape as a butterfly, it is hard to find a better one. Even for those who are taking their first steps along the path of independent decor, it will be easy to join the work with it.
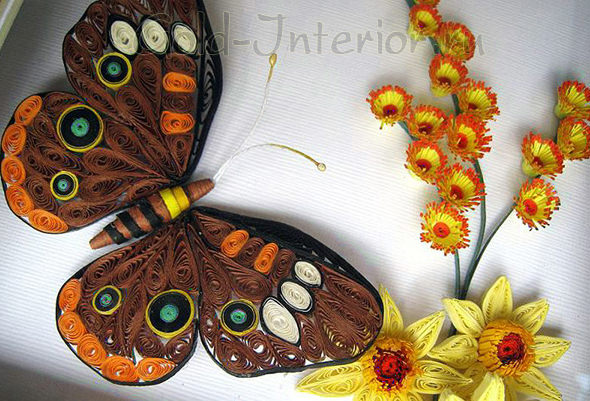
"Butterfly in quilling technique"
- If you have never heard of the art of quilling, it is time to envy you, because there are so many interesting things ahead! First, let's talk a little about what it is.
Quilling is the creation of volumetric compositions from strips of paper twisted in a spiral. The size and shape of the curl varies, and these tiny elements make up quite large-scale works. It sounds quite simple, but the resulting things surprise with their thoughtfulness. This hobby is a craft with a history that has been practiced since the distant Renaissance. And in the 19th century, it became one of the most popular ladies' hobbies.
Quilling is a rather complicated technique, do not expect everything to work out perfectly the first time. But over time, crafts will look more and more elegant, and less and less time will be spent on them.
"Materials for Creation"
What tools will be needed in order to make butterflies with your own hands using the quilling technique?
- Colored paper of the usual grade, which must be cut into strips, 3-5 mm wide. In specialized stores, you can also purchase ready-made cuts, but there is nothing difficult in doing it yourself.
- A twisting tool, which is a thin stick with a blunt end. Specialty sticks are sold in stores in the right thickness, but if you are still not sure whether you are serious about quilling, you can make it from a toothpick or ballpoint pen refill. In the rod or toothpick, you need to make an incision directly along the section with which you will grab the paper.
- Glue - regular PVA is perfect. But for some operations, a glue stick may come in handy, so grab that too.
- The paper that will serve as the base. This is left to your choice. You can use thin white, thick black, cardboard, craft - in general, anything.
- Scissors with thin tips.
- Tweezers to capture the resulting curls.
"Mini video lesson"
It does not make sense to explain the technique in brief, it is best to watch a few video tutorials that will save you from common mistakes. If you want to create the same complex designs for the interior as do-it-yourself butterflies in the photo below, start learning. Then the unusual will not keep you waiting!
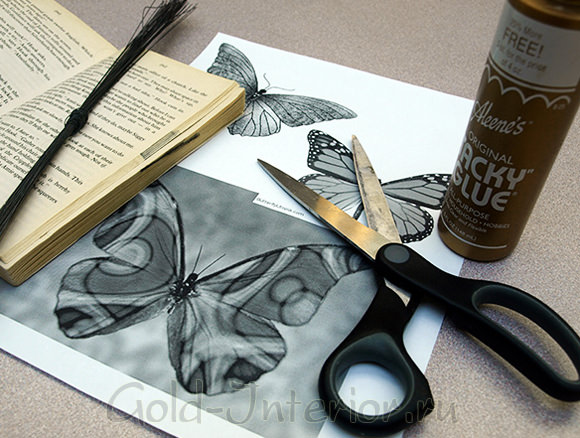
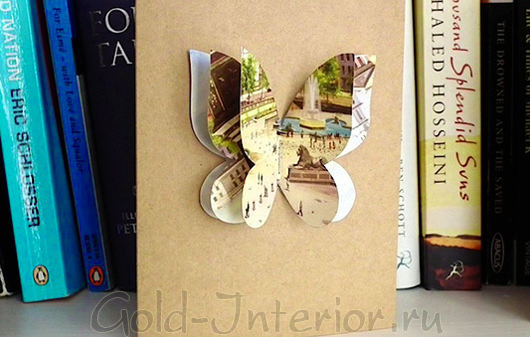
"Butterflies from book pages"
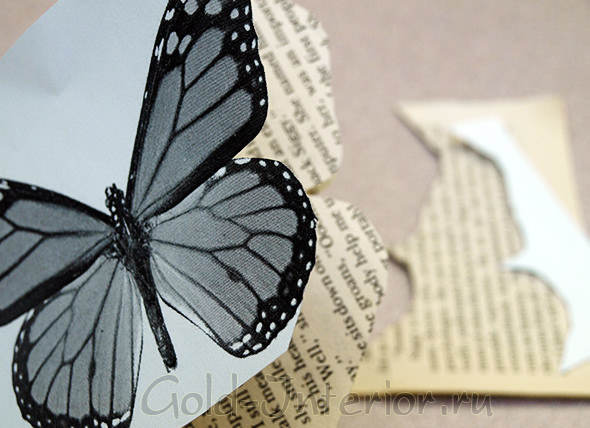
- Intelligent and very gentle design of the room - butterflies made from old books. This, again, is not at all difficult and very exciting! Original simplicity is now in vogue!
"We will need"
"Creation Instructions"
1. Tear two pages out of an old book.
2. Place a roughly cut butterfly on top of a white piece of paper.
3. Trim the book pages around the outline of the picture, making sure they match exactly.
4. On one cut, place a thin wire laid crosswise. This is necessary so that the finished butterfly can be shaped.
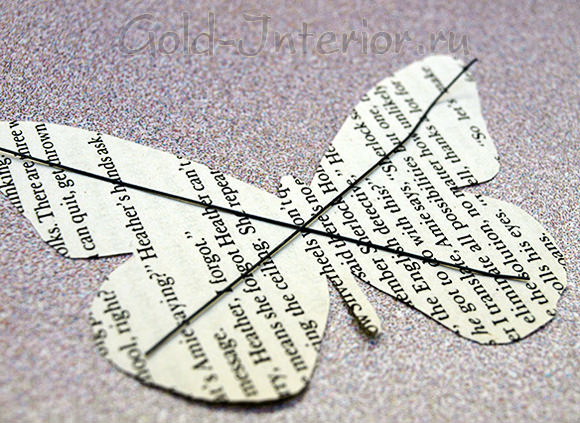
5. Spread one butterfly well with liquid glue.
6. Put a wire on it and connect it to the second half.
7. By pressing on the wire, give the piece any shape you like.
That's it, library butterflies are ready! They can decorate walls, bookshelves, hang on the ceiling and mirrors, in a word, anything.
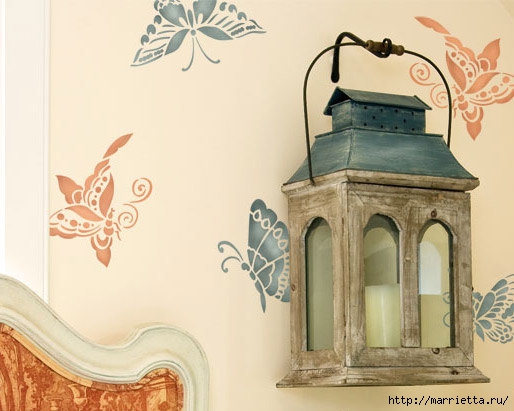
"Vintage Butterflies"
Butterflies are mythical and somewhat mysterious creatures. They are often used to embellish classic designs. We will show you two that you can make with your own hands, where butterflies are not cheerful and frivolous creatures, but more mysterious and mysterious.
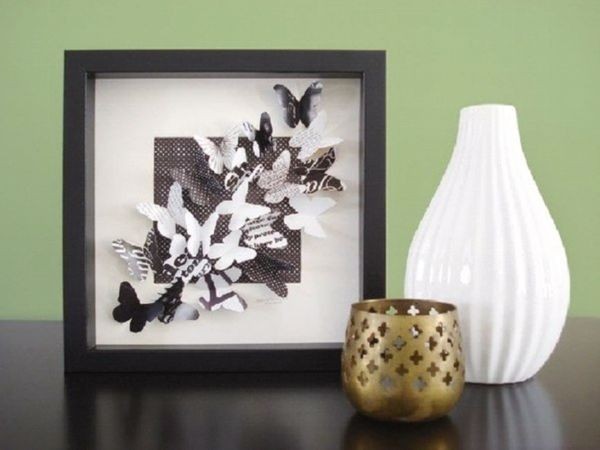
"Butterflies within"
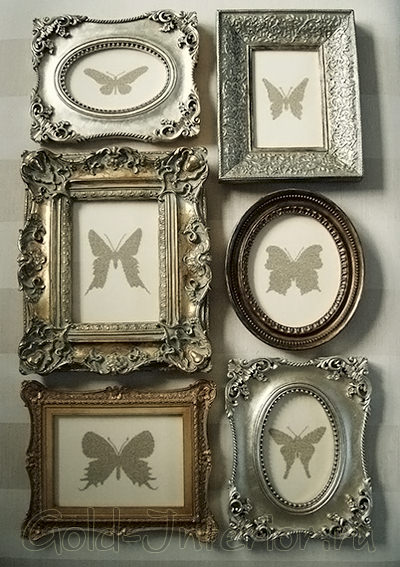
- We can offer you a very elegant solution in a sophisticated Victorian style. Such butterflies can be hung in an old office or living room decorated in vintage style. The harmonious ratio of photo frames is very important here - in addition, you will have to work on the art of decorating them or buy retro accessories at the flea market.
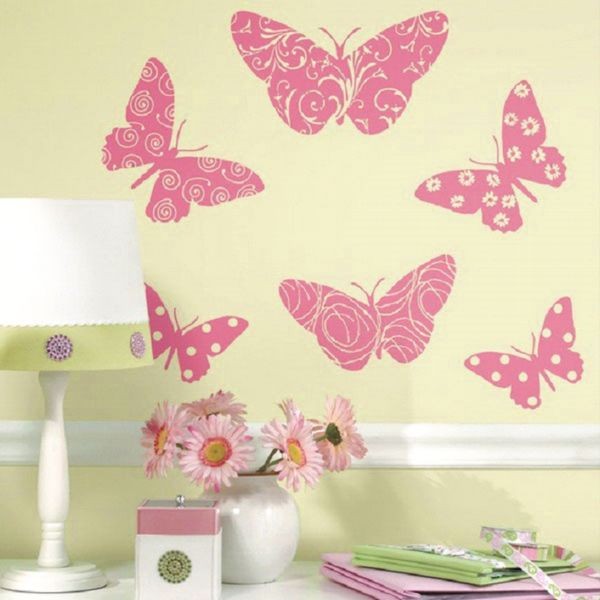
Butterfly silhouettes are easiest to print on a printer, and if you know how to draw, do it in watercolor. Our advice - do not use plain office paper for printing. Get something interesting - textured rough sheets or paper with bamboo fibers. If this is not possible, tint the sheets yourself, with tea or brewed coffee, to get the effect of old paper.
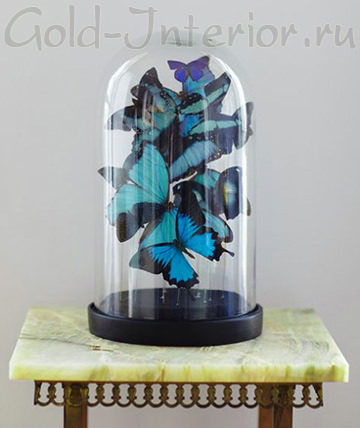
"Butterflies under glass"
- Another accessory reminiscent of a bygone era is handmade butterflies placed under a glass jar. You can make the butterflies yourself or buy them in a flower shop; florists often use such specimens to decorate their magnificent arrangements. There you can also find a foam base, which you will be happy to decorate beautifully. And then you just have to cover them with glass and put them in a conspicuous place. It is advisable to allocate a separate nightstand or console for this.
"Garlands of butterflies"
Garlands are not necessarily a Christmas decoration. They can be useful for the usual weekday decoration of the room. Moreover, DIY-made butterfly crafts will doubly “please the eye”.
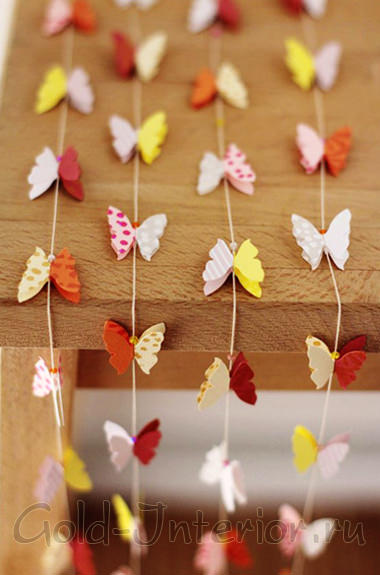
"Double Cardboard Butterflies"
- Double butterflies made of thick multi-colored cardboard can be used to assemble a variety of garlands. This decoration is very simple, but also very popular because it looks more spectacular than you might think. Despite the number of elements, it is done quite quickly. After all, butterflies for this can be cut out in whole bundles. Be sure to use thicker paper because you will end up having to bend the butterfly's wings to the desired angle, otherwise the garland will look flat and implausible.
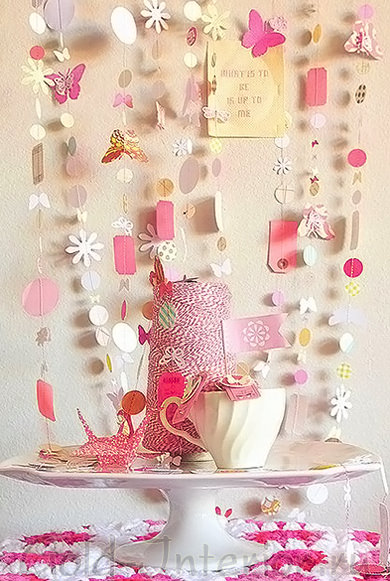
"Butterflies, circles and flowers"
- Moreover, you can create garlands consisting exclusively of butterflies. And you can mix them with other paper elements to make the composition look even more interesting. In the photo below, the butterflies are harmoniously woven into "beads" made of paper circles and.
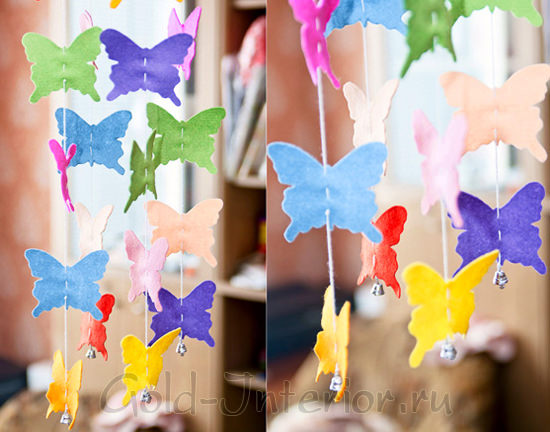
"Butterflies from felt"
- And it's not even limited to paper. If you are making garlands for a child's room, you need to be aware that paper products will not last long. Whether it's fabric, but sewing so many butterflies with your own hands is a task too time-consuming. So, we need a dense fabric for cutting, for example, felt. As you can see in the photo below, the central thread is simply passed through the parts with a needle. By the way, butterflies look very nice, being interspersed with felt pompoms. Additionally, they can be decorated with beads or sequins.
"Butterfly-paintings"
Such masterpieces are mastered very easily! We select, cut out and framed or under glass. Matte photographs, aged school atlases, and glossy magazine pages will do.
"From Photos"
- In photo albums, not the most successful photos were stale, which it is high time to throw away? Don't make hasty decisions. We may need them to create mini-paintings to help you decorate your bookcase shelves. You already know the algorithm of work - cut out several butterflies on a stencil, glue or wrap with a thread, then glue to thick cardboard.
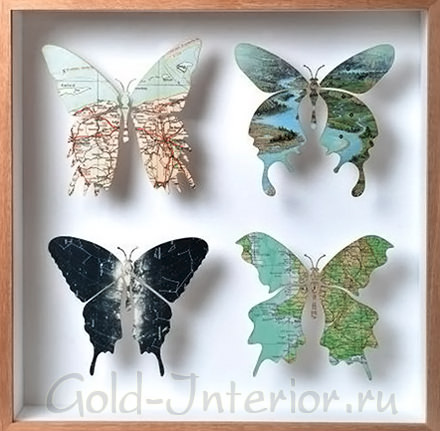
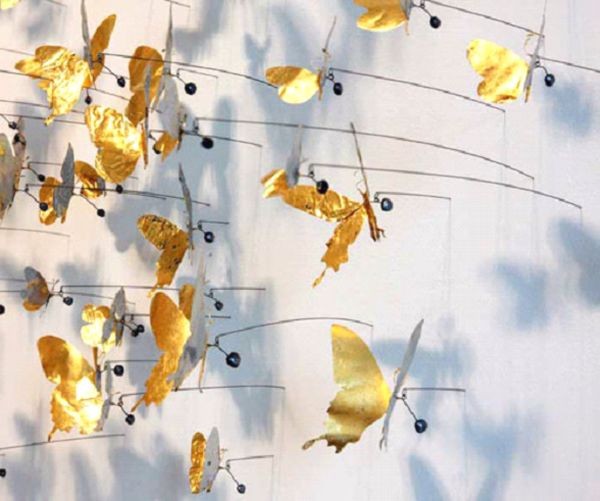
"From the Atlas"
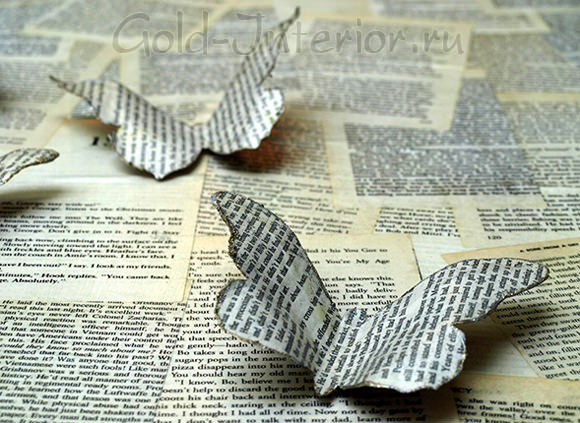
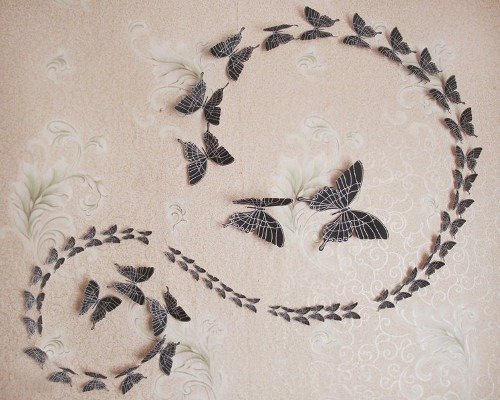
- As you understand, butterflies can be cut from anything - their sophisticated and exotic shape will look good on any medium. For example, you can use an old school atlas, and make unusual butterflies with your own hands, as in the illustration below.
"Pendant Butterflies"
Butterflies are supposed to flutter, so hanging them from the ceiling seems like the most obvious solution. Or against the wall, perhaps to the door, or maybe over the bed? Let's take a look at some options...
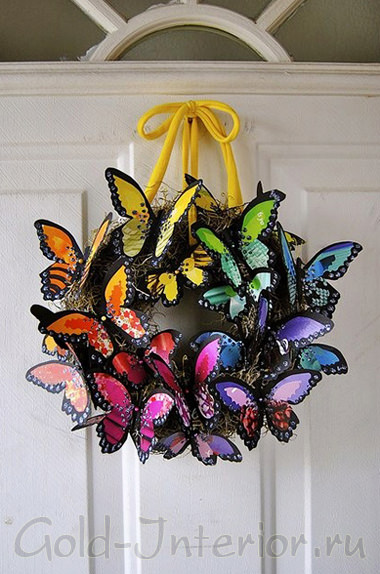
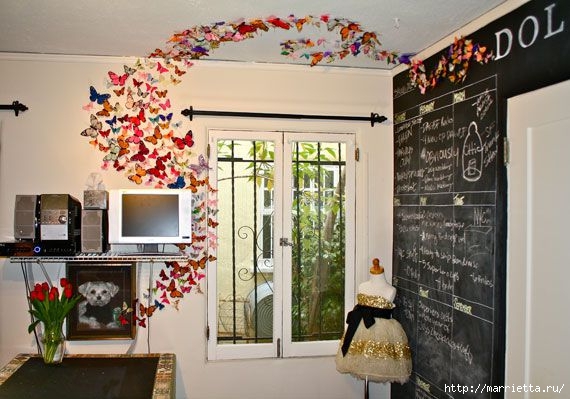
"At the front door"
- Decorative wreaths on the doors are appropriate not only for holidays. Why not decorate your home with these cheerful symbols all year round? You can print images of butterflies on colored paper or buy a ready-made set of pictures, and then paste them over a wicker wreath.
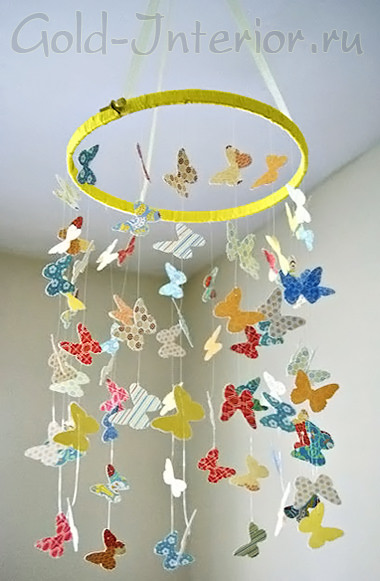
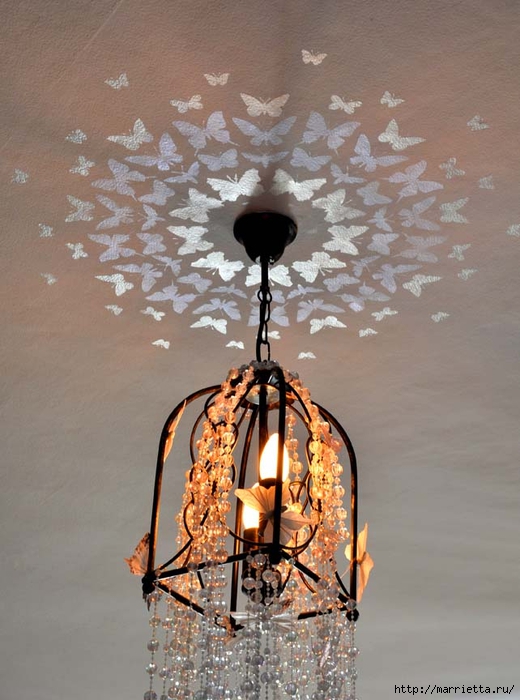
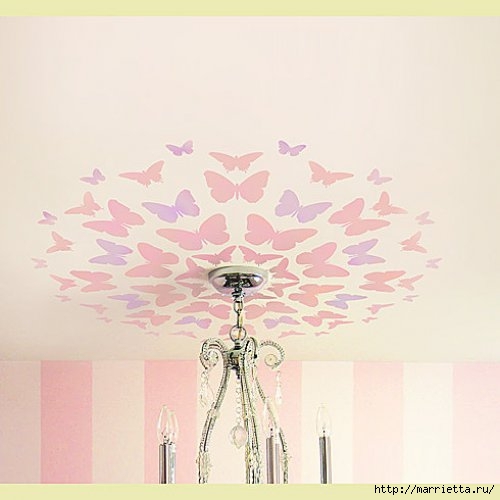
"On the ceiling"
- To make it beautiful, we will use nothing more than an embroidery hoop. We connect the hoops with each other with cords or a thick fishing line, around them we tie threads with our butterflies. The lighter your tropical creatures are, the more believable they will move their wings at the slightest breath of wind. Therefore, instead of cardboard, use thin paper, and if you want to hear the rustle of wings, then foil.
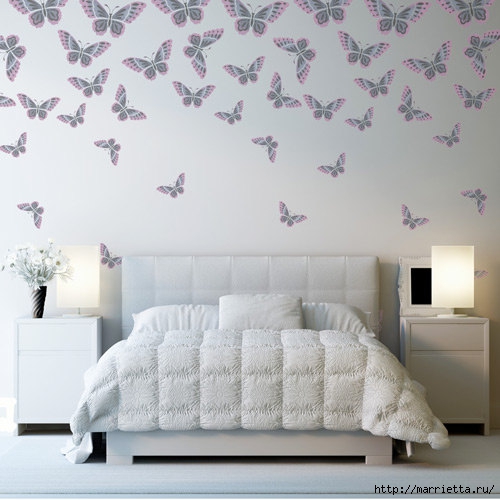
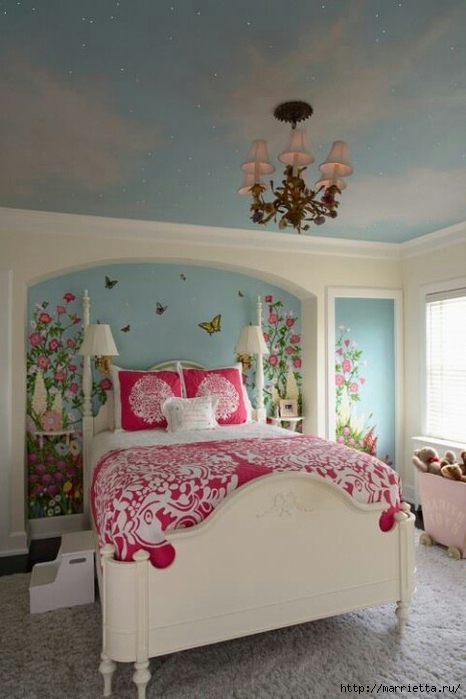
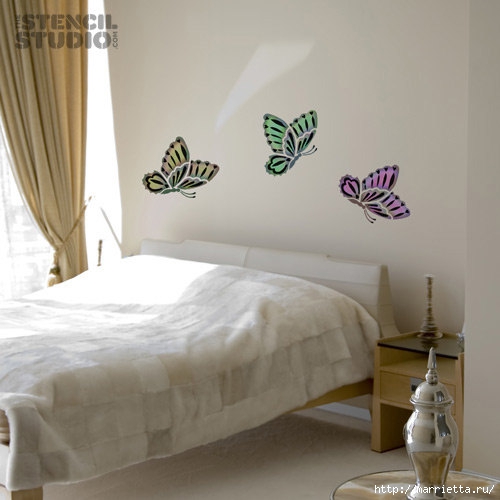
"Over the bed"
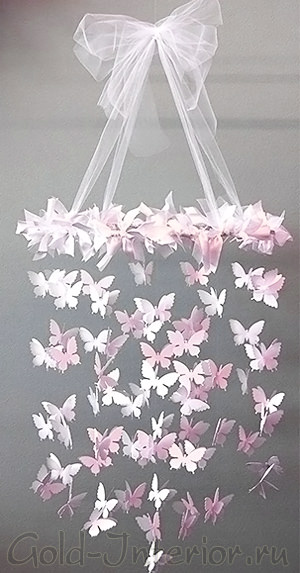
- Do wooden hoops seem too heavy for you? If yes, then you can make the base with plain white ribbons like in the photo below. The basis is the same hoop, but this time wrapped in translucent chiffon. Such butterflies can decorate the interior of both a children's room and an adult bedroom.
"Fabric Butterflies"
To convey the brightness and subtlety of the pattern on butterfly wings, it is good to use high-quality textiles. Perhaps you will like the idea to make for the interior? Or replace the boring seat upholstery with a new one? Even sewing is not such a difficult task for a person who has never dealt with a sewing machine before. But before you open up new possibilities for decorating - it's worth a try!
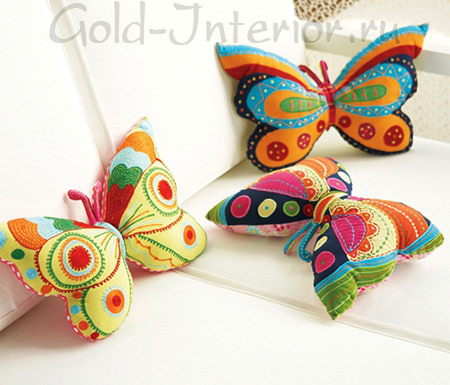
"Butterfly Pillows"
- Making small butterfly-shaped sofa cushions is easy, and how much fun they can bring! Use as bright fabrics as possible or sew appliqués on top if you want to play with the tropical theme.
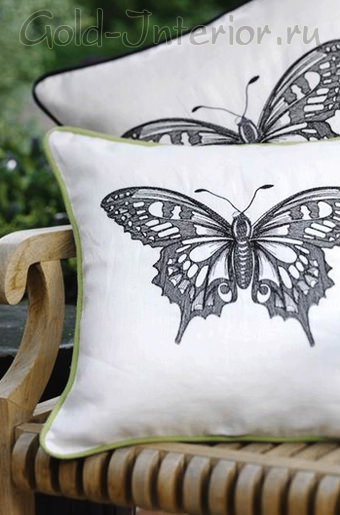
"Prints"
- A more complex interior will go with butterfly prints on a simple plain fabric. For example, in the form of a strict graphic pattern. It can be pillows, and bed linen, and towels, and capes.
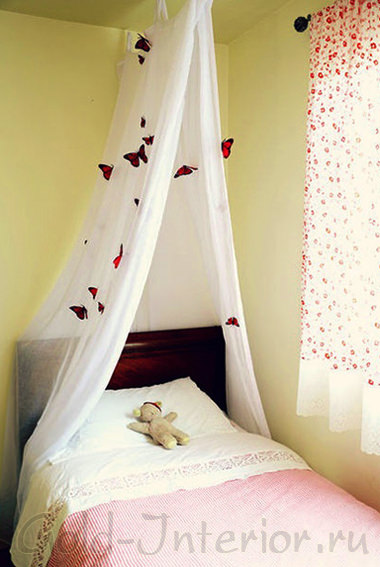
"Canopy with butterflies"
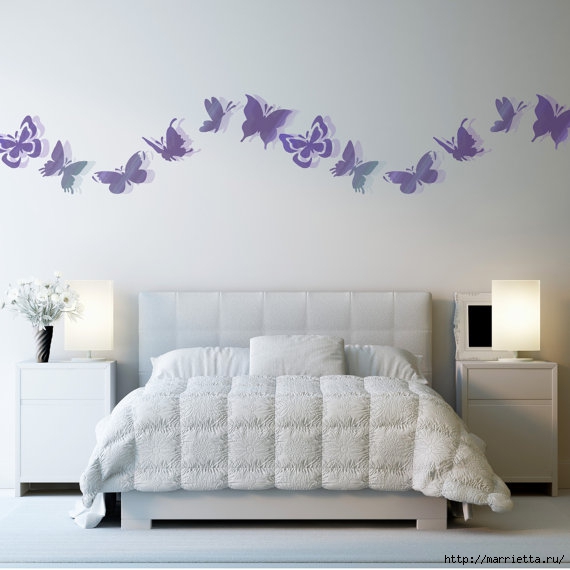
- Butterflies have always been considered a symbol of tender love and well-being, so they have a place in your bedroom. How to place them there to make the atmosphere as romantic as possible? Kill two birds with one stone by hanging a thin canopy dotted with moths over your bed. Such an interior decoration with butterflies will certainly bring harmony and comfort to the house!
Many in childhood were engaged in origami or created other crafts. It was very interesting, but now you can not limit yourself to just New Year's snowflakes or paper figures. You can direct your creativity to decorate the walls in the apartment, and butterflies will help you with this!
Butterflies on the wall with their own hands - it's very beautiful decoration, which does not require large investments, but can always diversify the design. Such an interior will always bring a good mood to the house. If you want to come up with something unusual, to revive the apartment, then you should definitely think about how to decorate the wall with butterflies. Each person will be pleased to return home and see what beauty there is!
How to make butterflies on the wall? Yes, very easy!
It is necessary to carefully cut out a lot of butterflies of different sizes from paper, and then stick them on the wall or attach them with adhesive tape or pins. It will be very beautiful if the butterflies are of different colors and different shapes.
What are butterflies made of?
- Colored or black paper, cardboard is better
- A set of good pins
- Scissors, preferably sharp, so that they do not tear the paper, but cut it.
- Pliers or pliers
- Pencil to make a stencil
- Cardboard as a basis for a stencil
- Glue. It is better if it is superglue or "Titanium".
Where to start design
There is nothing complicated in decorating your walls with butterflies. First you need to take a pencil that is well sharpened and draw butterflies on cardboard. Consider their size and shape so that the butterflies are different. The number of such insects can be unlimited. The more beautiful butterflies you make, the more interesting your interior will be decorated.
The cardboard stencil of the butterfly on the wall that you cut out must be applied to colored paper, and then butterflies should be cut out of it.
We take pins and with pliers or pliers we bend them at a right angle, that is, ninety degrees. We make them look like the letter "G".
The next step is gluing or attaching the pin to the base. To do this, we glue the butterfly on a pin in the middle so that it holds tight. In fifteen or twenty minutes everything should be dry.
Butterflies made of paper on the wall can be attached without the help of pins, if it is pasted over with wallpaper. In this case, you will need everything the same as in the previous version, except for the pins. We cut out the butterflies, and to make them look alive, they can be bent at the base to highlight the wings and abdomen. So they will look like living beings that sit on plants or flowers. Next, glue the base of the butterflies to the wall.
Butterfly wings can not be glued, so it will look much more beautiful. In addition, many people like to decorate the ceilings of the apartment in this way or create entire collections of butterflies of different colors, shapes and sizes.
Big plus attaching butterflies to pins is the shadow they cast on the wall. The picture becomes very realistic.
Butterflies on the wall: photos of them can also be found on the Internet, printed and pasted in the same way. This method is used by those who have a very unusual interior at home or have items that they want to combine with something unusual in color.
Ideas for such design can be found on the Internet, for example, on sites
A major overhaul of a house or apartment requires a decent financial investment, and sometimes you really want to update the interior of your home! You can breathe newness into the design and slightly embellish it without spending money, simply by calling on creative thinking to help. One of the spectacular and inexpensive ways to decorate is wall decoration. Panels, collage, fabric paintings, paintings, drawings, butterflies ... That's just the last type of decor we'll talk about today.
After all, making butterflies on the wall with your own hands is simple, and most importantly, low-cost! You only need ready-made stickers or hand-made applications.
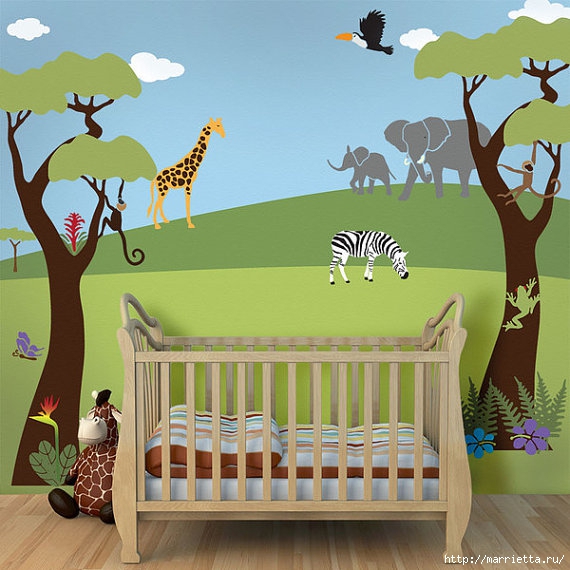
The role of butterflies in the interior
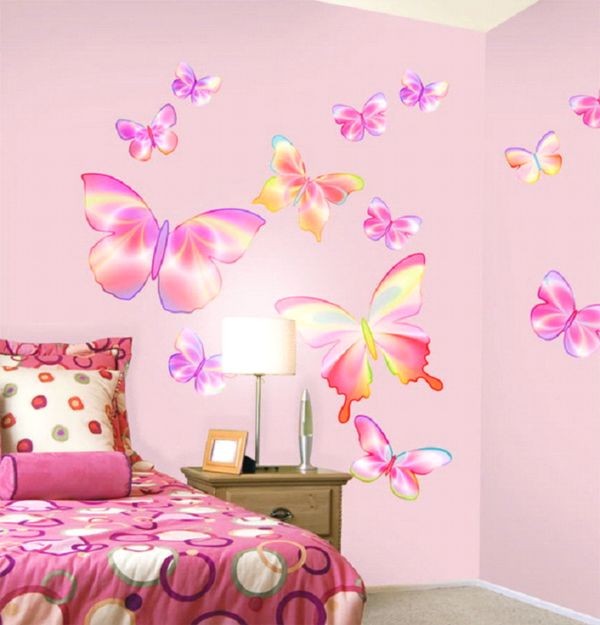
Fluttering beauties are widely used in the interior. They decorate ceilings, chandeliers, frames of paintings and mirrors, but most often decorate walls. It is no coincidence that they are preferred. Butterflies not only bring a special zest to the design of rooms, but, according to the canons of Feng Shui, are the messengers of mutual love and joy, symbols natural beauty and revival.
Their placement in the bedroom will bring new meaning to the relationship, awaken long-forgotten romance, and be able to rekindle the fire of love. At the same time, fluttering moths should not be attached singly, they should be arranged in pairs or whole compositions.
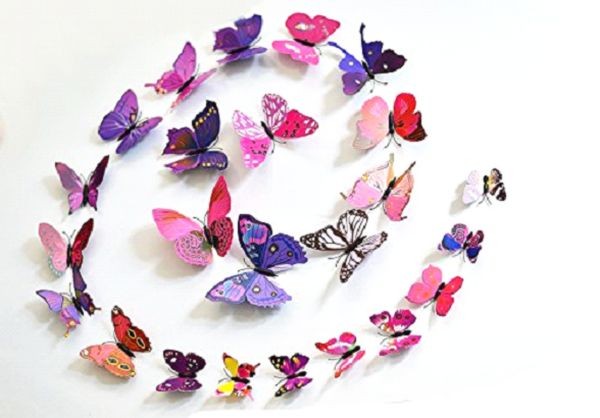
DIY wall butterflies are made from a variety of materials: colored paper, vinyl film, thin cardboard, fabric, and even metal. They can be of various sizes, shapes, colors. As for the type of accommodation, it all depends on your imagination.
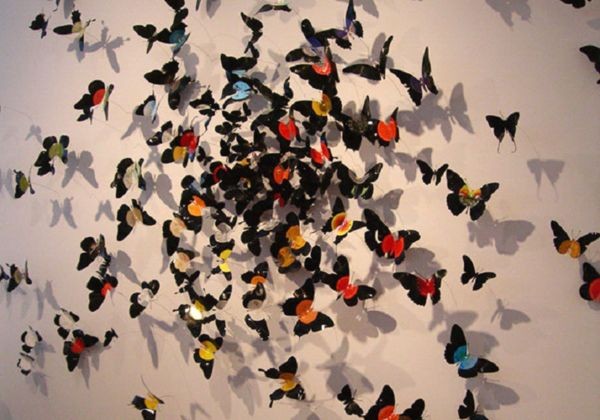
A chaotic round dance, a swift whirlwind, airy compositions, various moth figurines - the options are unlimited and are welcome in the interior in any interpretation.
Harmony with design
Butterflies will become an appropriate interior decoration in any style, whether it is technological high-tech, sophisticated classics or ascetic modern. But they will give a special charm to rooms decorated with a cute rustic comfort, in a country style. The main thing at the same time is to keep the color balance, otherwise the design will “crush” with tinsel and hint at a lack of taste.
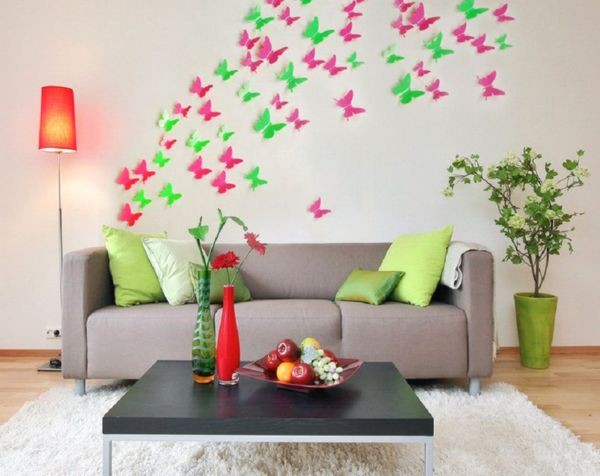
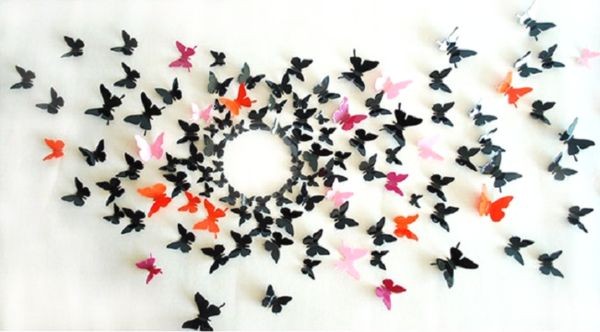
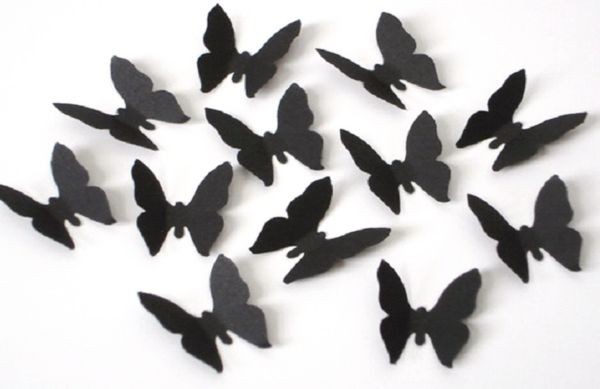
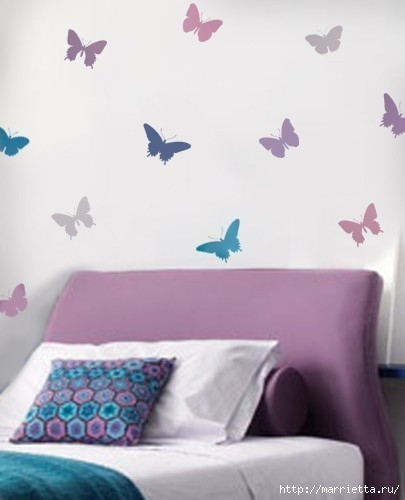
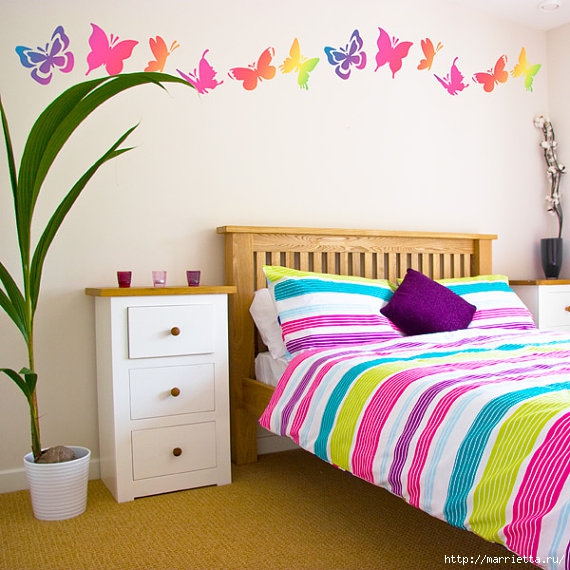
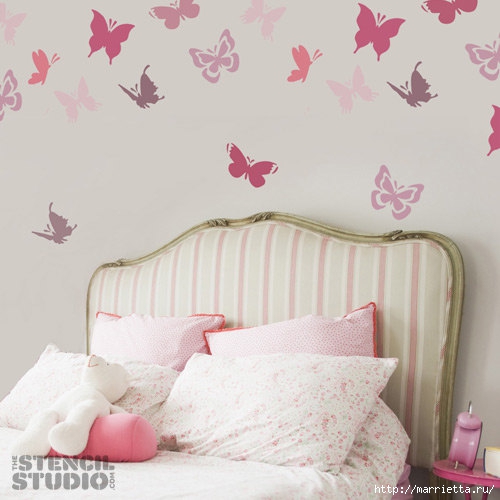
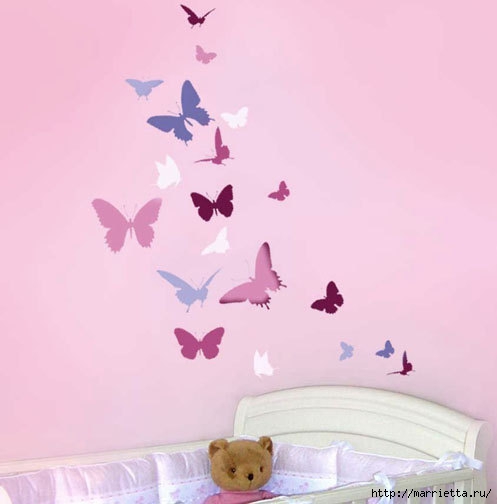
Bright, colorful moths are the perfect complement to a monochrome interior. For example, red or green butterflies on a beige background. Luxurious decoration of light walls (white, gray, pastel) will be black applications.
Moth compositions can be kept in one color or delight the eye with multi-colored magnificence. Often the beauty of the decoration is enhanced by neon lighting, which creates the illusion of a 3D decoration. Designers recommend decorating the bedroom and nursery with butterflies. Although, if desired, they can decorate the walls of the living room.
Preliminary actions
Before you make butterflies on the wall with your own hands, decide on appearance and composition material. Consider the color of the decoration, choosing it for the style of the interior. Moths should stand out against the background of the walls, and not get lost in them, merging into a single spot.
Having prepared the material you like, draw butterflies of the desired size on it. At the same time, do not get carried away art, drawing the most complex bends and ruffles on the wings - all this will create difficulties when cutting. Also take care of the method of attaching applications to the walls - glue, decorative pins, push pins.
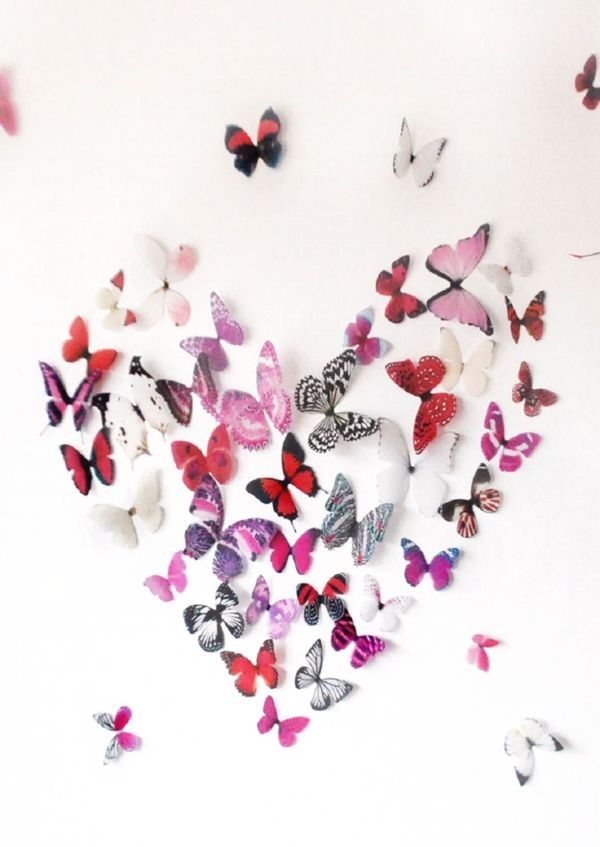
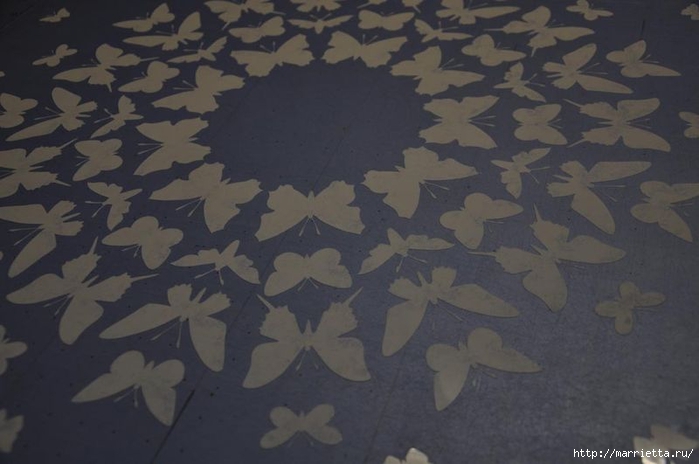
As mentioned above, the picture of the location of the moths on the wall may be different, but with the condition of combining the decor with the pattern on the wallpaper, decorative plaster and other interior elements. A whirlwind, scattering, flocks, clusters of butterflies in the form of a bouquet of flowers or a heart will fill the room with the freshness of spring and the desire for romance.
Having recreated in your head a clear vision of the decor, mark the main points / lines of the moths on the walls with a pencil or chalk. This will help you not to deviate from the intended pattern in the process of fixing jewelry.
Butterflies on the wall with their own hands. 7 ways to decorate:
From paper
This is the easiest way to plant fluttering beauties on the walls. The basis for the decor can be plain or colored paper. The drawing can be drawn by hand or created using graphics programs on a computer. A significant plus of this method is the low price of the material.
The paper is also easily and securely fastened, and the wings of the moths acquire dynamism, effectively fluttering from air currents. Annoyed decoration can be removed at any time without damaging the design and without regretting the money spent
The first thing to do is to make a stencil out of cardboard. By applying it to colored paper, you will outline the outlines of butterflies, and then cut them out. If you prefer bright, multi-colored moths, turn to the help of read glossy magazines with colorful drawings.
There is another option to make butterflies on the wall with your own hands - find photographs of moths on the Internet and print them on a printer. To make the decorations temptingly glow in the dark, you can cover them with luminescent paint.
Finished moths are attached to the wall with pins, glue or double-sided tape. Only the center of the layout is fixed, while the wings are left free in order to beautifully sway from air currents.
From cardboard
Butterflies made of thin cardboard will be much stronger and more reliable than paper ones. Although cutting them out will take much longer than the first option, cardboard moths will take and keep any shape you specify. The wings can not only be beautifully bent up, but also give them a rounded look.
To implement this idea, slightly wet the cardboard and bend it, pressing it down with a heavy object. After drying, it transforms into the model you need. Cardboard moths can be cut out of notebook covers, old geographical atlases, packages from under nylon tights. Since this material is heavier than paper, it is necessary to fix it on the walls in reliable ways.
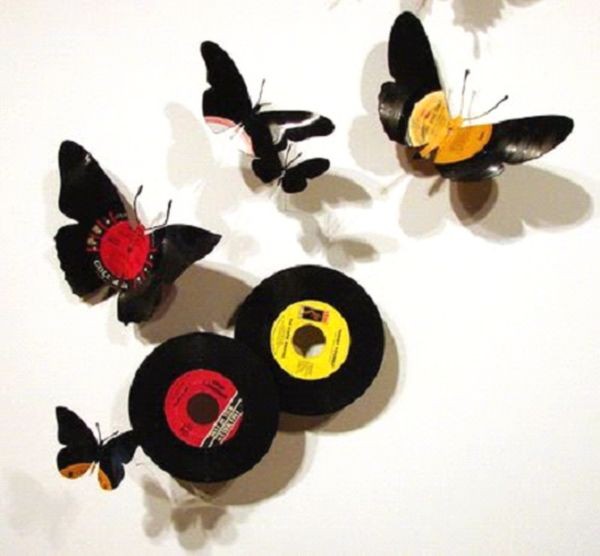
From vinyl records
One of the surest ways to make the decor original is to make butterflies on the wall with your own hands from old vinyl records. They will turn out to be more voluminous and durable, and most importantly - glossy, luxuriously sparkling and shimmering under any light source.
The process of creating moths is carried out in several stages:
Put the butterfly drawings on the plate. After that, the disk needs to be melted a little in a microwave or oven, since this material is quite hard and it is difficult to cut it.
Place the plate in the oven and after a minute take it out, waiting for a slight deformation of the material (the edges will begin to bend).
Cut the disc according to the drawings.
Armed with sandpaper, sand the edges of the model, removing errors and sharp protrusions.
Attach the moths to the walls with glue.
Fabric butterflies will be a wonderful decoration for walls with plain colors. liquid wallpaper, drapery or any other soft finish. They perfectly complement the concept of "warm" design and bring notes of sweet home comfort to it. In this case, the fabric is suitable for both monophonic and variegated. It is better to fix soft butterflies with PVA glue.
painted butterflies
Do-it-yourself painted butterflies on the wall look no less impressive and luxurious than the options described above. To create a drawing, stock up on the following tools:
stationery knife;
cardboard or plastic for stencil;
brush and sponge for painting pictures;
paint - acrylic or water-based, the contours of butterflies can be circled and fluorescent so that they mysteriously flicker in the dark.
Having prepared the necessary tools, think over the type of drawing on the wall and transfer your idea to cardboard or plastic. Using a clerical knife, make a stencil from the selected material. Mark on the wall the place and direction of the flight of butterflies.
Then dilute the paint and build yourself a drawing tool by attaching a small sponge cut from a sponge to the brush. After fixing the stencil with masking tape, transfer the pattern to the wall. You can remove it only after the paint has dried.
in the form of a picture
You can also place butterflies on the wall in the form of a bright picture. To create it you will need:
pages from a glossy magazine;
adhesive tape and scissors;
picture frame;
several stencils, varying in size.
Cut the pages of the magazine into squares equal to the size of the moths. Attach stencils to them and cut out butterflies. The number of them should be exactly such that they fill the center of the picture and are not located on top of each other.
Having prepared a sheet of paper, which will be the basis of the photo frame, place butterflies on it and decide on the type of composition. Then glue the moths to the sheet with double-sided tape. Make sure that they are not adjacent to the picture, but slightly rise above it.
To achieve the effect of volume, insert a piece of foam rubber between the adhesive tape. If your moths are multi-colored, observe smooth tint flows. Such a picture will look more harmonious.
Insert the designed sheet of paper into the photo frame. Butterfly painting is ready!
From tin cans
Another exclusive way to make butterflies on the wall with your own hands is to cut them out of tin cans and fix them in the chosen place with a thin wire. True, when creating jewelry, you will have to take the greatest care so as not to cut your hands. But the result is worth the candle - at the slightest breath of the breeze, the butterflies will “come to life” and sway, filling the room with a melodic ringing.
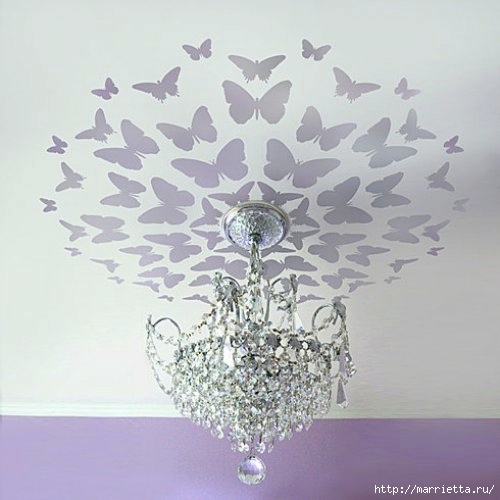
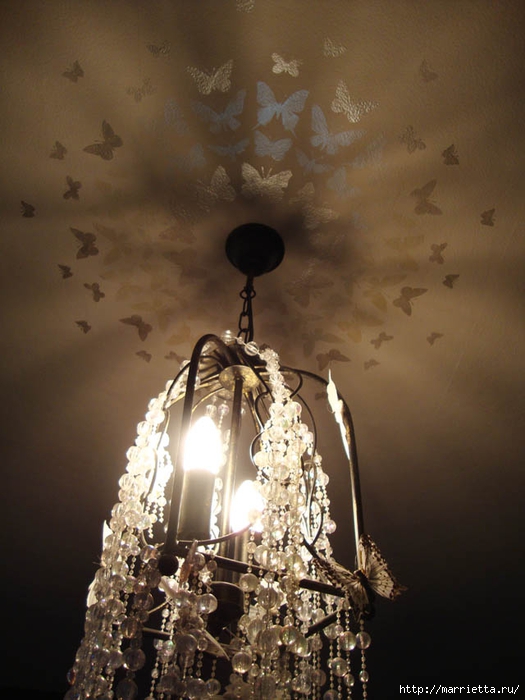
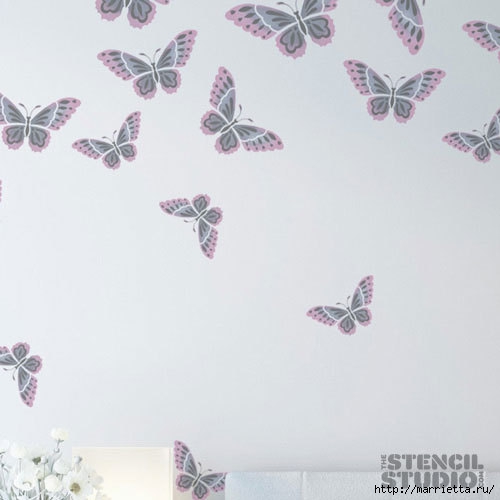
Using stencils on the walls or on the ceiling, you can draw fluttering butterflies. According to the Feng Shui philosophy, butterflies are considered a symbol of ease in relationships, a symbol of joy and sincere love. Chinese experts say that the presence of butterflies in the interior is simply necessary for a happy family life, especially for the important room- bedrooms. With the help of butterflies, you can activate romance in the house, refresh sexual relationships and fulfill your most secret desires)
In this version, the butterflies are placed in the bedroom, on the ceiling, around the chandelier. They are painted using acrylic paint stencils. By placing butterflies in the bedroom, you can, when alone, improve your personal life, revive the flame of passion in the presence of a prosperous relationship.
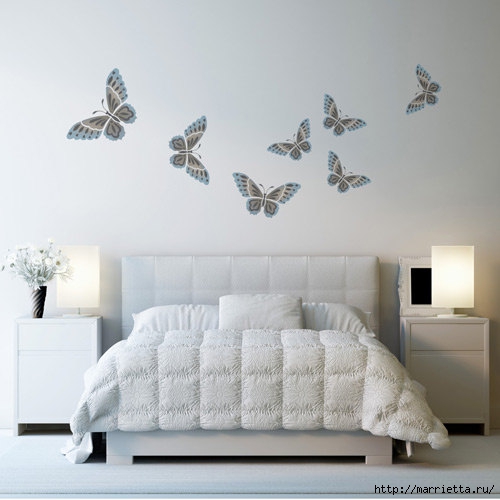
In the interior, on the walls or ceiling, butterflies are placed in pairs or small flocks. Everything should look as natural as possible, as if they themselves fluttered into the bedroom through the door or through the window, after which they began to circle around the bed and under the ceiling. When you open your eyes in the morning, joyful fluttering butterflies will meet your awakening, regardless of the weather outside the window. And at night, falling asleep in your comfortable bed, you will be overwhelmed with pleasant feelings and emotions.
There is an important caveat here about a mistake many people make. They believe that by attaching a butterfly to a curtain or tulle, you can give it airiness, thereby improving the effect. But remember, the tulle and the curtain are located near the window, and your butterflies can simply fly into it, taking your happiness and well-being with them. It is also inappropriate to place a panel with butterflies dried in the sectors of the South-West and East.
The butterfly symbolizes the resurrection, rebirth and immortality of the soul. She can transform, transform, transform from an ordinary caterpillar into a beautiful celestial creature, appearing in the world in a completely new guise. Stencils are used to apply drawings on the ceiling or walls of the house (not everyone knows how to draw), stencils can be purchased in online stores, but you should not buy something that you can easily do with your own hands. It is enough to have a printer at home, the butterfly is printed out and carefully cut out, attached to hay or the ceiling with adhesive tape and that's it), all that remains is to choose the color of acrylic paint, in accordance with the shades of your interior.

In online stores, it is better to buy something more serious, for example gadgets. Take a look at the page ex-power.ru, here you can browse the catalog with modern and interesting devices that perform completely different functions: from education and work, to recreation and entertainment. Here are the most interesting gadgets that are popular today.
![]()

![]()
Decorating the walls with your own hands is quite an interesting and exciting activity. At minimal cost you can turn the room into a real work of design art. For example, decorate the wall with fluttering butterflies, which can be made from a wide variety of improvised materials. Such a decoration is quite easy to perform, it is not at all difficult to do it yourself.
Beautiful flying butterflies, to decorate your walls, can be made from any suitable materials left after the repair.
How to make paper butterflies?
You will need:
- colored paper;
- butterfly pattern;
- sewing pin with a plastic head;
- universal glue;
- scissors;
- pliers.
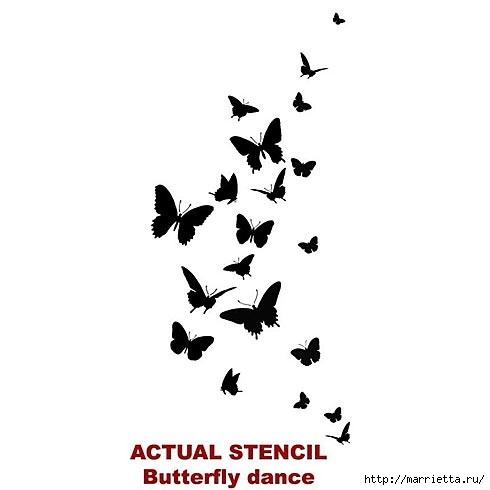
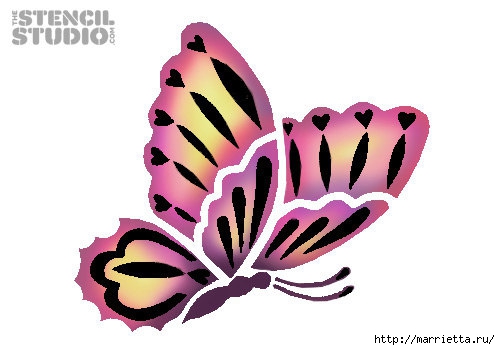
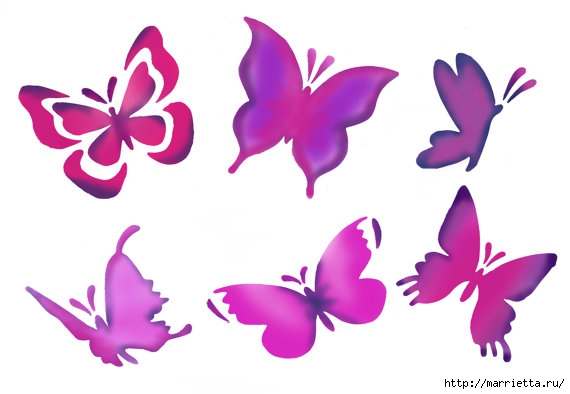
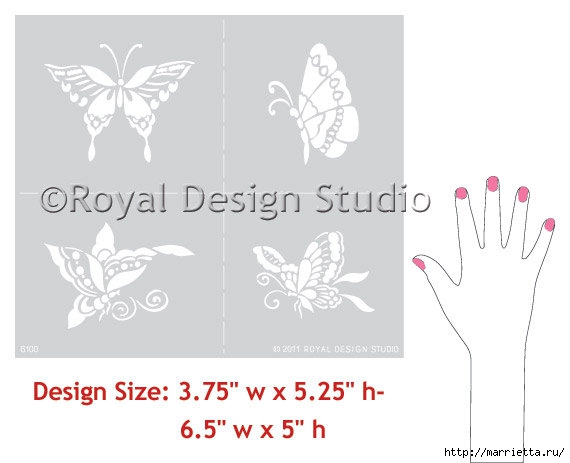
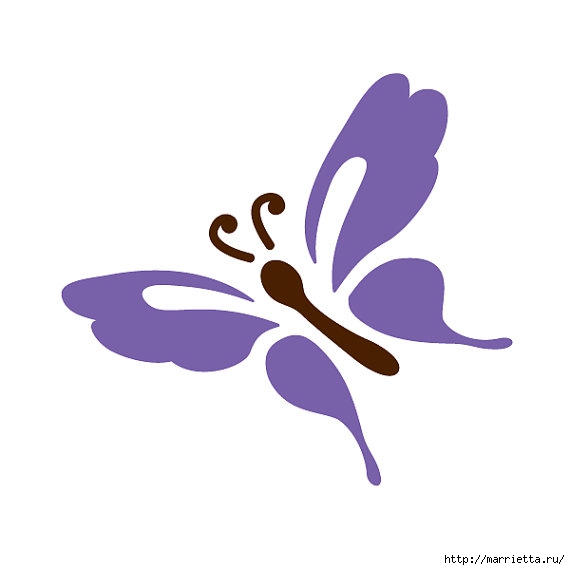
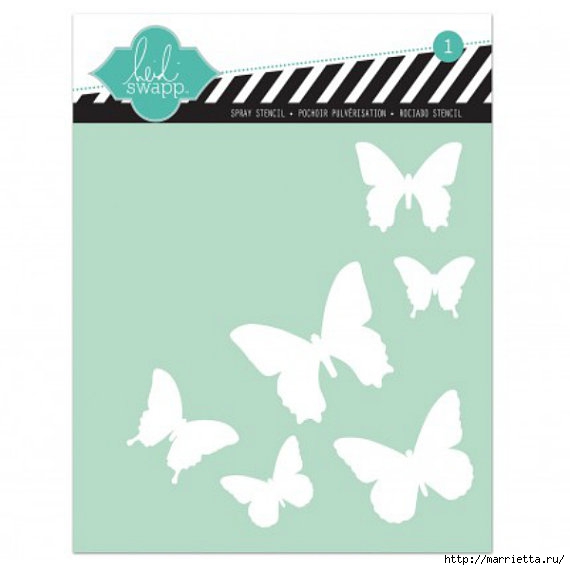
Wall decoration with butterflies must begin with a selection of suitable patterns, you can simply draw them by hand on paper or find the desired image on the Internet, then print it on a printer, after which the pattern is cut out with scissors. It is best to make butterflies of various sizes, then the composition will look more interesting. A few examples of patterns that are easy to redraw yourself can be seen in Fig. one.
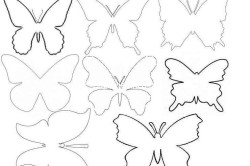
Figure 1. Template options for cutting butterflies with your own hands.
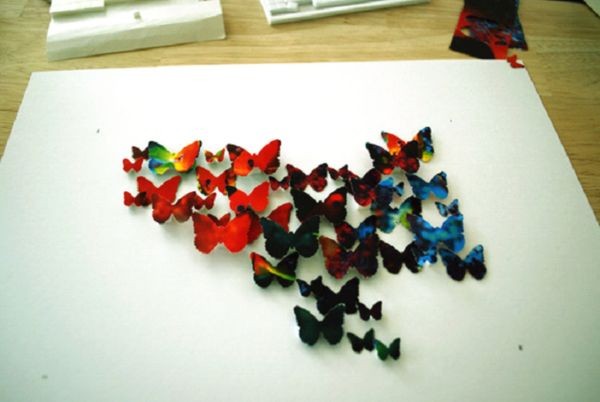
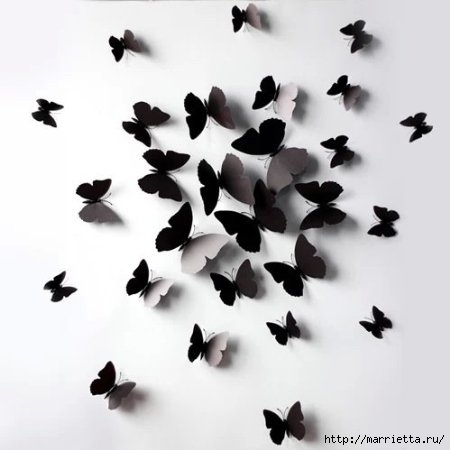
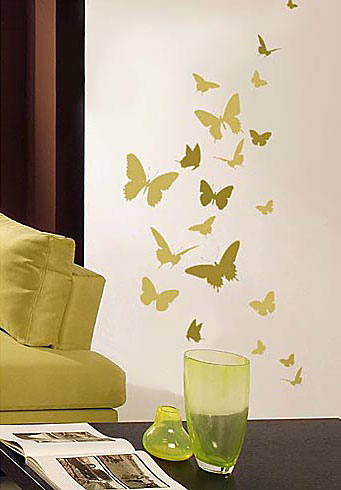
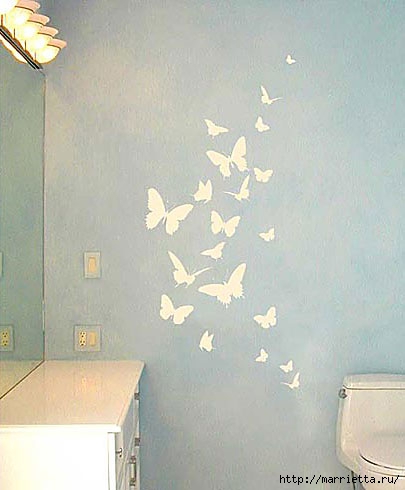
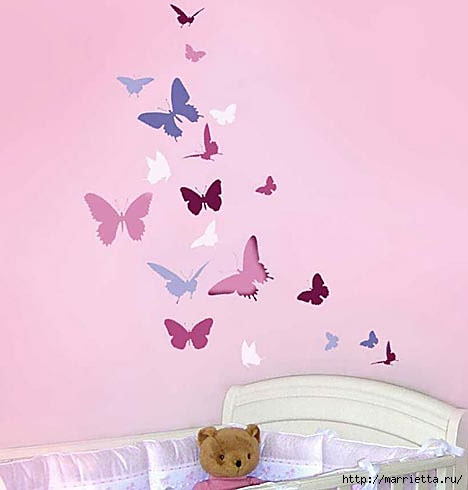
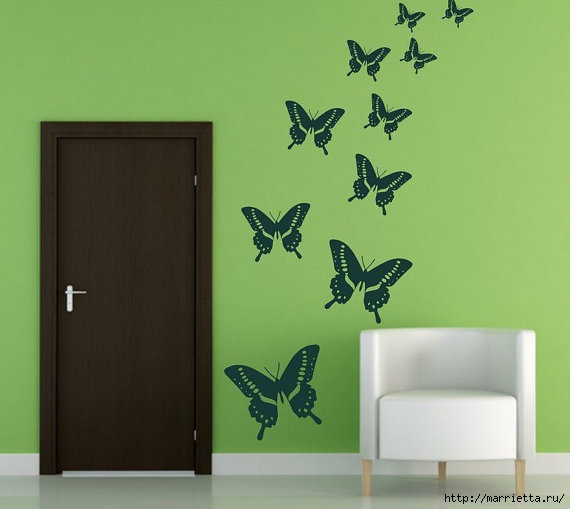
After all the patterns are done, transfer them to colored paper, then cut out, bend the wings at a slight angle, such butterflies will look more natural. If you do not have paper of a suitable color, then you can take ordinary office white sheets and color them. acrylic paints in any shade you like. Fluttering black butterflies look very elegant on a light wall, an example of such a composition can be seen in fig. 2.
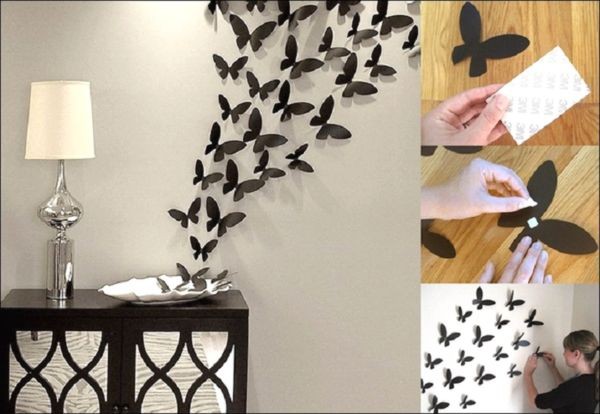
It remains only to make a mount with which it will be easy to decorate the wall without damaging it. The easiest way is to use foamed double-sided tape, it is cut into small squares or rectangles. Then the protective film is removed from one side, the butterfly is glued, this is done with all the prepared parts. After everything is ready, you can proceed to the design of the walls with butterflies.
There is another interesting mounting method that is perfect if you have wallpaper on the walls. To make a fastening device, you will need sewing pins with round plastic heads. Take the blank, turn it face down, then apply glue in the form of a large drop on the butterfly's abdomen, glue the pin head down. Leave the parts for about a day, they should dry well. Then bend each pin with pliers at an angle of 90º, so you get a mount with which you can simply fix the parts on the wallpaper.
Decorating walls with a stencil
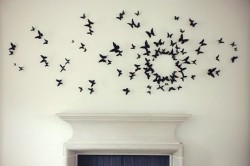
Figure 2. Black butterflies look most impressive on a white background.
You will need:
- stencil;
- acrylic paints;
- foam sponge;
- construction tape;
- putty;
- palette knife.
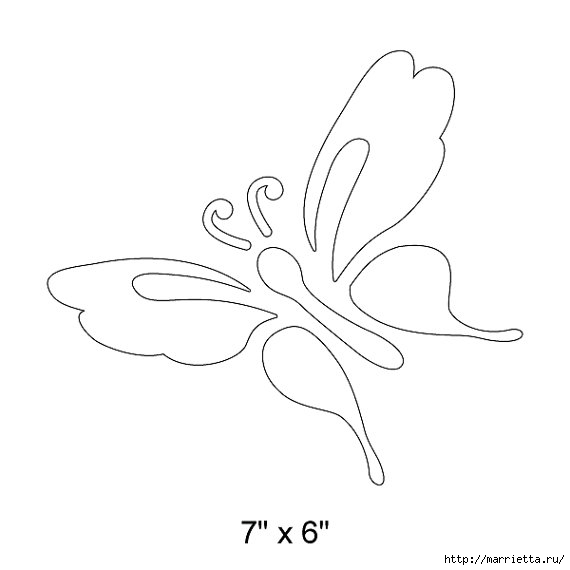
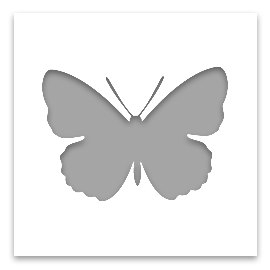
Wall decoration with butterflies is easy to do with a stencil. If you were unable to purchase a suitable template, then it is easy to do it yourself. To do this, you need to draw by hand or print an image of a butterfly on a printer. Then take a stationery folder from a dense film, cut it in half. After that, attach a transparent part to the drawing, circle with an indelible marker, cut along the contour with a sharp clerical knife. If you do not have such a folder at hand, then you can use another method. Stick transparent tape on the drawing on both sides, then cut the image along the contour with a knife. You can see an example of the simplest homemade stencil in fig. 3.
Figure 3. Stencil option for painting a butterfly on the wall.
After everything is ready, start decorating. The stencil is glued to the wall with construction tape, then the drawing will be clear and accidental errors will be avoided. Then they take a foam rubber sponge, pick up paint with it, remove the excess by patting on some unnecessary surface. After that, the drawing is applied to the wall, while it is necessary to ensure that the paint falls on the stencil as little as possible. For work, it is best to use a sponge with rounded edges, then the paint will lie more evenly. The drawing should dry very well, only after that it will be possible to remove the template. In order to prevent the paint from reaching for the stencil, a sharp knife or blade is passed along the contour.
You can decorate the wall not only with paint, but also using putty. Butterflies made in a similar design look especially impressive. After you have attached the stencil to the wall, take the putty, apply it with a palette knife, immediately remove the template, rinse it with water from the remnants of the material. After the putty dries, you can paint the image in absolutely any color you like.
Decorating with vinyl records
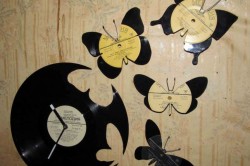
Figure 4. Old gramophone records can serve as material for cutting out butterflies.
You will need:
- sample;
- vinyl records;
- foil for baking;
- white chalk;
- sharp scissors;
- double sided tape.
If you have old vinyl records lying around, then you can make beautiful butterflies out of them. To do this, take a template, attach it to the plate, circle it with white chalk (easily replaced with a bar of soap). The plate may be light in the center, use a black marker in this place. Now you need to soften the material, for this, take the foil for baking, spread it on a baking sheet, put the plate on top. Preheat the oven and send the record there for a few minutes, it should become soft.
Remove the softened vinyl, immediately start cutting out the image with sharp scissors. It is possible that you will have to work hard and warm up the material several times in a row. Don't forget to shape the wings nicely while the vinyl is still warm.
The record cools very quickly, so keep the oven on and reheat the vinyl if necessary.
Take double-sided foam tape, cut into rectangles equal in length to the butterfly's abdomen. Decide on the location of the scenery, stick pieces of adhesive tape on the wall, and then plant butterflies on it. On fig. 4 you can see an example of vinyl record decor.
Mosaic wall decoration
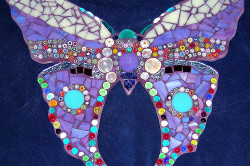
Figure 5. An example of a decorative butterfly made in mosaic.
You will need:
- mosaic;
- universal glue;
- stationery tape;
- grout for seams;
- rubber spatula;
- sketch.
To make butterflies, you can take a store-bought mosaic or use various materials at hand, for example, seashells, beads, leftovers ceramic tiles, broken dishes. In order to make a mosaic of tiles, wrap it in a dense fabric folded several times, then break it into small pieces with a hammer. Pack the mosaic by color, then it will be much easier to work, for this purpose you can use carton boxes, cans, cut plastic bottles.
Draw an image of a butterfly on paper, then lay out the puzzle pieces on it. After you lay out the whole pattern, take stationery tape, cut it into strips, fix the pattern. Then turn the mosaic over with tape down, apply glue (pay attention to the instructions, it may take some time to cure). Stick the mosaic on the wall, leave it to dry completely, then remove the adhesive tape. Dilute the grout for the seams, this will help you detailed instructions on the package. Using a rubber spatula, spread it along the seams, after complete drying, wipe off the remnants of the grout with a damp cloth. For edging such a butterfly, you can use special self-adhesive profiles designed for stained glass windows, which are easy to purchase in needlework departments. An example of such a mosaic is shown in Fig. 5.
Decorating a wall with butterflies using various techniques is quite simple, for this you only need desire and a minimum of material costs. A hand-made design will make your home more comfortable and unique, bring a touch of freshness to an ordinary and familiar interior. Do not be afraid to show imagination, create, and everything will work out for you!