As soon as people began to live in caves and huts, they immediately woke up a craving for beauty. They wanted to decorate their homes with what seemed to them the most attractive. This was done in order to scare away other tribes, as well as to show their status and importance. For the same purposes, they decorated themselves. Later, with the advent of the polytheistic religion, decorations began to be made in order to appease the gods: in time to cause rain, drive away evil spirits, get a harvest, and so on. Much later, decorating a house became a real art that required skill and perseverance. In summer people worked in the fields, and in winter short days could afford to indulge in such a hobby as carving. Various ornaments served as amulets, figurines of animals and birds were carved, plant elements were used. We will tell and show everything about house carving and its interesting facts!
Later, a separate branch of woodcarving was formed to decorate the facades and platbands of the house, which was called house carving.
It is better to collect material for woodcarving in winter - the tree is drier at this time of the year, the juice does not circulate in it. The blanks are dried for several years, but in construction and specialized stores you can buy ready-made timber.
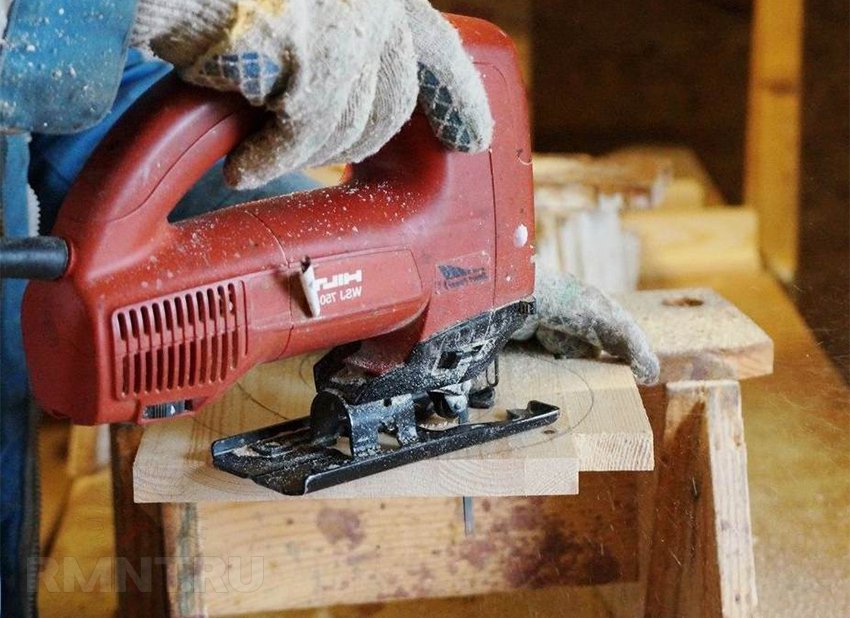
For internal works softwoods such as linden and alder are well suited, and hardwoods, conifers, are well suited for outdoor decoration. They are more difficult to cut, but they last much longer. In addition, with modern tools, hardness is not a big problem: a router or an electric jigsaw is often used for house carving. To get beautiful products, you do not need to have the ability to draw. It is enough just to hold the tool firmly in your hand and cut clearly according to the stencil.
It should be noted that for the exterior decoration of the house, the technique of slotted carving is most often used.
Before you start carving for your home: tools, tips, preparation
First you need to purchase a tool. It can be a manual or electric jigsaw with a set of files or a router. You will also need a drill, sandpaper, and also varnish or paint suitable for outdoor work; brushes for them.
It is necessary to measure all parts of the house that are to be decorated. According to the dimensions, pick up bars with a thickness of 1.5-2.5 cm. It is important to ensure that they are made of hard wood, do not have cracks, knots and chips.
Safety when working with wood and power tools
Work should be done outdoors or in well-ventilated areas, it is best to wear safety glasses and a respirator: chips and sawdust can get into the eyes and lungs, which should be avoided. For the convenience of work, good uniform lighting is also very important in order to see all the details and patterns that are to be cut.
Where to find sketches for house woodcarving for exterior
There are a huge number of books in the public domain and in stores where you can find a huge number of sketches and ideas for house carving with photos and examples of the work of craftsmen. Not less interesting solutions can be found on the Internet. After the template is selected, it is necessary to fit it to the desired dimensions. You can use graphic editors or do it yourself.

Where to start do-it-yourself wood carving
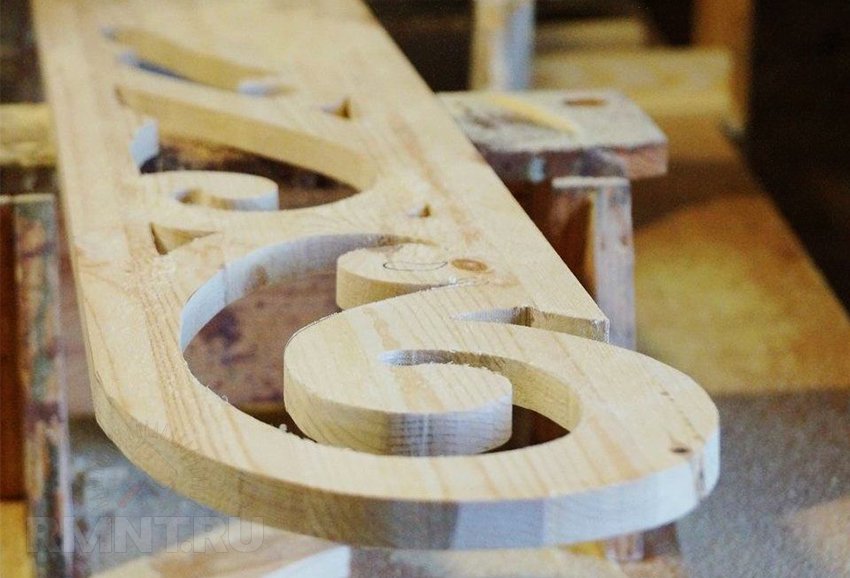
A template is cut out of thick cardboard, previously drawn or printed from the Internet. This is, as a rule, a small fragment of a pattern that is repeated many times on a casing or other element of a house. It must be traced with a pencil on a prepared and pre-sanded bar, after which the stencil must be moved and circled as many times as the size of the future decor element requires.
After the “pattern” is transferred to the tree, you first need to cut out the shape of the product, that is, the external contours, then drill holes in future cutouts with a drill and expand them to the desired size and shape with your main tool.

What determines the result and appearance of the product in the technique of house carving?
The work is simple, but painstaking, requires patience and accuracy, because the smoother the pattern, the better the result looks. It is important to remember about symmetry: for example, the right and left window trims must be cut in a mirror, all patterns must be at the same height and the same width. In this case, the house will turn out really beautiful, it will be pleasant to look at it and it is impossible to look away.
How to correctly install overlays in their places
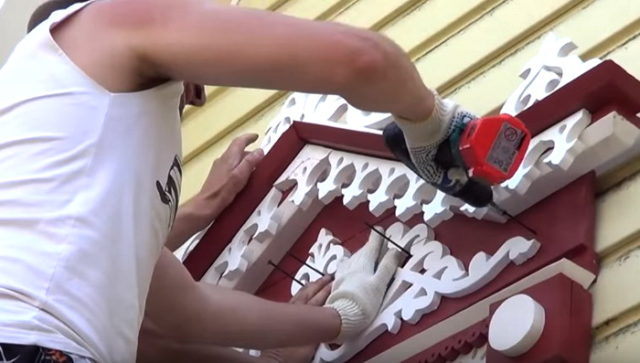
Parts must be coated with paint or varnish before they are installed.
There are several types of fasteners for overhead elements. Usually blind dowels are used for this, accurately measuring the distances on the wall and the attached part. In this case, the fastener will not be visible from the side, it is reliable and convenient. There is another option, easier and more convenient: to nail the part with nails. There is a drawback to this method: the heads of the nails will be visible, and they may rust over time. To prevent this, the hats are already in place covered with the same paint as the decor element itself.
A selection of videos on the topic “House woodcarving”
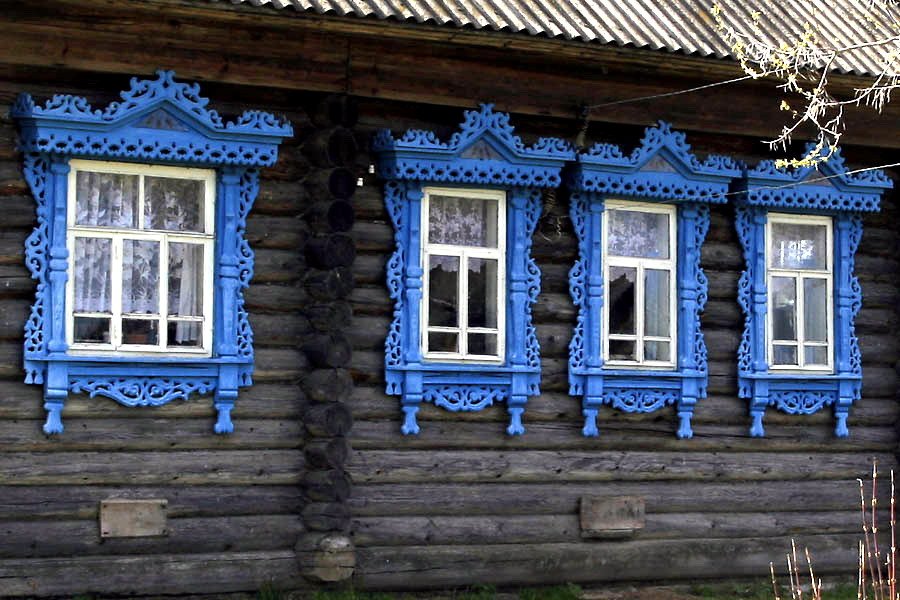
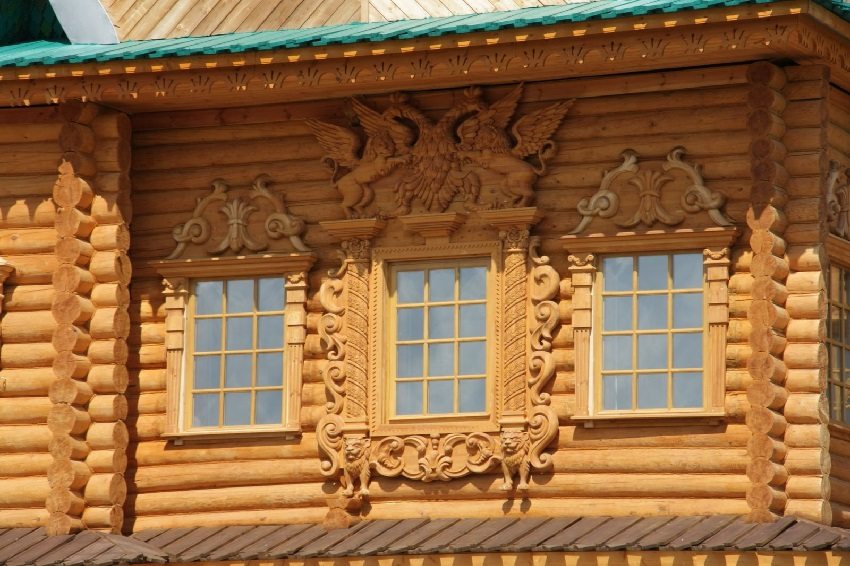
Platbands on the windows, despite their simplicity, have great importance in decorative design facade of the house. They not only create a neat look and add an element of personality to the building, but also perform the more prosaic task of eliminating the gap between the wall and the window frame. In addition, platbands must withstand the influence of weather factors without losing their qualities.
Window frame function and a bit of history
The platband was first mentioned as an element of the house as early as the 15th century. Now the architraves have somewhat lost their relevance, but their function is still the same, regardless of the material of the building and its decoration. Due to the design features of the windows of high-rise buildings and in cases where glazing is used, their presence is inappropriate.
Platbands appeared many years ago
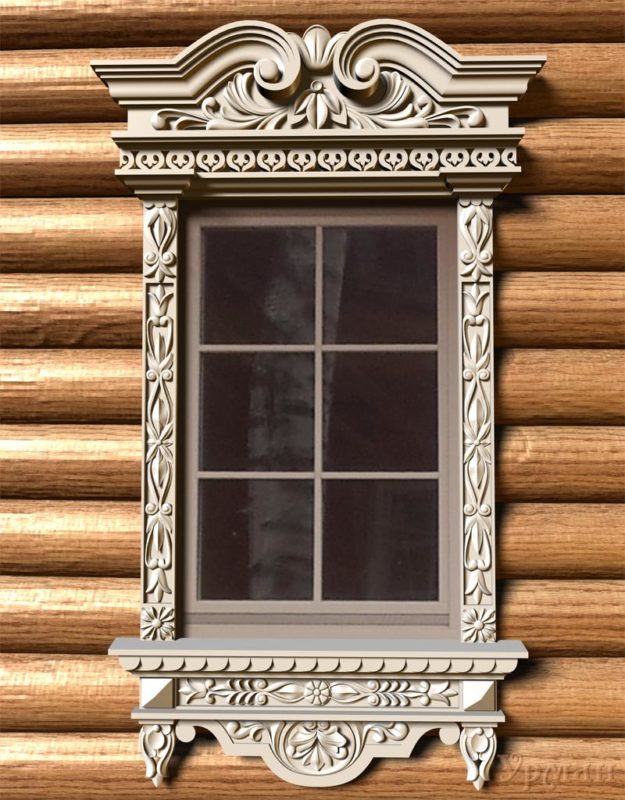
Simplified, the platband is a wooden frame with a width of 30-40 mm, which frames the window.
The aesthetic function of this detail is important, but the main task is to bridge the gap formed by the window frame and the wall, which increases thermal insulation and prevents the penetration of dust and moisture from the outside atmosphere, as well as reduces the noise level. In some cases, in the presence of shutters, it performs the function of a frame.
Types and types of platbands for windows
Their form may be:
- curly;
- flat;
- rounded;
- convex.
Flat platbands are characterized by ease of production and low cost. Convex platbands are made using special machines and, in connection with this, the price of products increases significantly. Carved platbands are of great aesthetic value and significant cost.
According to the method of installation, platbands are classified:
- telescopic. They have special protrusions that go into the corresponding cavities of the box;
- overhead.
An important factor in choosing the profile of this window element is the slope that is performed at the top of the casing. Its purpose is to remove sediment.
Modern materials and requirements for the elements of houses have determined the trends in the requests of homeowners. Popularity leaders are carved architraves made of plastic.
Requirements for the material of platbands
In addition to high aesthetic qualities, the casing must meet practical requirements. Its important qualities are the ability to withstand temperature fluctuations and high humidity. In addition, the material must withstand wind loads.
It is important that the material has sufficient strength and is not subject to chipping and cracking. The use of MDF or plywood is out of the question. The properties of these materials are such that they are able to absorb moisture, are prone to cracking, and the paint on them peels off over time. All this is a sign of the fragility of products made from these materials.
In this regard, MDF as a material for platbands can only be used inside the dwelling. The manufacturability of the material determines the simplicity and relatively low cost. In addition, it does not take much time to get ready-made platbands. Such platbands on the facade will require constant care and additional processing.
Our ancestors have been making platbands from wood for many centuries. Oak and beech are the most common types of wood used for this. Pine and birch have found less use for the production of architraves. Wood tends to absorb moisture, so to increase the life of the product and its appearance protective coatings are required. In addition, over time, the tree tends to darken, so the restoration of the original shade of the material is required.
When using gypsum as a decorative facade element, the problem of interaction of the material with moisture is also encountered. When the water that has penetrated into the gypsum freezes and thaws in the process of temperature fluctuations, such architectural details are destroyed.
 Materials are subject to certain requirements.
 The use of glass fiber reinforced concrete and polymer concrete makes it possible to avoid the negative effects of temperature and moisture. Their use is limited by a significant mass of products. In some cases, when installing such platbands, the increased loads on the wall are taken into account and make it more powerful.
Polyurethane compares favorably with other trim materials. This is due to the fact that its use does not allow the problems described above, and also its characteristics make it possible to create additional thermal insulation. In addition, its mass is comparable to the weight of wood, which facilitates the installation of these facade parts.
How to make stencils for platbands on windows?
Choice of wood
Wood for the production of platbands can be used in various ways. It can be certain types of it, a combination of rocks by gluing or otherwise connecting.
Simple and shaped stencils for window frames are best made from pine.
The production of carved architraves requires that the material be soft. Linden has this quality. Material requirements are due to the manual processing of wood.
 The choice of wood must be made carefully
 Climatic conditions associated with high humidity or significant dryness, as well as significant temperature fluctuations during the day, determine the use of wood with a dense and solid structure. These include oak and birch. Their manual processing is difficult, so the use of milling machines is necessary. Such products have a long service life.
Required Tools
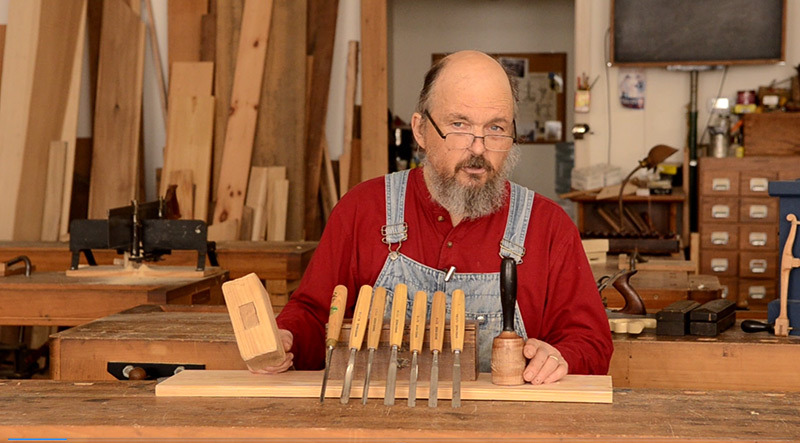
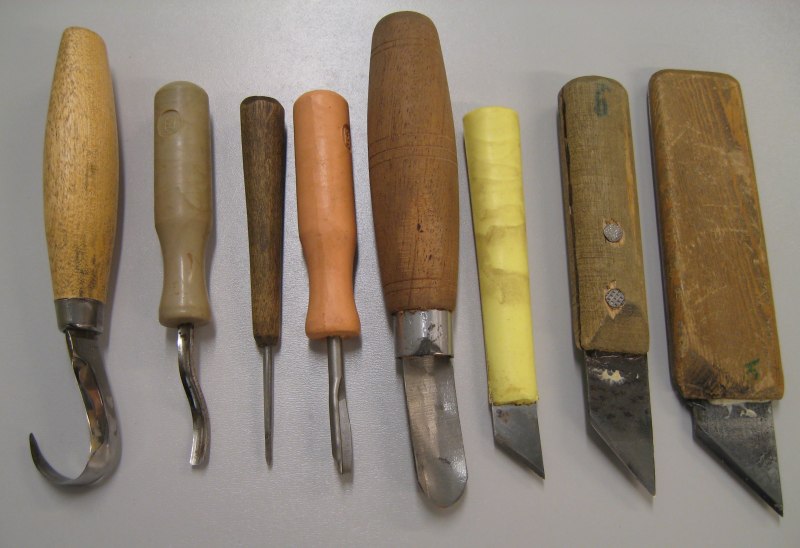
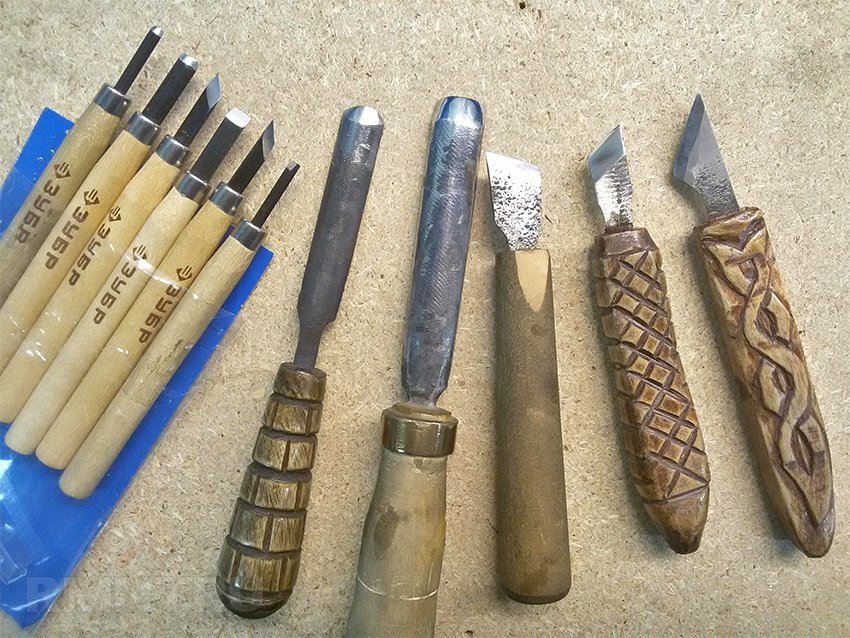
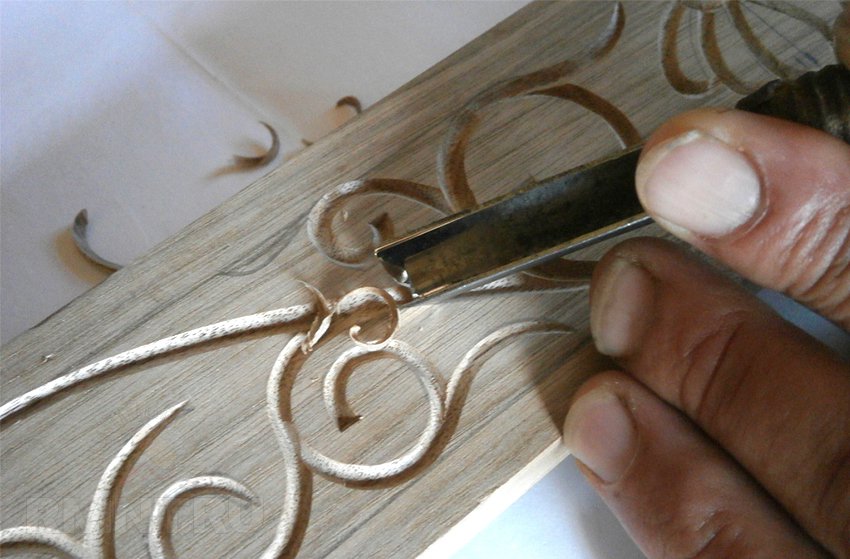
Before solving the problem of how to make carved platbands, it is necessary to decide on the tool used for these works. The main tools for this are knives and chisels, various in shape and size.
 Tools for the job
 For independent production of platbands, devices for manual milling, an electric jigsaw, and a drill are used. A jigsaw is almost indispensable when performing such work, since with its help you can create almost any pattern. In some cases, a home-made device can be used, which includes a step-down transformer and nichrome wire.
In addition, it may be necessary to make a tool for filing corners. To make such a device, it is necessary to fix two hacksaw blades with a fine tooth between three wooden rails. When working with this device, spikes are sawn with one canvas, and the eyelets of the product are filed with the other.
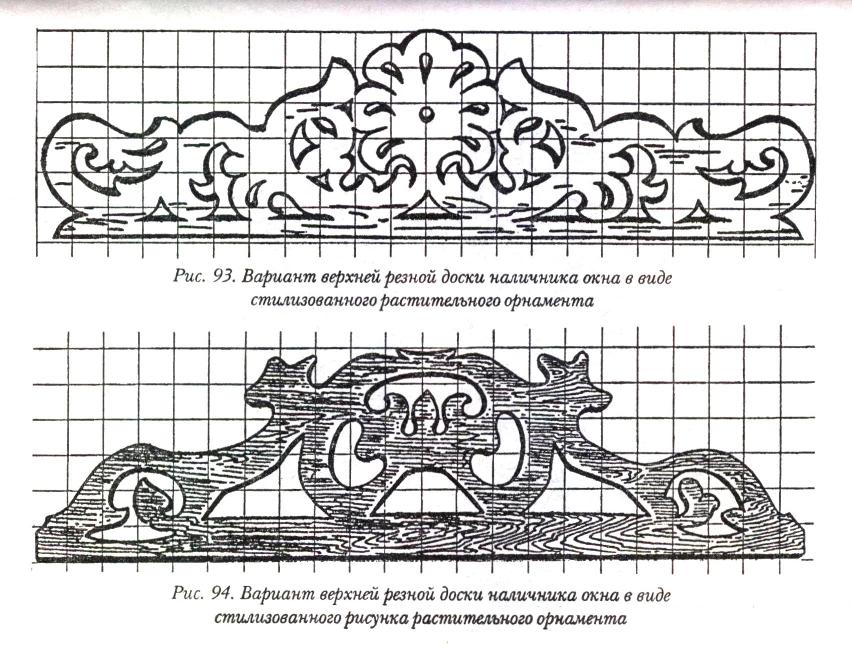
How to choose patterns for platband?
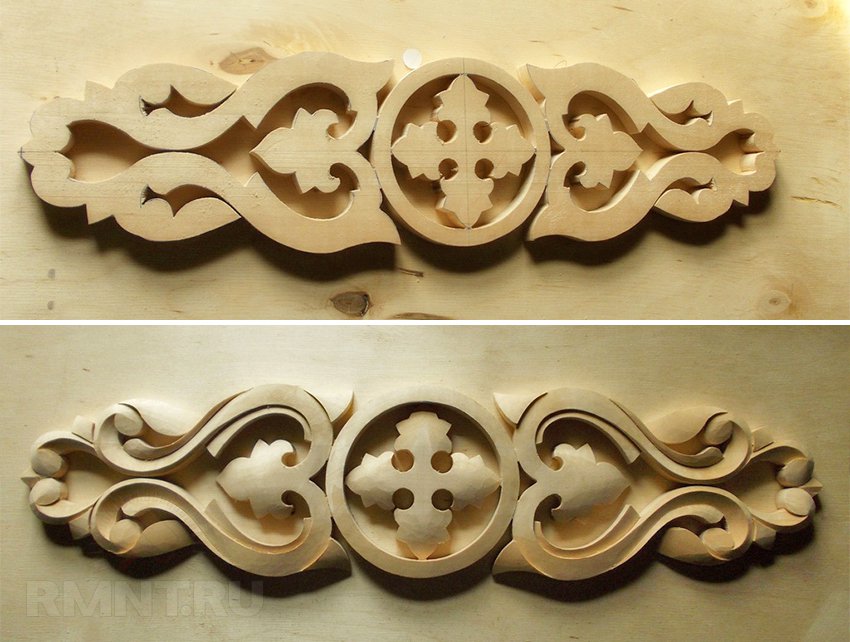
Using the slotted carving technique suggests that aspen, alder, linden or softwood are best suited. The thickness of the board should be in the range from 5 to 50 mm. It is necessary that the chosen design of the pattern for the casing should be well distinguished at a distance, and act as a single whole of the architectural ensemble. Therefore, it is not desirable to create an image with a large number of small elements.
 Trim options
 For a long time at the top of the casing there is a kokoshnik with the image of the Sun. If desired, the top of the casing can be built up using spikes as a connection. Towels - this is the name given to the bottom of the casing. The design must necessarily include the presence of a water-cutting bevel. The bottom plank should be 10mm thicker than the plank at the top of the plank. It is important to observe the unity of the style of both parts.
To avoid the occurrence of cracks in the thread, the parts should be placed along the grain of the wood. As a rule, the endings and openwork bends, which have a small thickness, have significant fragility.
 Structural diagrams
 The simplest cut can be obtained by drilling a round hole with a drill. That is why it is desirable to make a choice on a pattern with a predominance of round holes. In most cases, the ornament is made up of repeating elements, each of which is made up of holes and cutouts that have a more complex configuration.
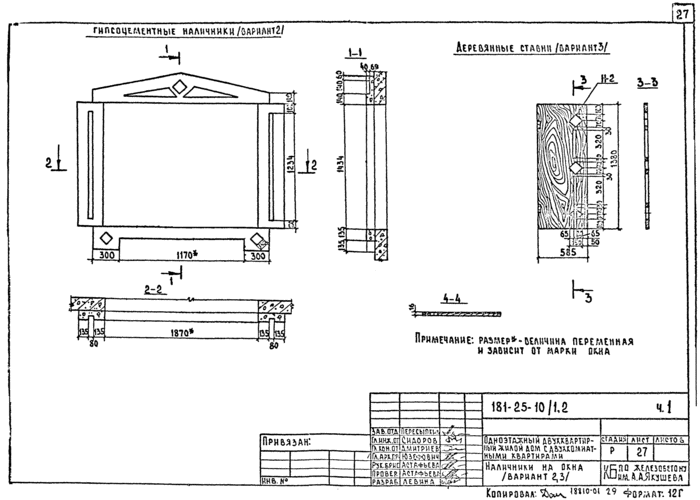
Drawings of platbands on windows contain the following elements:
- bottom bar or profiled belt;
- vertical slats or frame;
- top bar.
 Part Names
 To get a stencil, you need to stretch the pattern along the length. For this purpose, a life-size image is applied to paper. Places suggesting the presence of slots should be highlighted in color. Then, the resulting pattern is glued to the workpiece. Using a drill, drill holes of the appropriate diameter. If it is necessary to work with a jigsaw, small holes are made where necessary.
Production of platbands for windows
 platband
 The opening direction of the window must be taken into account. In the case when it opens outward, the casing should be installed at a distance of 30 mm from the window sashes. In addition, platbands should not become an obstacle to opening the window frame. Other parameters depend on the geometric dimensions of the windows.
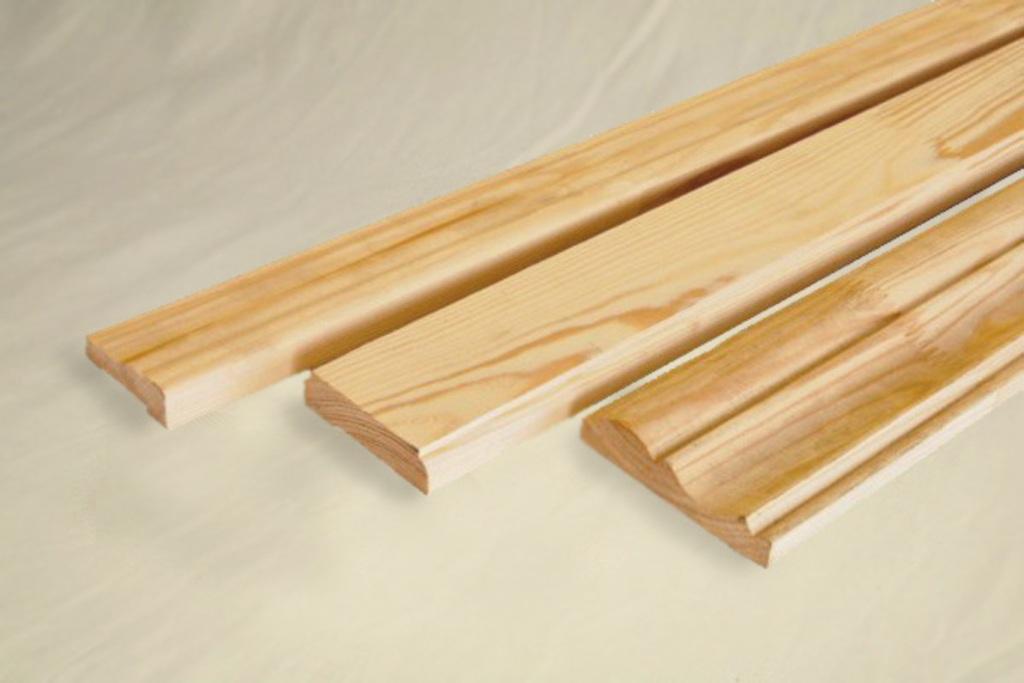
At the initial stage of the production of platbands, it is necessary to plan a dry board, the dimensions of which are within: thickness up to 30 mm and width 75-150 mm. In this case, the width of the platbands should exceed the corresponding size of the window frame by 25-50 mm. For a better fit of the platbands to the wall surface, a groove is selected or a gap of no more than 2 mm is made so that it is at a distance of 10-15 mm from the edge.
When working with a power tool, you should not make excessive efforts, as if helping him. This may lead to its failure. If there are difficulties with cutting wood, you should pay attention to sharpening the blade. Long cuts are recommended to be made with a wide blade.
How to mount carved platbands
The fastening of the details of the platbands is carried out by means of deaf or through spikes. Moreover, it is believed that the use of the first of them is preferable, since there is no need to decorate the places where the connection takes place.
The grooves for the spikes are made by drilling several holes, the depth of which is slightly greater than the spike. The removal of partitions between the holes is done with a drill designed for metal. The entry of the spike should be tight, however, without the use of force.
The spikes are fixed with pins made of solid wood. The use of glue is not recommended. This is due to the fact that adhesives are not able to work for a long time under the influence of an aggressive atmosphere.
Platband installation: features
Installation of platbands is carried out without the use of glue using nails. They are driven in in increments of 400-500 mm so that the hat is recessed into the wood. Most often, platbands are attached tightly to the box. In some cases, an indent of 5-20 mm is made to the side, which depends on the direction of opening of the valves.
 Architraves drawing
 The window sill at the window opening and the platband are installed closely. This design allows you to install bedside tables that protect the lower part of the platbands.
Upon completion of the installation work, it is imperative to carry out a protective treatment of the platbands. You should also apply paint or varnish, which needs to be updated from time to time.
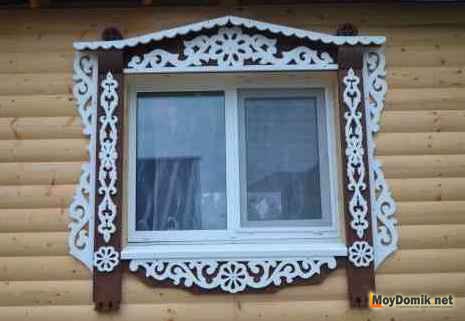
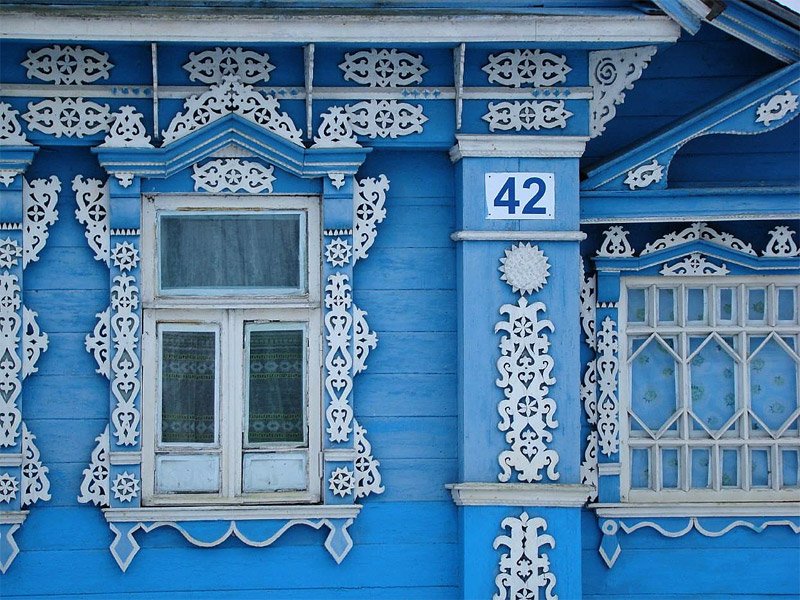
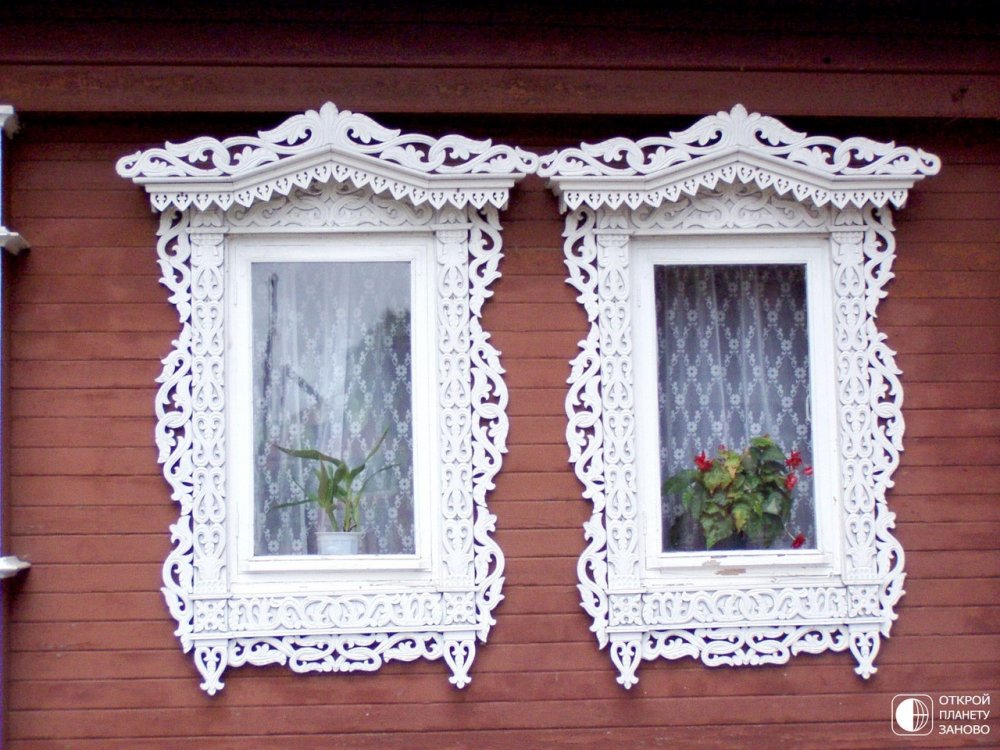
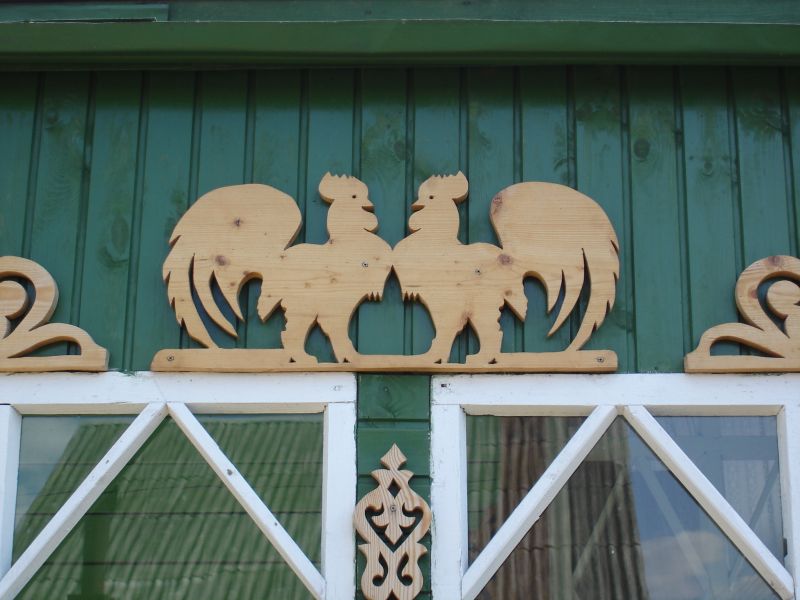
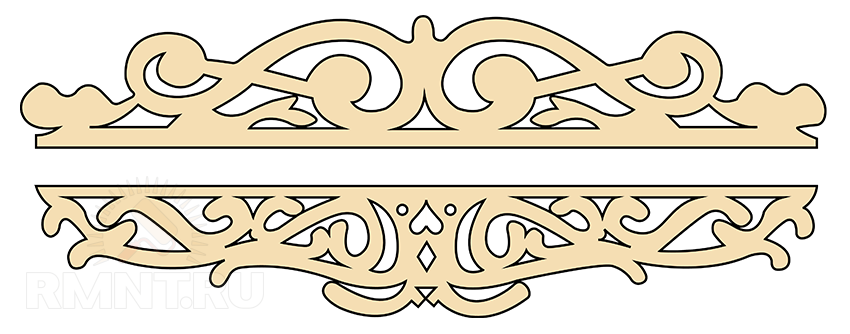
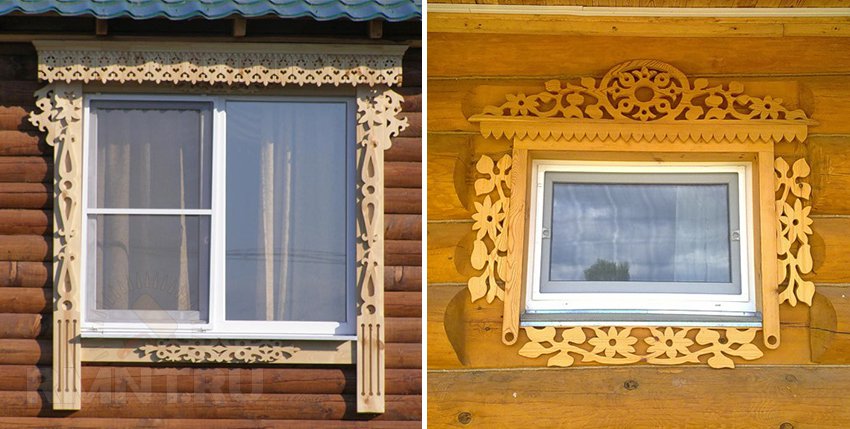
Photo of platbands of an interesting design
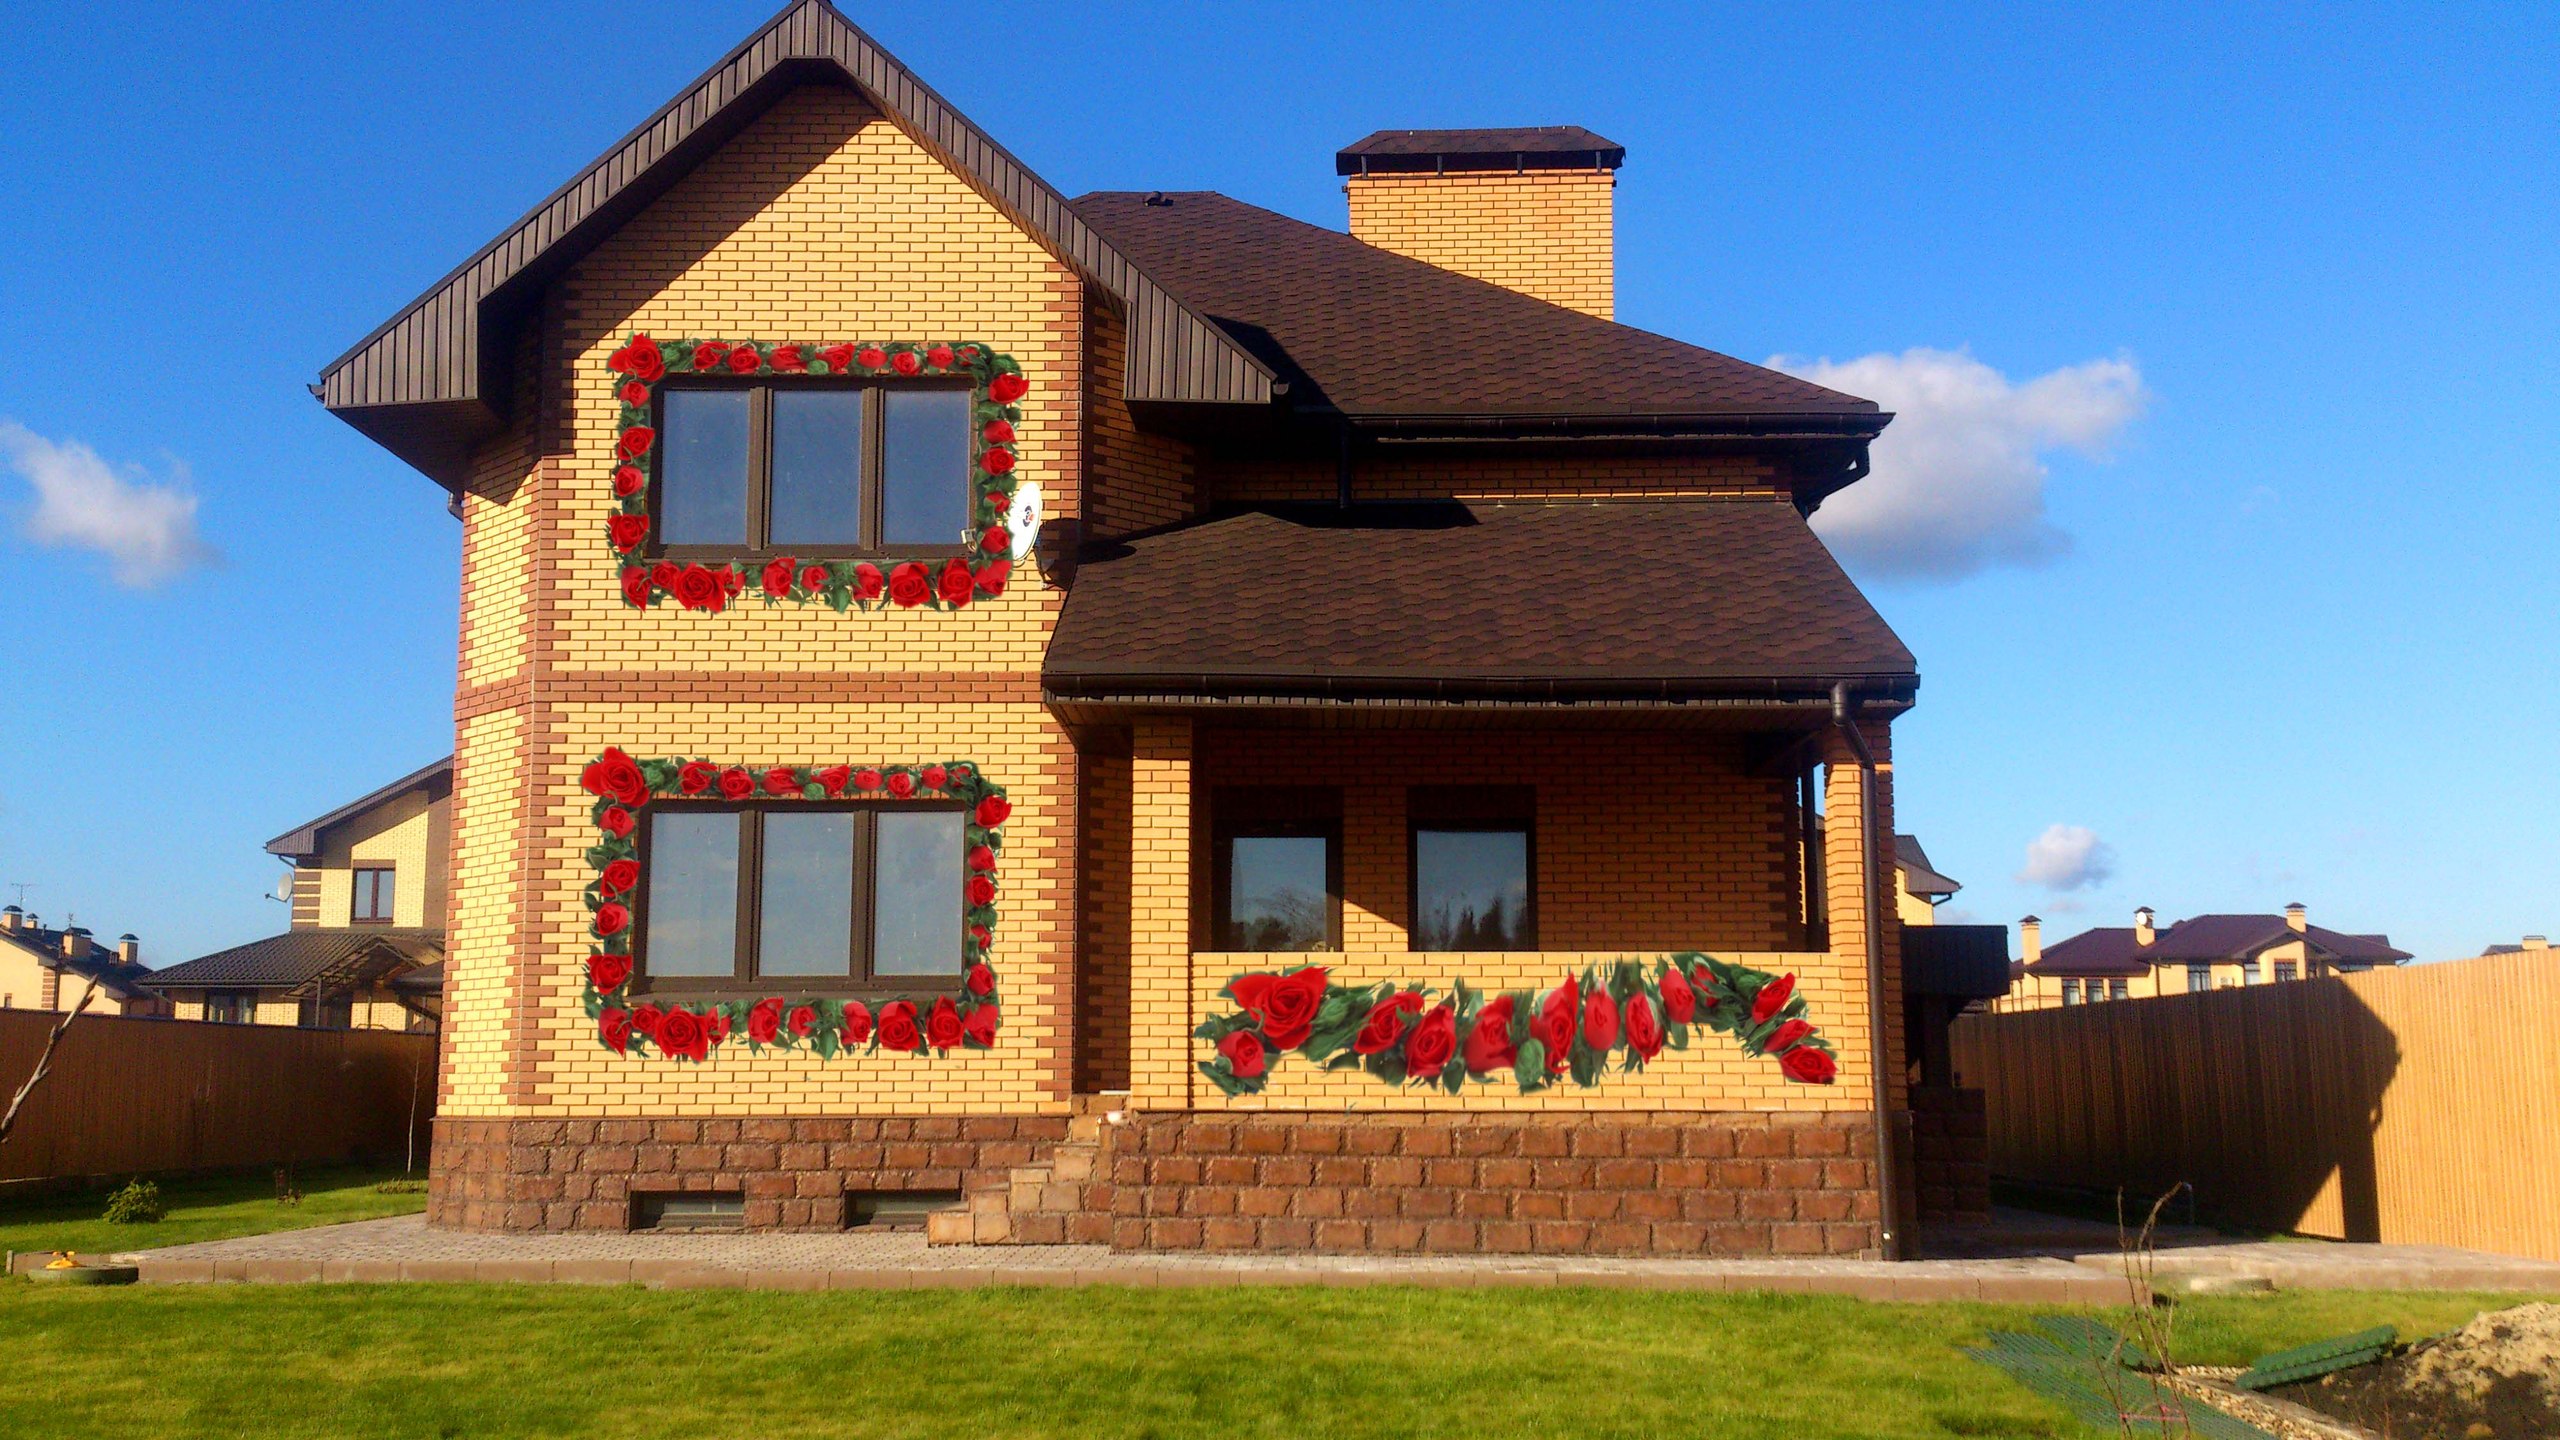 Beautiful rose trims
  platbands
 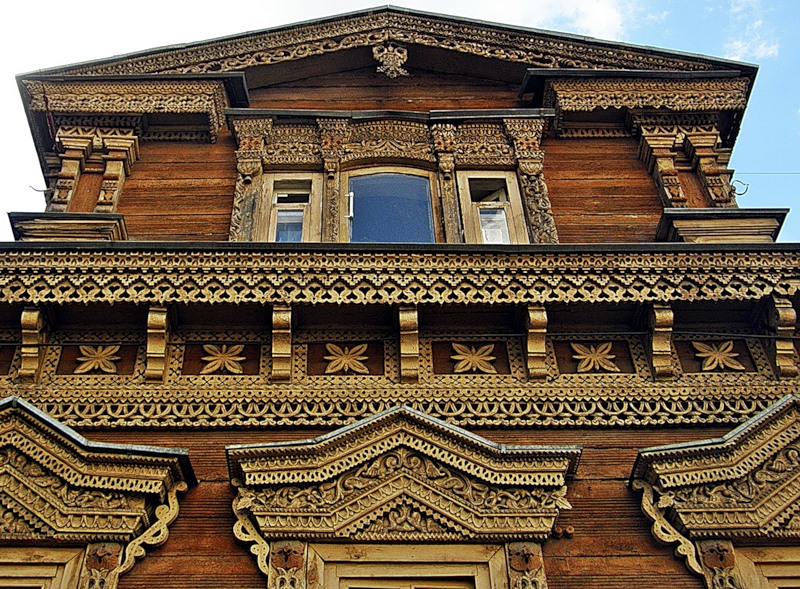 Platbands are an important part of the architecture of the house
 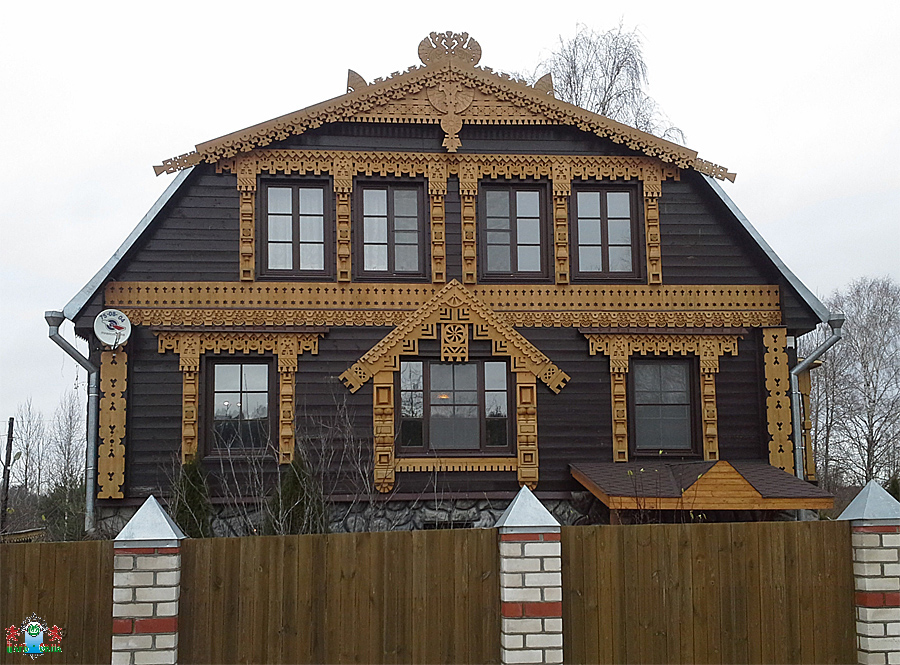 Beautiful platbands
 Do-it-yourself window trims are a wonderful decoration for the facade of the house (ready-made stencils and templates will be given in the article below). They make the house look like no other, visually change its proportions.
Today, having certain skills, you can independently create elegant platbands for windows in a wooden structure. Moreover, they can be made not only from wood, but also from other materials.
Specificity
When the owner decides to mount the platbands, he seeks to arrange traditional decor in his possessions.
Platbands have the following advantages:
- Excellent decorative function. So the building visually increases.
- Complementing the overall style of architectural design.
- The space between the window opening and the wall plane is protected from moisture and dust.
- Reduced heat loss and noise levels.
- The individual features of the house and the style of the chosen era are highlighted.
There are platbands and shortcomings:
- Wood needs a certain treatment from high humidity and deformation.
- Products need regular care and processing.
- They do not harmonize with metal-plastic windows. In this case, the platbands are made in the same color scheme.
Self-creation of templates
 Today there are many platbands. Their types are determined by the way they are mounted to the window. There are two types of this criterion:
- Telescopic. Their specifics: L-shaped protrusions, coinciding with the grooves of the window frame.
- Overhead. Installation takes place on window frame. Fasteners - construction glue or nails with screws.
Note: finished samples are created in full size. They are printed according to the required parameters.
An elegant solution is the installation of carved products. Such plans can be realized independently only with special equipment.
Popular materials
- The most common material for platbands is wood. Products from it have an elegant and harmonious appearance.
- Plastic versions are often used as well. They are characterized by powerful resistance to temperature changes and ultraviolet radiation. Plastic options are sold already finished.
- Another popular material is MDF. It is made from wood waste. It is more environmentally friendly than plastic. In addition, products made from it are characterized by a look reminiscent of natural wood.
- Polyurethane. Variations from it are highly practical. Facade stucco molding is often made from this material.
The nuances of choosing the right wood
 As already noted, wood is the most popular material for platbands. And the performance of wooden platbands depends on the type of wood used.
Here, attention is usually paid to such options.
- Hard deciduous. These varieties include ash, oak and beech. They are very durable. But it is quite problematic to create patterns on them.
- Soft leafy. These are: linden, aspen and alder. They are easier to process. On their surface patterns are created even by hand. And such surfaces are thoroughly processed by special means.
- Cherry and apple tree. They are optimal for creating small components that can be attached to the base.
- Pine and birch. They are also easy to handle. And they have excellent working qualities.
- Various combinations of wood types. The use of special protective compounds for powerful impregnation is mandatory here.
With the help of wood High Quality it turns out a beautiful original design of the window opening.
The nuances of creating templates with your own efforts
The basis of the work is to create stencils and design.
Self-printing stencils is quite feasible for everyone. It is important to achieve a combination of the selected ornament with the whole style. Mixing geometric and floral patterns is not allowed.
When working on platbands, the following subtleties are taken into account:
- There should be harmony in the color palette of the walls and decorative elements.
- Be sure to select the correct parameter. The platbands should not be very wide or small.
- A high-quality version of the coating is selected. Special paints are used.
- A template is needed for the manufacture of external carved components.
- The drawing is correctly positioned on the workpiece. Details follow along the wood fibers.
When it is possible to achieve a color combination of platbands and the plane of the walls, a holistic and harmonious facade is obtained.
Manufacturing stages
Before creating window decor, carved platbands are selected from photographs. You need to make a template first. It should turn out the same for the design work of all openings.
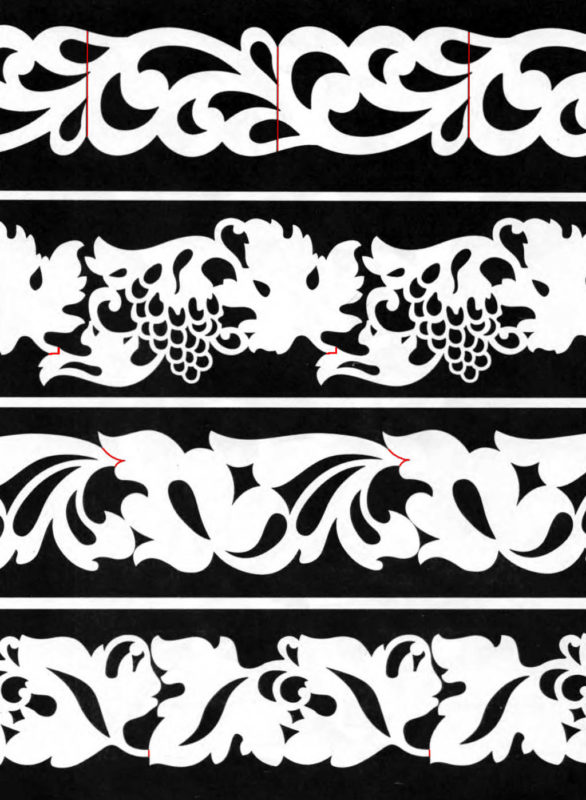
Typically, the following methods of creating patterns are used:
- Applied thread. It has isolated elements of the pattern. They join the same base.
Installation of overhead components should be on the base in compliance with the template pattern.
- slotted thread. Here they make a through ornament. It looks like wood lace.
With all methods of work, the presence of stencils is mandatory. This is how they look:
Advice: for simple patterns, it is not necessary to make a large-scale stencil. Enough of the notebook paper.
You also need to have the following tools:
- Jigsaw.
- Hacksaw (oriented for wood).
- Knives and chisels.
- Drill.
- Milling technology
Platbands must be created from prepared materials. The working stages are:
- Rigorous measurements are taken.
- The selected tree must be dry. If it is wet or damp, it must be brought to dry conditions. The width of the boards is determined by the parameters of the window opening. The thickness of the material reaches a minimum of 3 cm if a slotted thread is made, and at least 1 cm when an overhead thread is made.
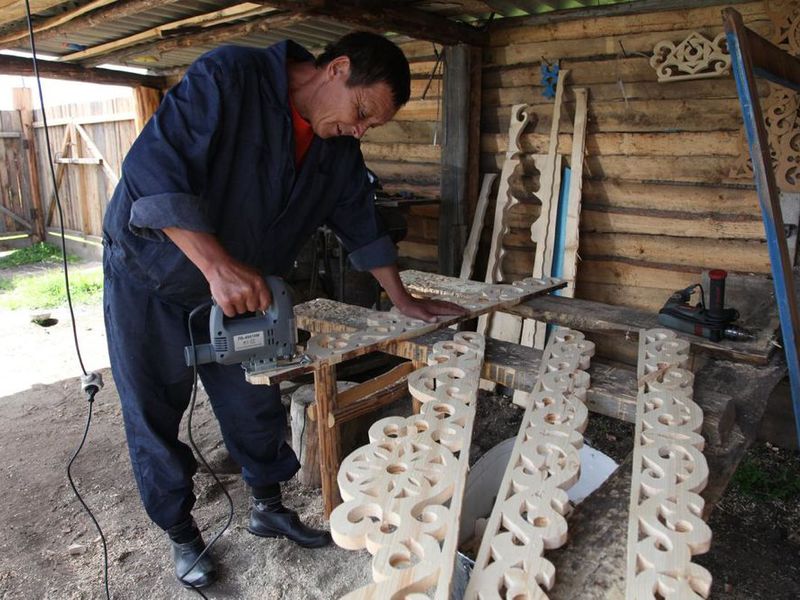 All blanks are pre-treated with a protective compound. Their cutting is done using templates. And the cutting of ornaments takes place using a jigsaw. This tool is best used different types files.
To work with an electric jigsaw, certain skills and special care are needed. The created holes must be overwritten. An excellent tool for this is sandpaper. After powerful grinding, the part is treated with a special impregnation.
Next comes the installation of all prepared parts to the base. Here you need to use glue or special nails. In such work, it is better to refuse the use of self-tapping screws. They will cause cracking of products.
Installation specifics
 The created platband can be attached to the desired position using the following methods:
- On a dull thorn. The installation of such parts is inside. Especially for them, holes should be made in the frame. Glue is applied to the spike and distributed evenly. The spike is inserted into the groove. This fastening protects the platbands from dust and moisture.
- With the use of a through spike. The butt section here is thoroughly treated with varnish.
These techniques are justified when working with a wooden window. To attach to the metal-plastic, a special powerful liquid glue is used.
Care Required
 Installed platbands need constant attention and care. For processing, special preparations are used - powerful impregnations. They create high-quality protection against:
- tree pests;
- the appearance of cracks;
- sudden fire.
Carved options are necessarily covered with a primer, then varnish or paint. The intensity of such treatments is 1 time in 3-5 years. So the operational life of the products will be seriously developed, and at the same time their attractive appearance will be preserved.
When installing plastic or metal products, some kind of thorough maintenance is not needed. For products, it is necessary to arrange high-quality protection against corrosion. Periodic updating of the paint is also required.
Thus, it is very possible to make platbands of extraordinary beauty with elegant patterns on your own. Certain carpentry, carpentry and tool skills are required. So you are very original method decorate window openings and add an elegant twist to the chosen architectural style.
How carved platbands are made using the slotted carving technique, see the following video:
For buildings made of log cabins, carved architraves simply suggest themselves for decorating window openings. Them independent production- not at all a whim or an attempt to save money, because there are very few really good woodcarvers now.
Required minimum tool
The manufacture of platbands, unlike artistic wood carving, involves the repeated execution of the same type of operations, resulting in a rather primitive repeating pattern. Therefore, most of the work is done electric tool: this not only increases the processing speed, but also achieves uniform quality in different areas.
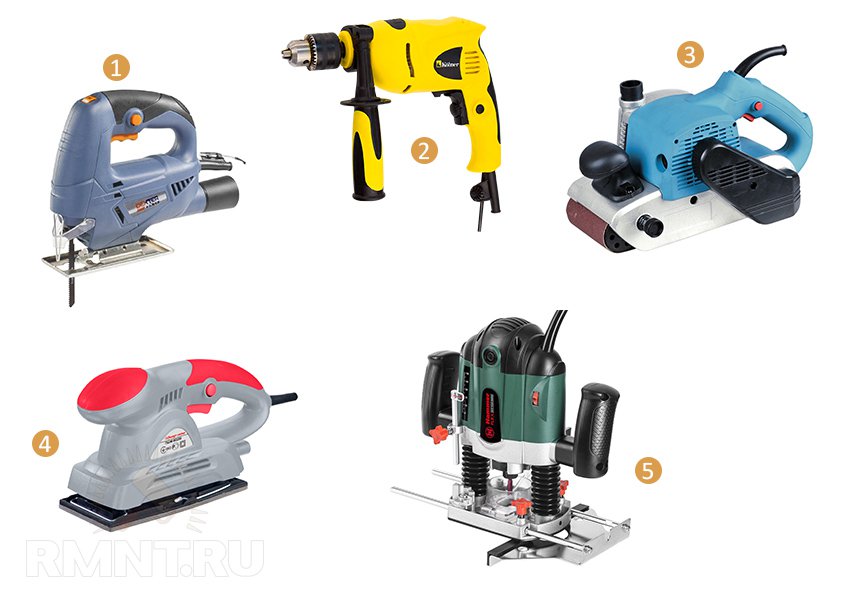 1 - jigsaw; 2 - drill; 3 - belt grinder; 4 - vibration grinder; 5 - manual router
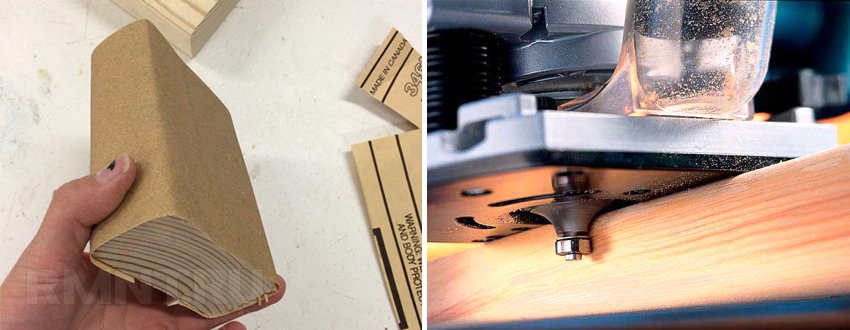
The main work is done with a jigsaw and a drill. The tool must be reliable and of high quality, capable of being in continuous use for a long time. For cleaning and grinding products, it is better to use an electric grinder, at least the simplest belt grinder. Fast finishing of the relief is possible using vibration-type machines.
If you intend to add additional fine details to the edges of your product, you can not do without a router. Descents, chamfers and a figured border can also be done manually, but only with a variety of chisels, cutters and specific skills in working with wood.
How to choose wood
For platbands, hardwoods are best suited: oak, birch, ash, maple, alder. Since the thickness of the finished product is relatively small (30-45 mm), hard rocks will be less susceptible to rotting and drying out, therefore, they will retain their appearance longer.
If you plan to decorate carved platbands with flat-relief elements with many small details, you should give preference to softer rocks with a fine texture pattern. Suitable linden, poplar, aspen, walnut and spruce.
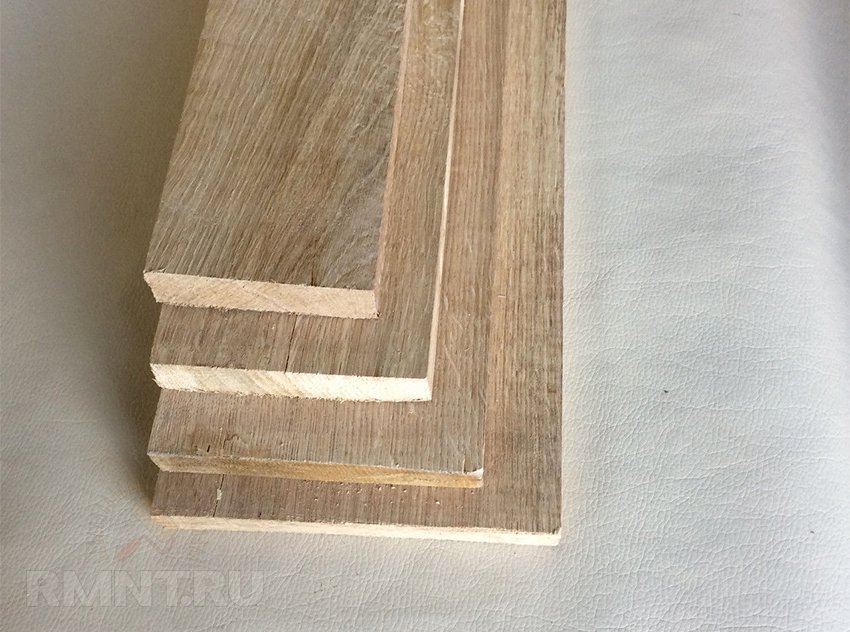
Wood for platbands should be selected and, preferably, chamber dried, with a moisture content not higher than 12%. It is not allowed to have traces of warping or other pronounced defects, large branches. Ideally, you should immediately order calibrated boards with a width of 100-150 mm and a thickness of 30-40 mm.
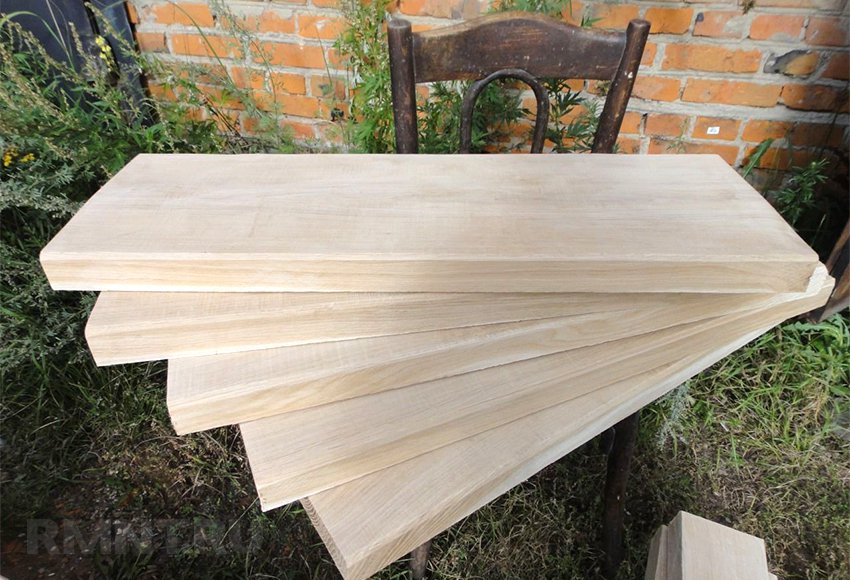
The length of the blanks must be sufficient to completely cover window hole horizontally and vertically with an overlap in each direction by 1.5 board widths. It is important that you initially calculate the number of blanks needed and, in addition to them, purchase a few more boards of the cheapest breed for training and carving skills.
Making templates and stencils
Almost any wood carving begins with drawing a pattern on a workpiece according to a pre-made template or stencil. There are plenty of threading schemes in the network, the main difficulty comes down to transferring lines to the part accurately and without distortion. We will warn you right away: do not chase the high complexity of the drawing. A set of even the most primitive elements in the correct sequence and with well-chosen indents takes its modesty and quality of processing.
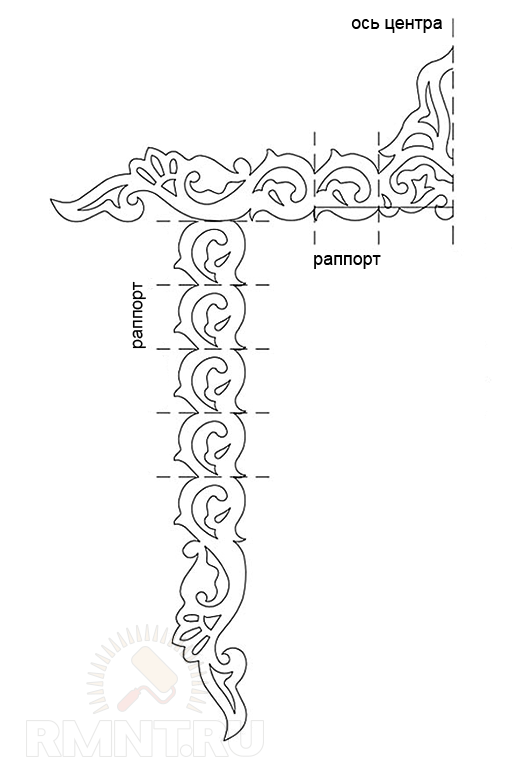
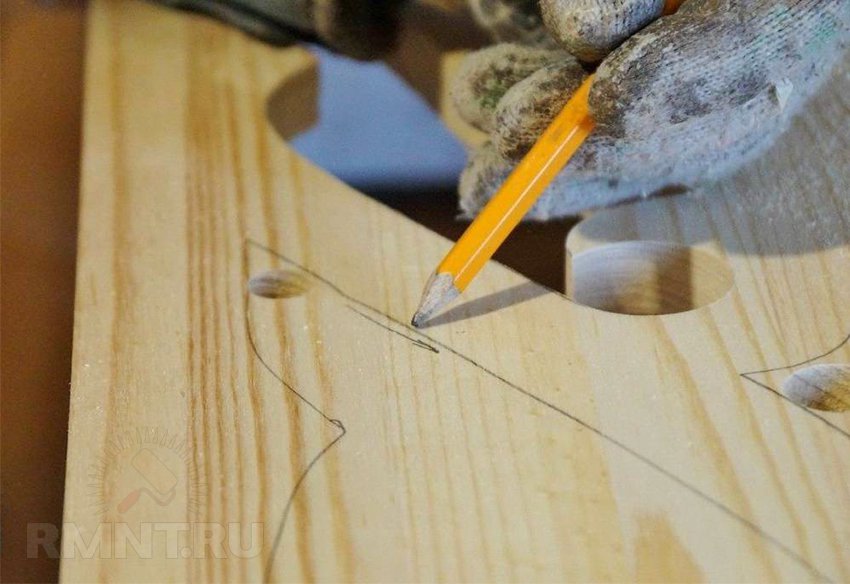
The first option for marking is the manufacture of a small piece of plastic or solid sheet material, on which a single element of a repeating pattern is applied. Such a template is successively applied to the workpiece and outlined in pencil.
It is also possible to produce a single template. You need to take a strip of paper of the appropriate width, fold it with an accordion several times, and then cut out the pattern according to the principle of a Christmas tree garland. The resulting tape must be glued onto cardboard or LMDF, and then cut out the desired shapes. This method is welcomed with a significant amount of work.
The resulting stencil is subsequently simply superimposed on the board and outlined with a soft pencil. Ideally, saturated, but precise cut lines and boundaries for further processing should remain. When marking out the details, it is also necessary to take into account the layout of the pattern so that the platbands form a solid and complete contour, and the repeating pattern is not interrupted at random.
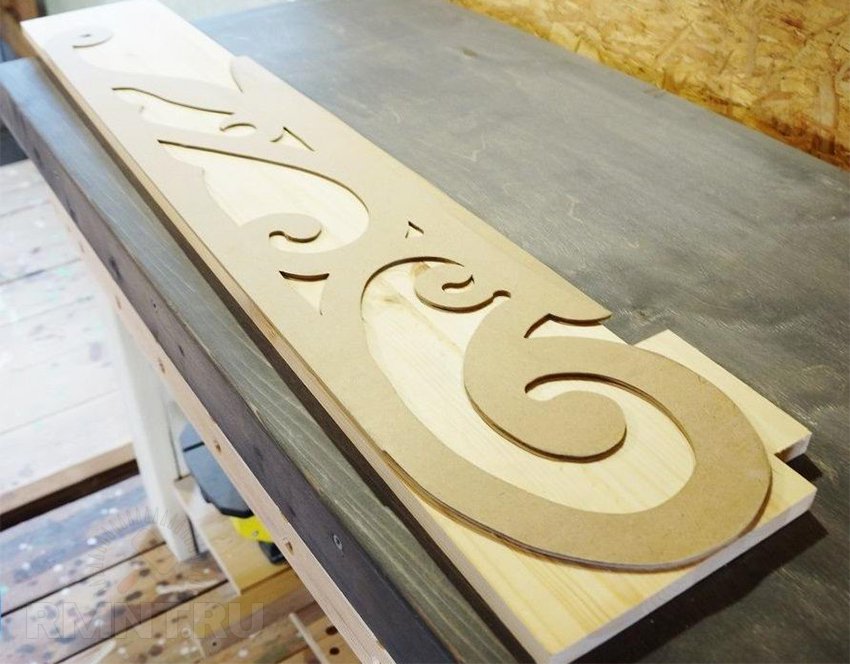
Through hole selection
The first step is to trim the edges of the workpiece and select holes in the center. With the edges, everything is simple: we cut out the excess with a jigsaw, stepping back from the marking line 1-1.5 mm outward for further processing. To cut out figures in the center of the plane, we drill a part at the very line of each cutout, then select the inner contour with a jigsaw.
For making large holes, it is reasonable to use core drills. In this case, it is necessary to mark on the template not the contours, but the centers of the circles in which the centering drill bit will be installed. A similar technique can also be used in the manufacture of oval holes or elements with small rounding radii: a complex bend is drilled with the appropriate radius, and everything else is cut out with a jigsaw.
When the excess parts of the workpiece are sawn out, the cut edges must be carefully processed with a rasp and then sandpaper. It is recommended to use bars of square, round and rounded profiles, on which sandpaper is stuffed. This way you are less likely to "collapse" the edges and you can get right angles on each edge.
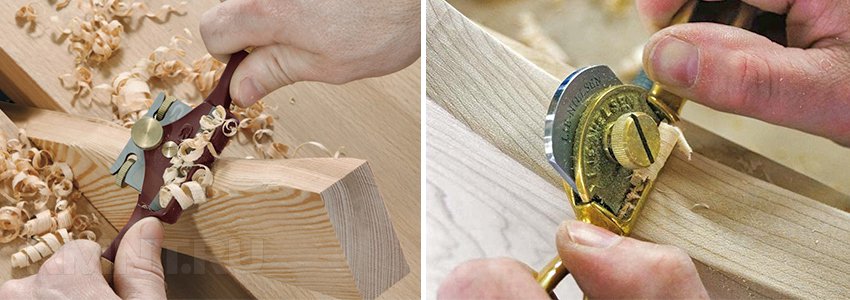
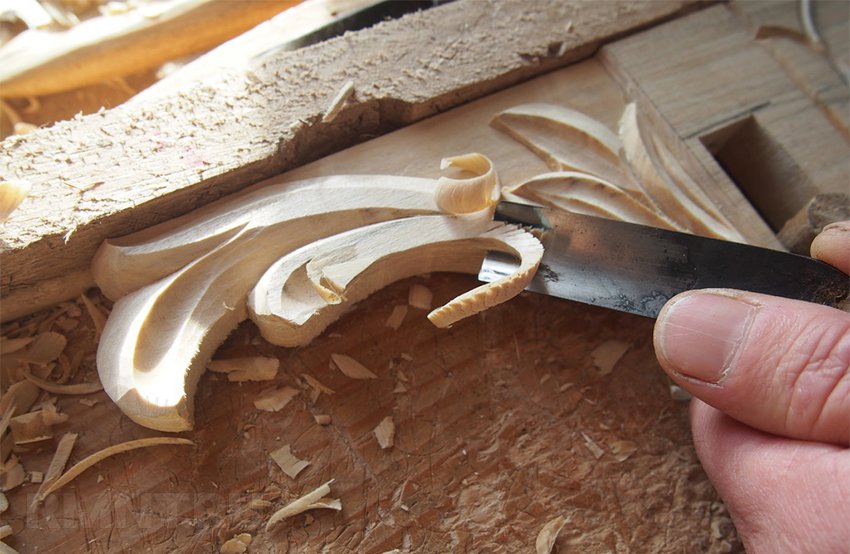
Rectangular edges look rather rough, so they are smoothed out with chamfers and slopes of different profiles. The easiest way to diversify the product is to walk along the outer and inner contours of the casing with a figured cutter. But manual processing options are also possible:
- to chamfer, walk along straight edges with a chip, keeping the angle of inclination of the handle to the part constant;
- a semicircular convex descent can also be made with chips, changing the slope of the blade, or use a concave cutter for this;
- concave semicircular pairing is performed with a chisel or a cutter with a rounded edge. Such elements must be cut out in stages, removing small chips layer by layer and carefully controlling the depth of the tool and the tilt of the handle;
- if the descent has a complex profile with several convex, concave and straight elements, this profile is divided into several stages and cut in strict sequence, starting from the widest outer part and ending with the deepest and shallowest tier.
Blind carving: we apply a relief
When you're done with shaping, it's a good idea to diversify the remaining flat pieces with simple ornaments or floral designs. Here are the simplest ways to work:
- A groove (branch, furrow) is made with a narrow chisel or cutter with a square, triangular or concave blade shape. The carving is carried out strictly along the line, the relief is selected with small chips and then polished.
- Sheet - several small grooves that imitate veins cut with a circular knife. From the center between the veins to each of them, small notches are made with a semicircular chisel, imitating the body of a leaf, then an external contour is drawn with a thin cutter.
- The flat areas adjacent to the descent can be diversified with a blind carving of a small ornament. For example, cut two grooves from the edge, forming a triangle with it, and punch an asterisk in the center with a notch.
Wood processing and installation of architraves
Due to the carved elements, the wooden product has a large surface shape, due to which it is more susceptible to aging. Therefore, wood should be treated in a special way.
First of all, carvings for placement on the facade should be soaked in an antiseptic composition for 5-8 hours, for which you can dig a small trench in the ground and put a plastic film there to temporarily equip the bath. After soaking, the parts are dried for several days stacked with linings after 30-40 cm.
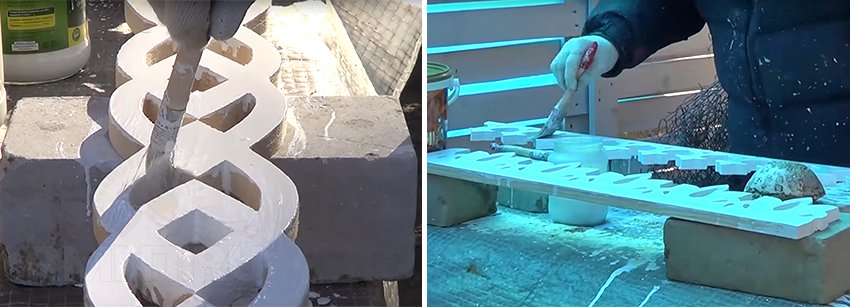
When the wood has dried, it must be carefully sanded, achieving smoothness and finally eliminating all traces of sawing and carving. The protective composition is selected in accordance with the type of facade finish, it can be either alkyd enamel, and polyurethane varnish, tinted or transparent.
Finally, for correct installation platbands, the window opening should be framed with a flat rail 10-15 mm thick and of such a width that its outer edge is not visible through carved pattern along the contour of the platband. The purpose of this plank is to eliminate the remaining irregularities in the wall and provide a solid base for the carved element to be attached to. Often this rail is painted in a color that contrasts with the coating of the casing itself for greater expressiveness of the pattern.

Platbands can be attached with straight and oblique trim, depending on the type and density of the pattern. Oblique trimming is performed with a 45° cut on each side, while the cutting line must pass through identical sections of the pattern and not cross the figures cut inside.
With a straight cut, a horizontal element is placed between two vertical ones. Their upper edge should be 1-2 cm above the crossbar if the cut end is straight. It is also possible to manufacture on the edge of the thread according to the general scheme, if, during the manufacturing process, fitting and precise fitting of the platbands are carried out. The very fastening of the platbands is elementary - for it they use ordinary ruffed nails without a hat. It is only important that the nail pierces the casing and the lath, protruding at least 5 mm from the inside.