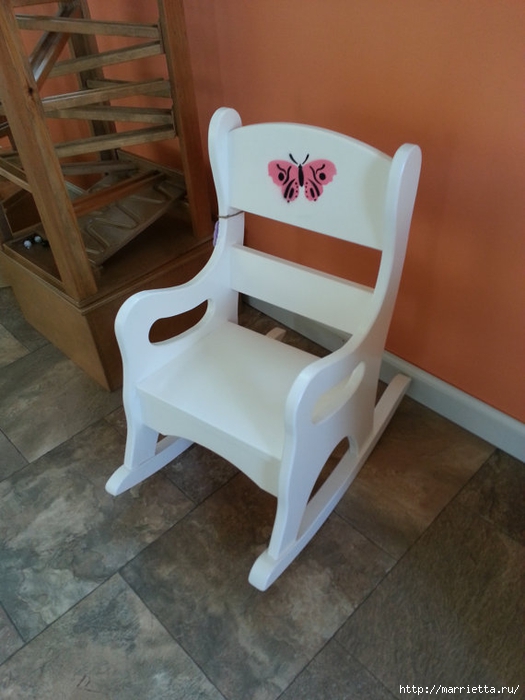
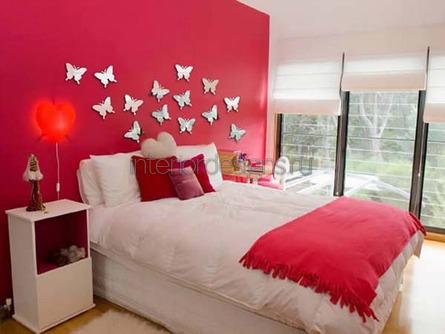
The design of the room can be anything - from classic to high-tech. It seems that everything is selected, everything is thought out, every item and every detail is in its place, but something is missing. Butterflies in the interior of the room can become such a highlight.
In order for the interior not to be faceless, museum-like, such light, fluttering creatures as butterflies are needed. Unfortunately, we cannot settle the living at home, but we are quite capable of decorating our lives with artificial beauties. Butterflies can be paper and fabric, made of nylon, organza and metal. They can be hung from the ceiling or a lamp, hang a picture or a clock with the image of butterflies. And how beautiful the butterfly looks on the wall or the Christmas tree!
Do not be afraid to fantasize and make your dreams come true. Moreover, the now popular feng shui science of harmony only welcomes butterflies, considering them a symbol of beauty, perfection, rebirth and lightness. But lonely butterflies should not be in the room. They should be placed in pairs or a whole swarm.
Consider how butterflies in the interior decorate our lives with you.
You can decorate the walls with butterflies as you like. The main thing is that it looks natural and stylish.
Option 1. Wallpaper
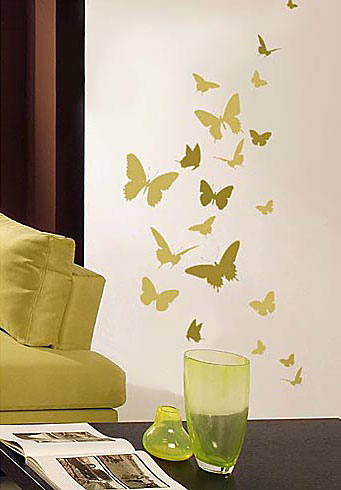
If you are not afraid to take risks or if you have country house, which is finished in a rustic, country style, the wallpaper on one of the walls with the image of butterflies will be a real decoration of the room. Add an olive color to the interior and a table, a sofa in the color of young grass, a large window. In such a room it will always be fresh and cool.
Option 2
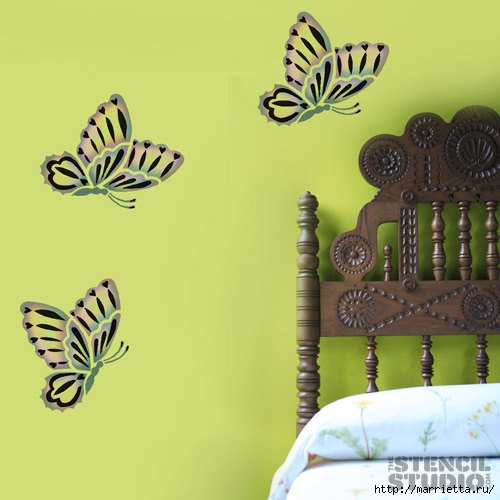
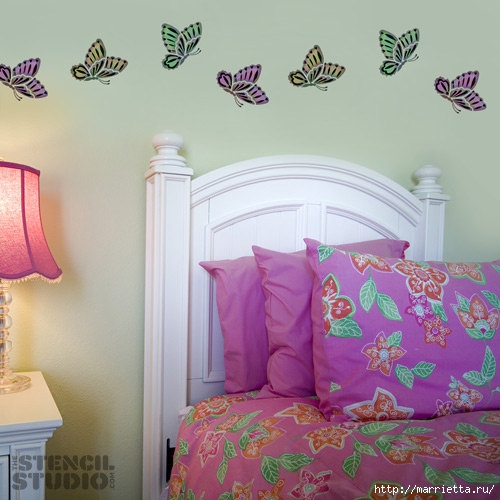
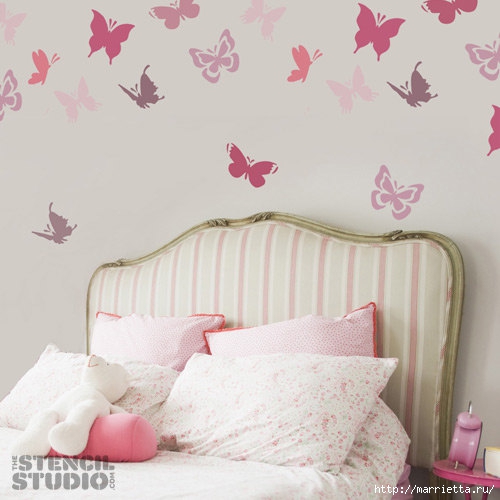
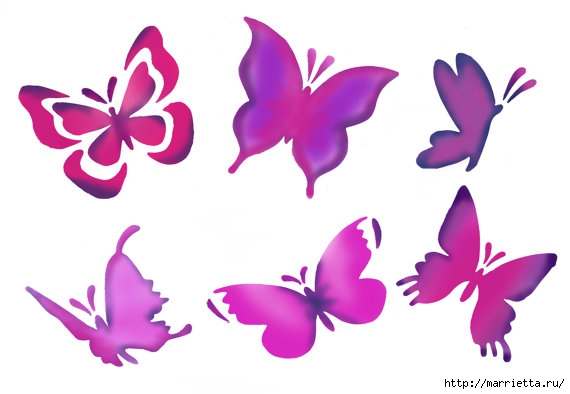
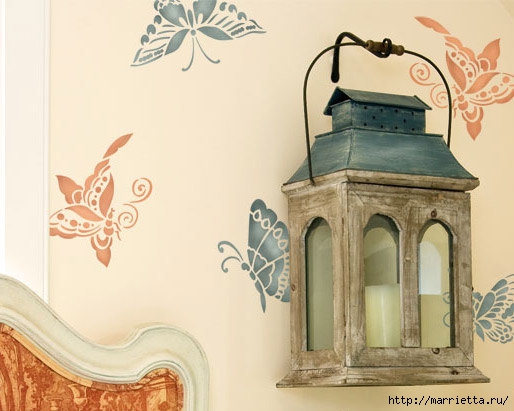
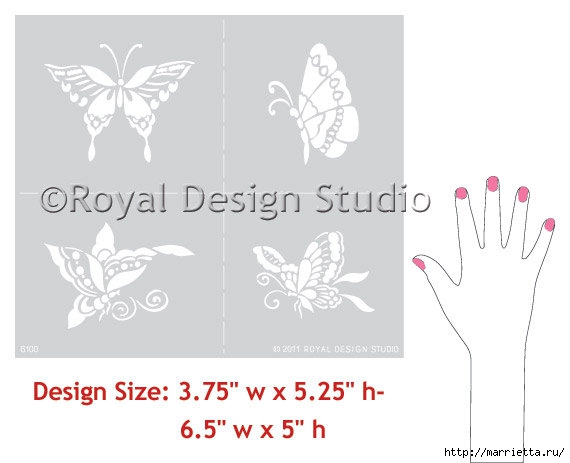
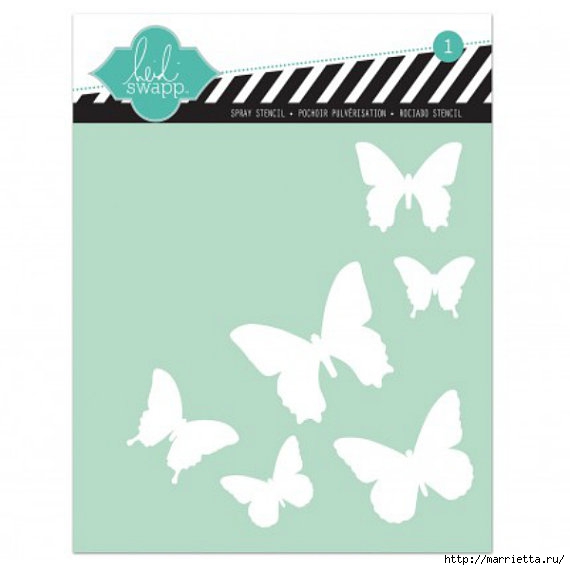
 With the help of stencils, butterflies on the wall can be drawn. Choose your own colors and arrangement. This ornament is perfect for a children's room or loggia.
You can apply a butterfly ornament to the wall using one stencil or ready-made wallpaper. This pattern will add novelty to your relationship.
Option 3
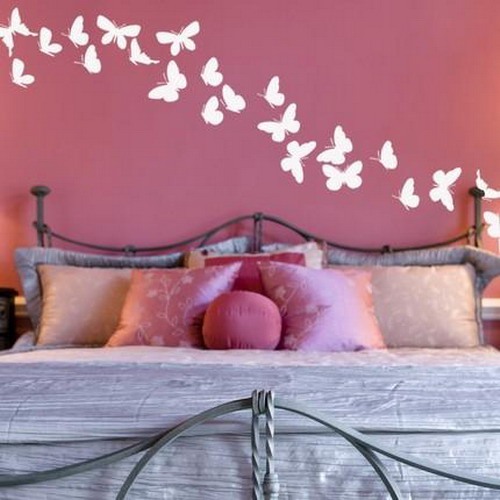
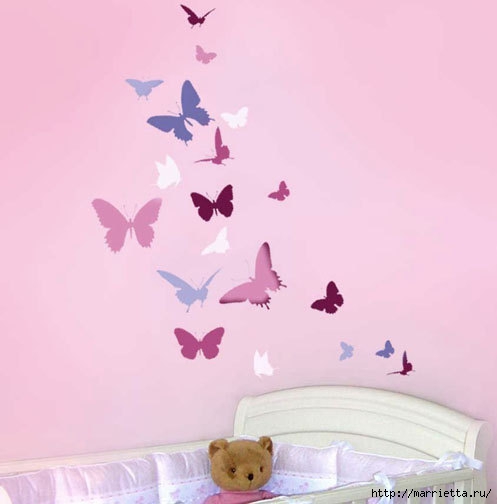
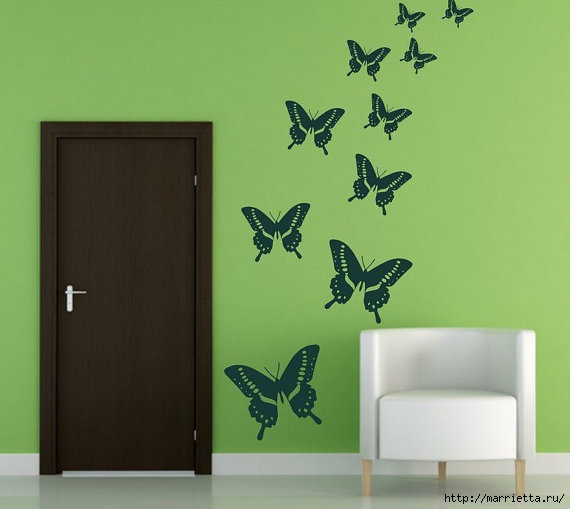
Butterflies are flight. Butterflies on the wall near the stairs leading from will look pretty good, right?
And the beds pasted in an ascending line above the head of the bed will give you only pleasant, romantic dreams.


Option 4
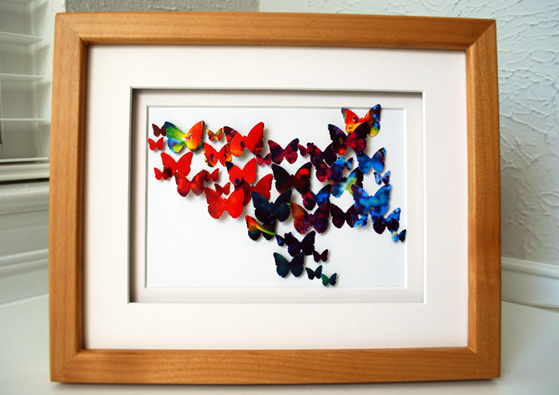
There may be butterflies on the wall. And it's easy to make.
We will need:
- pages from a colorful magazine;
- scissors, adhesive tape;
- Frame;
- several butterfly stencils of different sizes.
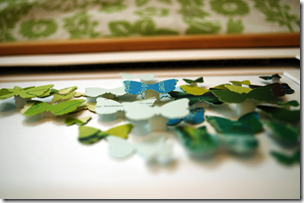
To get such butterflies on the wall with your own hands, we cut a page from the magazine into strips equal to the size of the butterflies. It will be better to watch large butterflies mixed with small and medium ones.
Attach stencils to the cut strips and cut out butterflies. Quantity is not limited. The main thing is that they fit in the frame and do not overlap each other.
We attach the finished butterflies to a sheet of paper, which we will subsequently insert into the frame. But we don't glue it. First, let's put together the perfect composition. When you like the result, glue each butterfly to the sheet with double-sided tape. It is better to take adhesive tape not flat, but on a foam basis. If not, insert a piece of foam rubber between two pieces of adhesive tape.
When placing multi-colored butterflies, achieve a smooth transition of color. So the picture will look more harmonious.
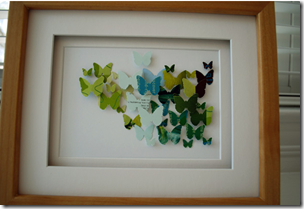
We insert the finished sheet into the frame. So the butterflies "sit" on the wall.
Option 5
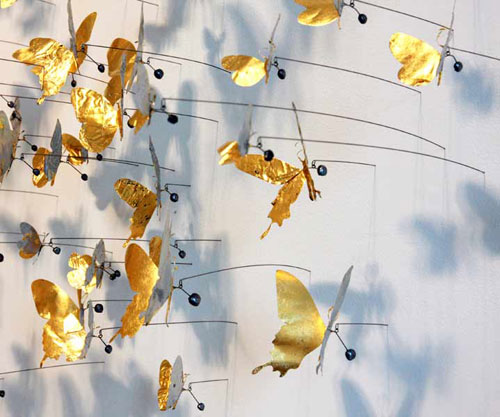
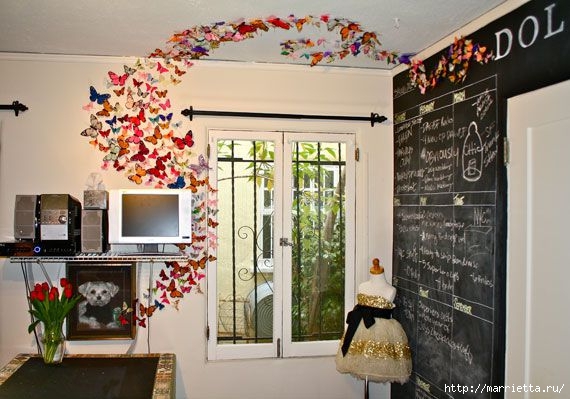
You don't have to limit yourself to the picture. And from tin cans and attach them with a wire to the wall. You will get a kind of mobile when, from the slightest breath of a breeze, butterflies on the wall begin to move.

Butterflies on interior items
Not only the wall, but also decorative household items can be decorated with butterflies.
We have already talked about how butterflies on the wall with their own hands can change the perception of a particular room. Let's go further.
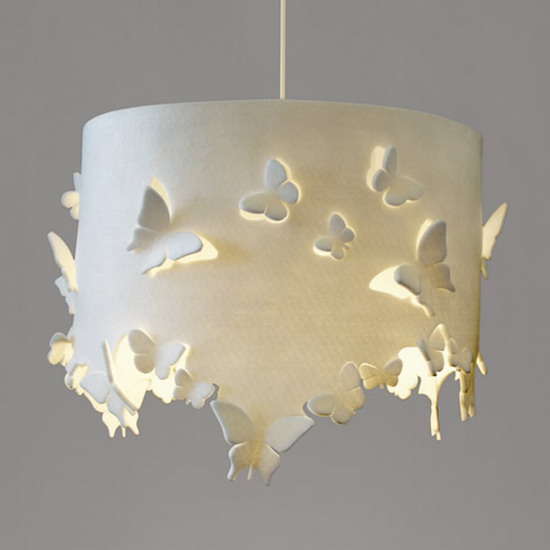
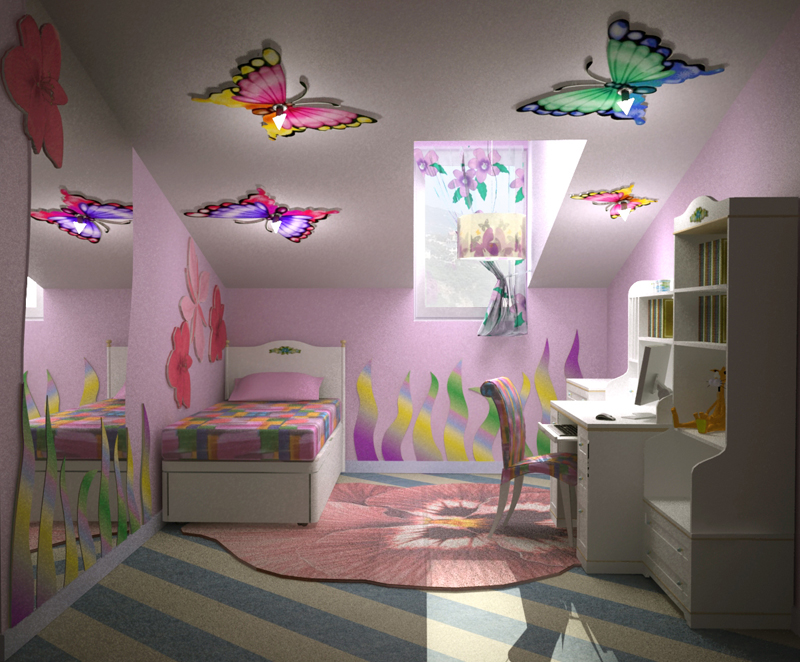
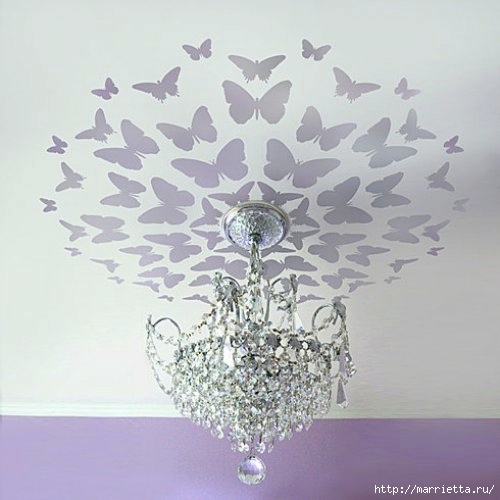
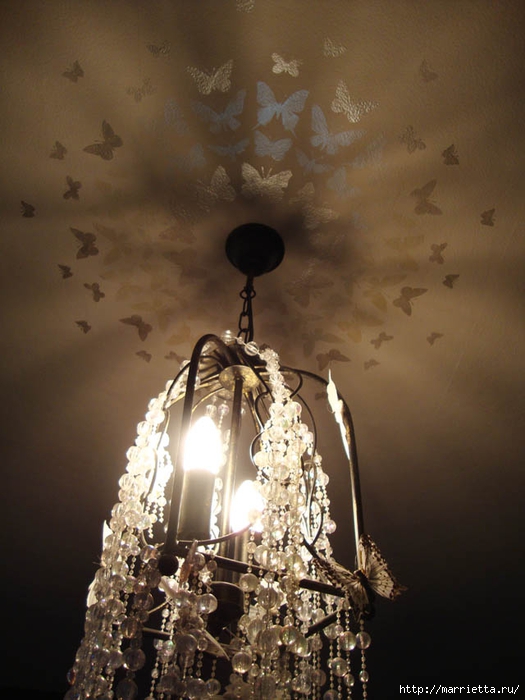
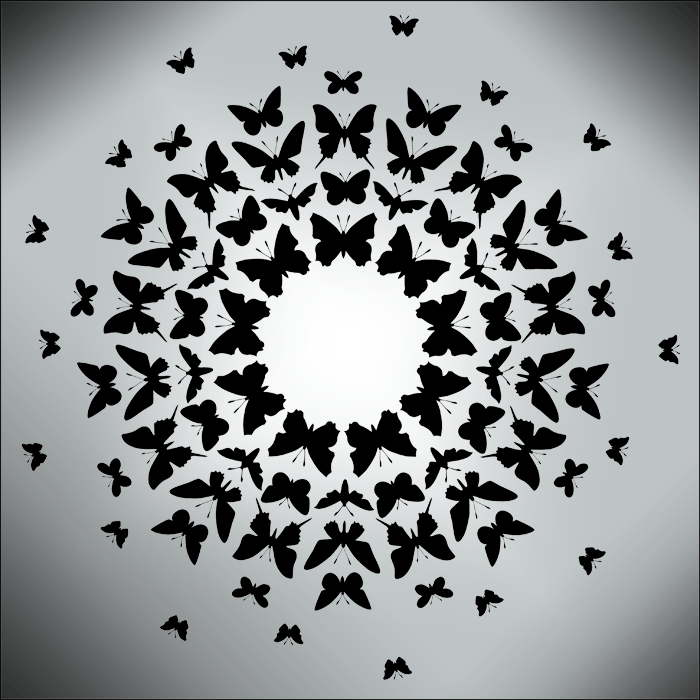
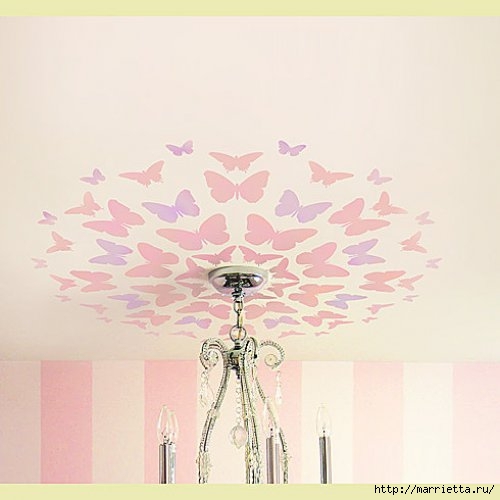
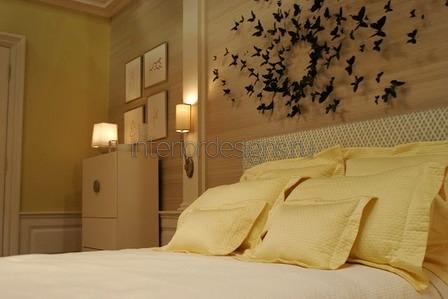
We increase the stencil and settle the butterflies on the ceiling. And the more the better. They can be plain or colored, matte and shiny. You can glue or draw a couple of butterflies, or you can depict a whole swarm flying towards the light. Such a light source can be a lamp or a chandelier with a suitable lampshade.
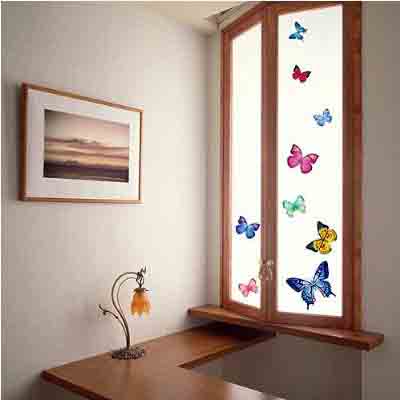
Using stencils, paints or cut out butterflies, you can create an interesting composition on the windows. Let the butterflies in the interior be shiny and translucent. Then the light penetrating from the outside will create a special atmosphere in the room.
In this way, you can decorate any door in the apartment.
Textile
If there is the most suitable place for butterflies in the interior, it is on textiles.
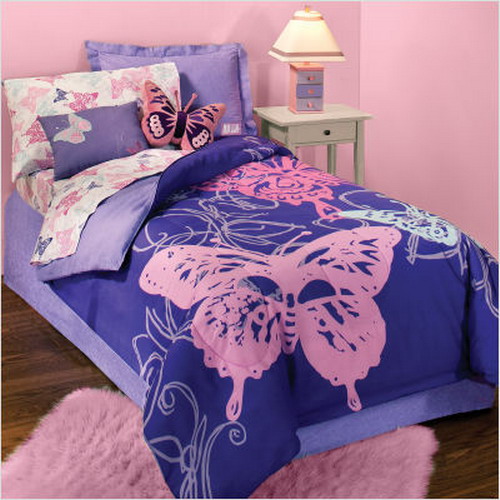
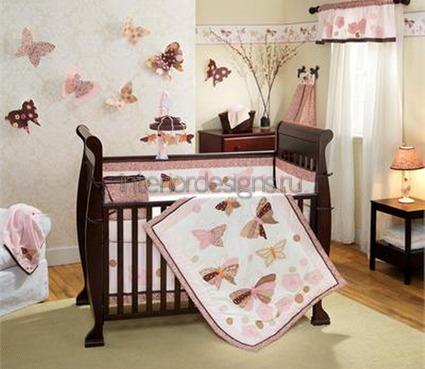
The most daring can pick up pillows, bedspreads, a blanket and even bedding with butterflies for the bedroom, not to mention. The question is whether such an abundance of winged creatures will become boring. But this is a matter of taste.
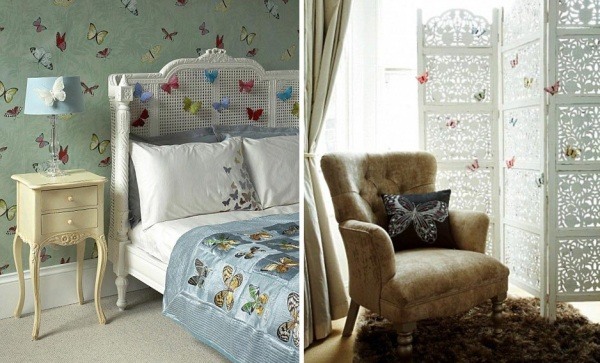
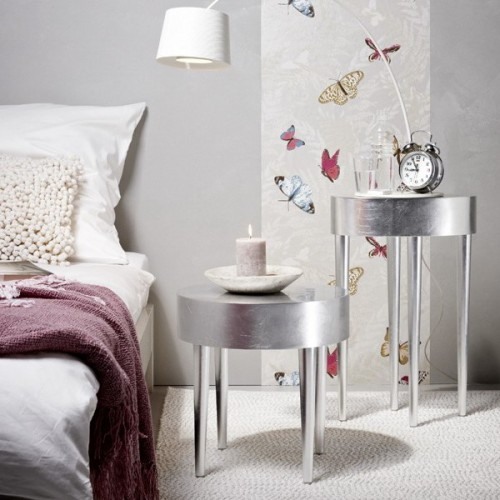
In textiles, butterflies can be found on pillows and curtains, bedspreads and fabric lampshades, on bed linen and a blanket.
If the curtains are plain, just attach a few organza or nylon butterflies to them. And the clothes for the windows will change.
Wind music with butterflies will decorate the arch between. And the attached wind chime open window fill the room with an enchanting melodic sound.
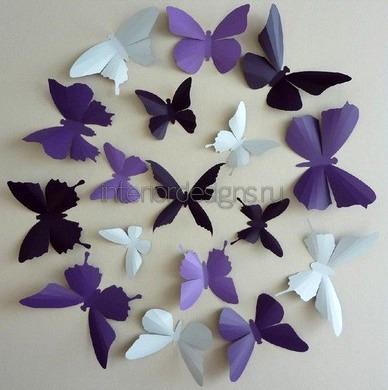
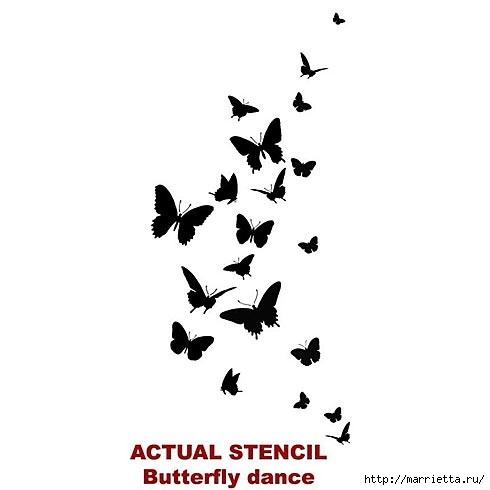
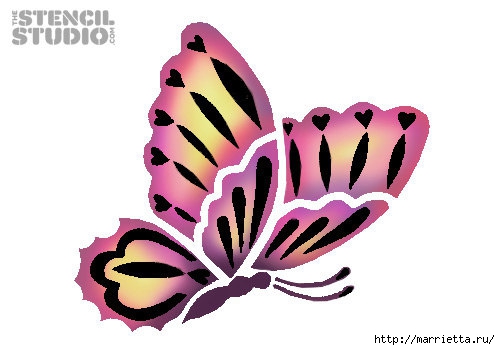
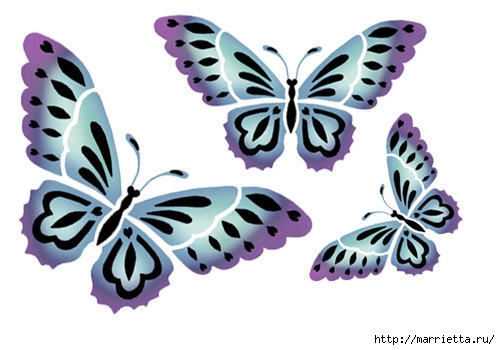
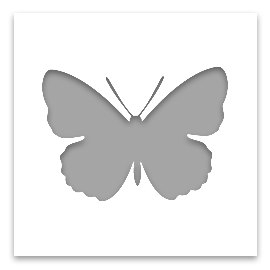
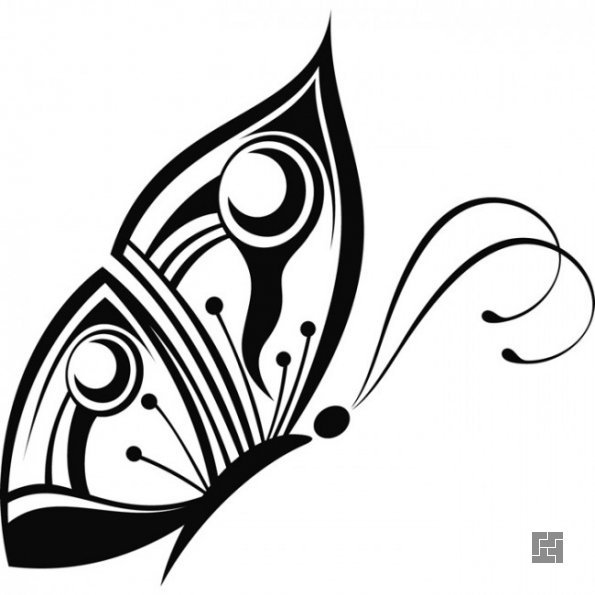
In conclusion, a few more ideas on how butterflies in the interior can transform a room. And to implement these ideas, we offer you stencils of these cute and gentle creatures of nature.
Fantasize, place, create your own unique interior. And let it be comfortable.
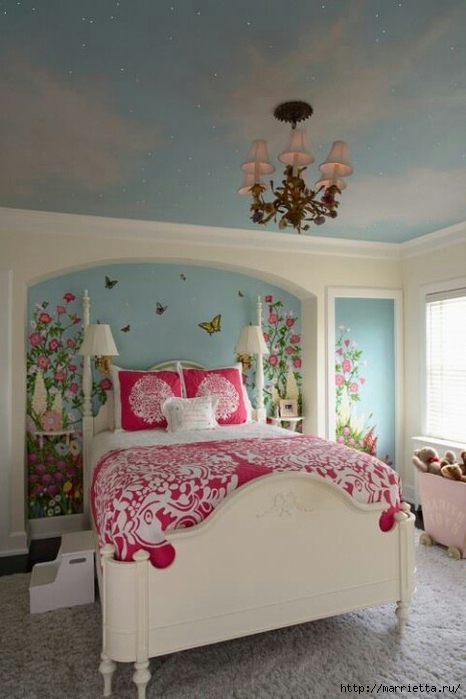
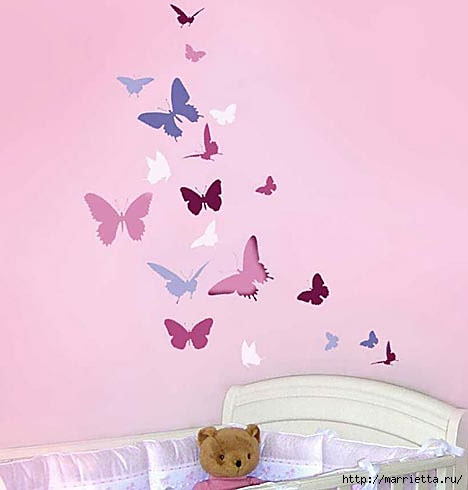
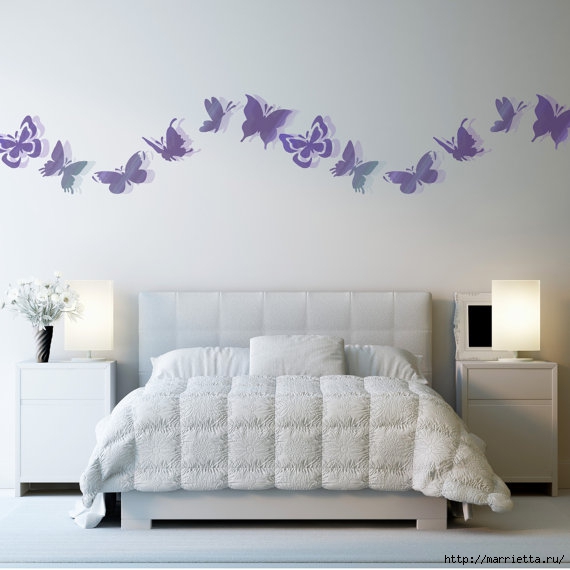
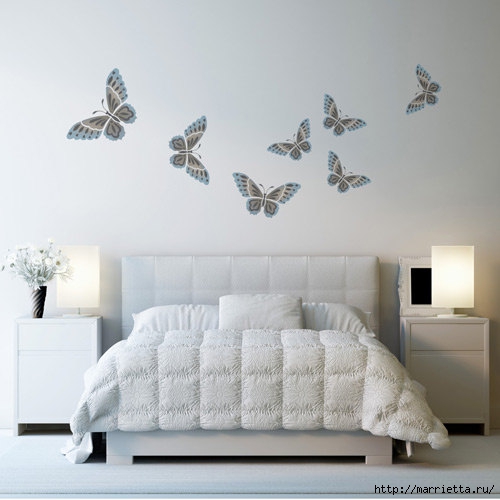
Using stencils on the walls or on the ceiling, you can draw fluttering butterflies. According to the Feng Shui philosophy, butterflies are considered a symbol of ease in relationships, a symbol of joy and sincere love. Chinese experts say that the presence of butterflies in the interior is simply necessary for a happy family life, especially for the important room- bedrooms. With the help of butterflies, you can activate romance in the house, refresh sexual relationships and fulfill your most secret desires)
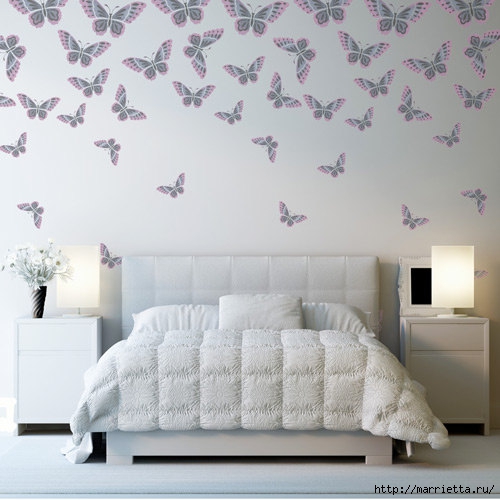
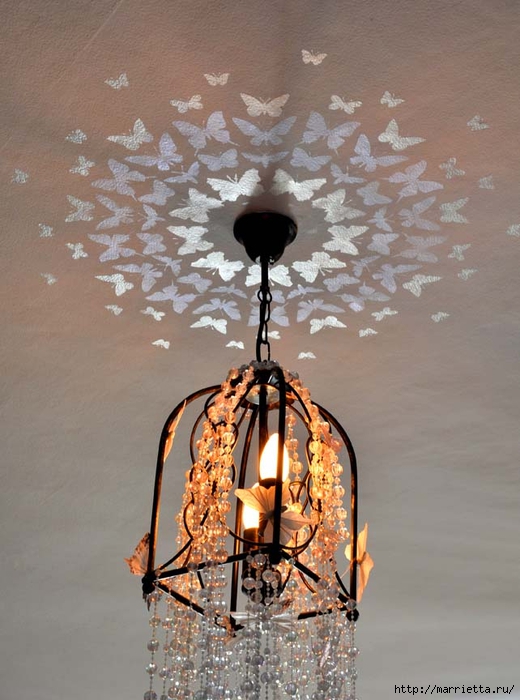
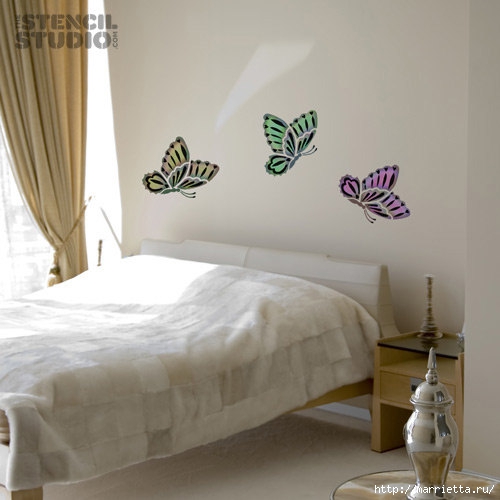
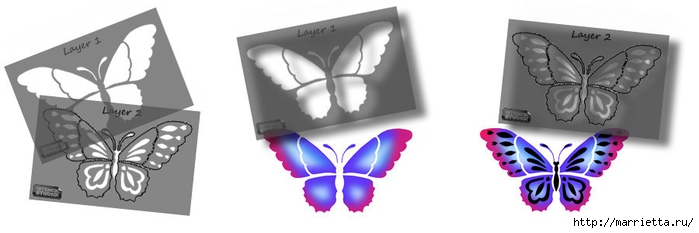
In this version, the butterflies are placed in the bedroom, on the ceiling, around the chandelier. They are painted using acrylic paint stencils. By placing butterflies in the bedroom, you can, when alone, improve your personal life, revive the flame of passion in the presence of a prosperous relationship.
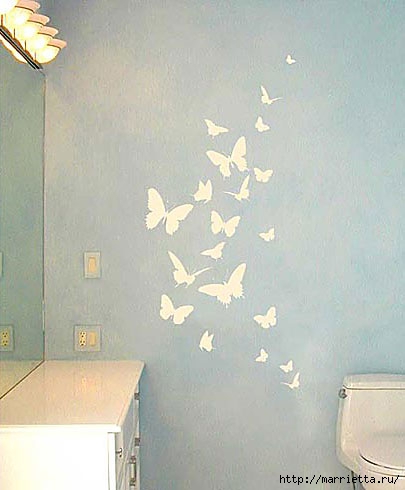
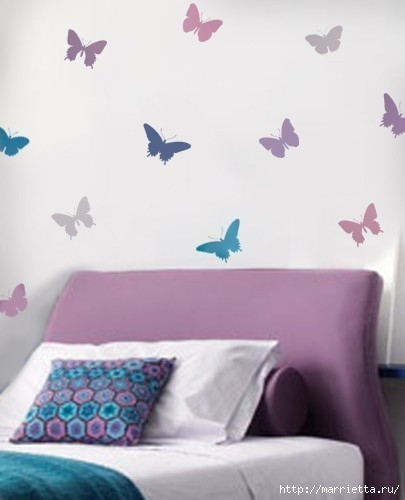
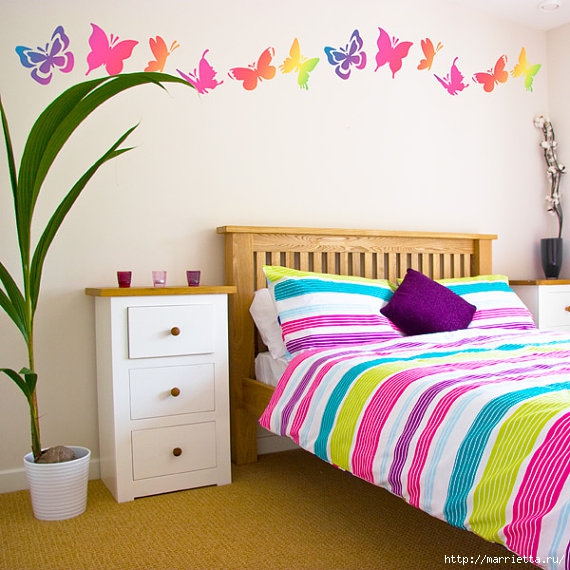
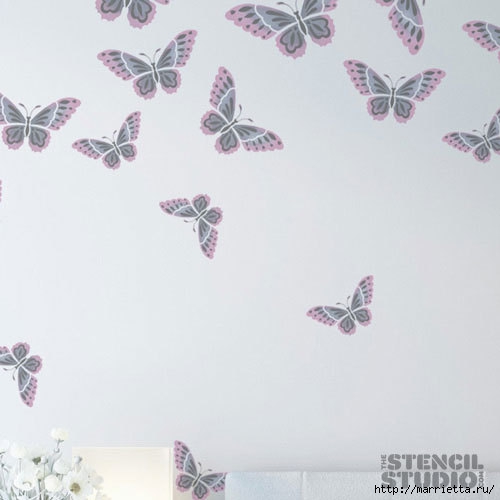
In the interior, on the walls or ceiling, butterflies are placed in pairs or small flocks. Everything should look as natural as possible, as if they themselves fluttered into the bedroom through the door or through the window, after which they began to circle around the bed and under the ceiling. When you open your eyes in the morning, joyful fluttering butterflies will meet your awakening, regardless of the weather outside the window. And at night, falling asleep in your comfortable bed, you will be overwhelmed with pleasant feelings and emotions.
There is an important caveat here about a mistake many people make. They believe that by attaching a butterfly to a curtain or tulle, you can give it airiness, thereby improving the effect. But remember, the tulle and the curtain are located near the window, and your butterflies can simply fly into it, taking your happiness and well-being with them. It is also inappropriate to place a panel with butterflies dried in the sectors of the South-West and East.
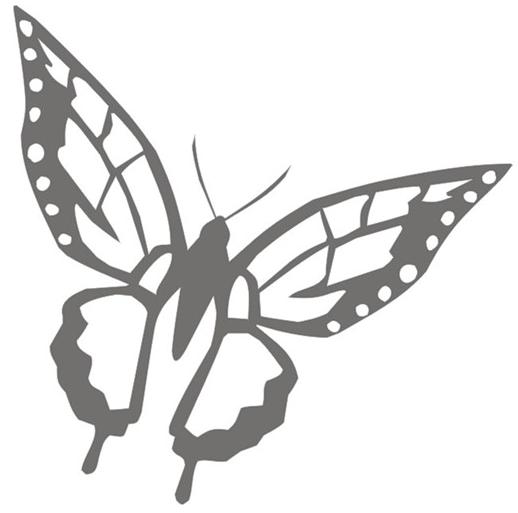
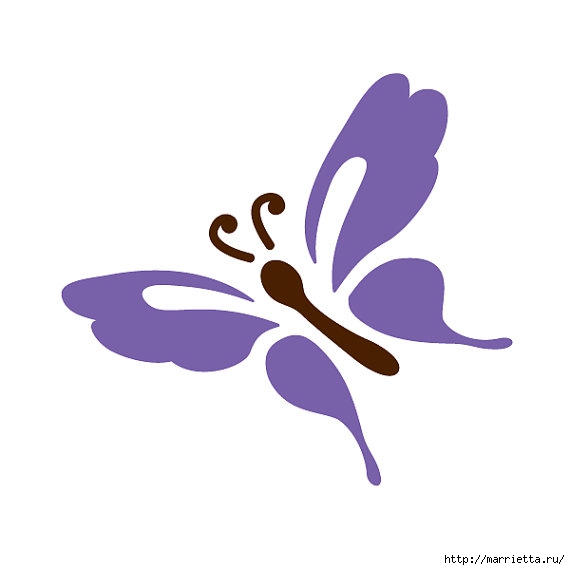
The butterfly symbolizes the resurrection, rebirth and immortality of the soul. She can transform, transform, transform from an ordinary caterpillar into a beautiful celestial creature, appearing in the world in a completely new guise. Stencils are used to apply drawings on the ceiling or walls of the house (not everyone knows how to draw), stencils can be purchased in online stores, but you should not buy something that you can easily do with your own hands. It is enough to have a printer at home, the butterfly is printed and carefully cut out, attached to hay or the ceiling with adhesive tape and that's it), all that remains is to choose the color of acrylic paint, in accordance with the shades of your interior.

In online stores, it is better to buy something more serious, for example gadgets. Take a look at the page ex-power.ru, here you can browse the catalog with modern and interesting devices that perform completely different functions: from education and work, to recreation and entertainment. Here are the most interesting gadgets that are popular today.
![]()

![]()
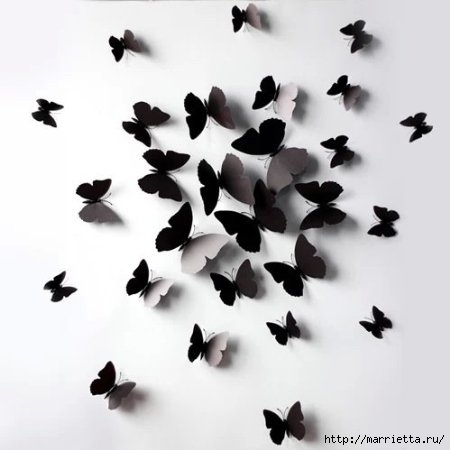
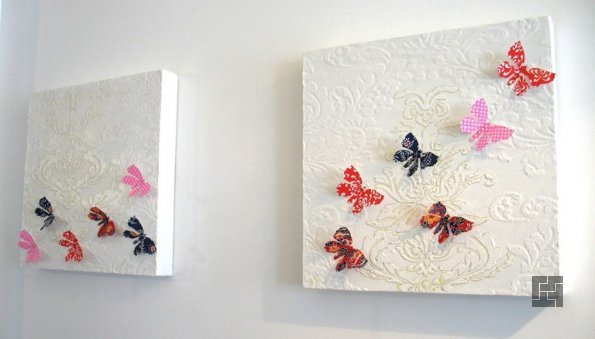
Many dream of modifying or updating their home. Most often, transformation means repairs, at least cosmetic. But if you approach the embodiment of this idea creatively, then it is quite possible to decorate a room or apartment in a new way without unnecessary costs and tedious work. Let us recall at least such a wonderful element of decoration as a panel. Combining this idea with simple option decorating with butterflies, you can get a very spectacular result.
There are many ways to make artificial butterflies, and the effect of the end result will depend on which one you turn to.
Selecting an overall composition
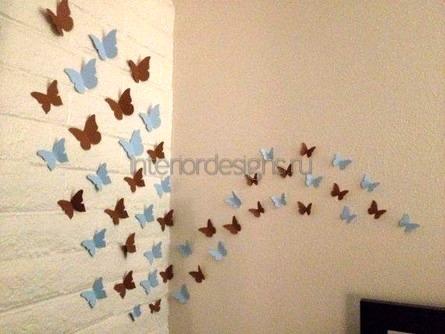
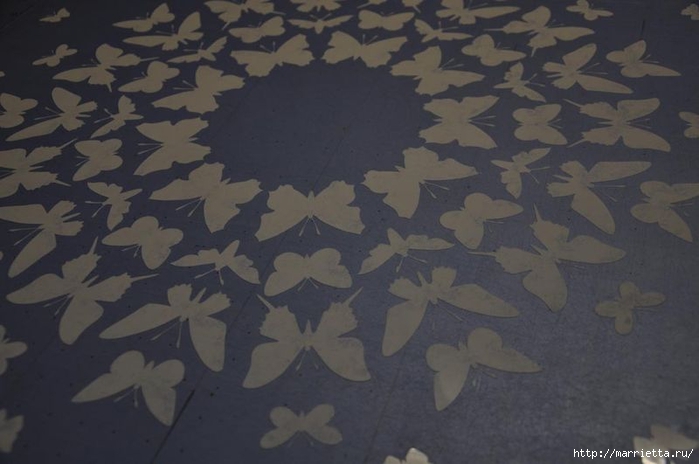
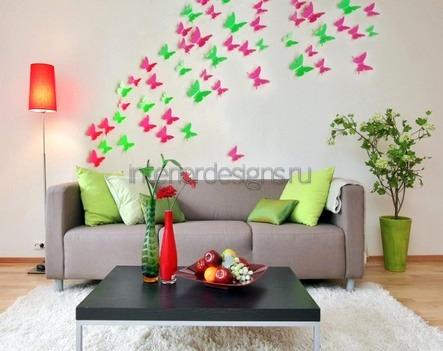
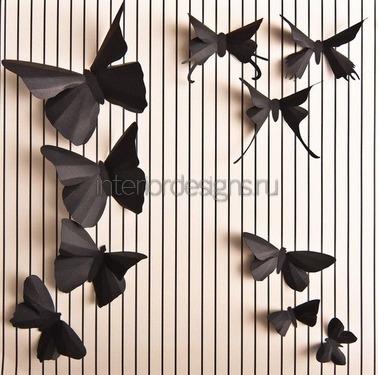
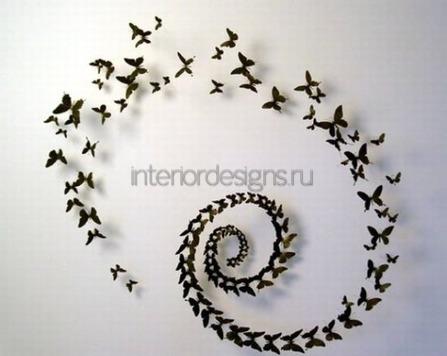
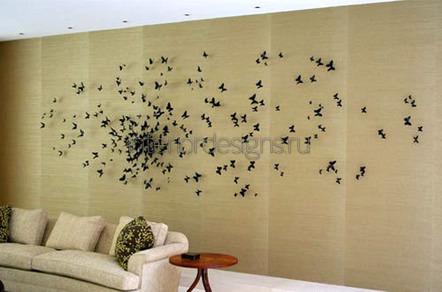
Before you start decorating, you need to decide exactly how you will place the butterflies on the wall. You can make, for example, a composition from a whole whirlwind of insects that will scatter in a spiral or in one direction, changing color, size, shape along the way.
A flock will look beautifulbutterflies moving from one corner of the room to another or sitting in small clusters in the form of, for example, a heart or a flower.
Naturally, we are talking about artificially created, not dried insects.
Preparing a sketch for decor
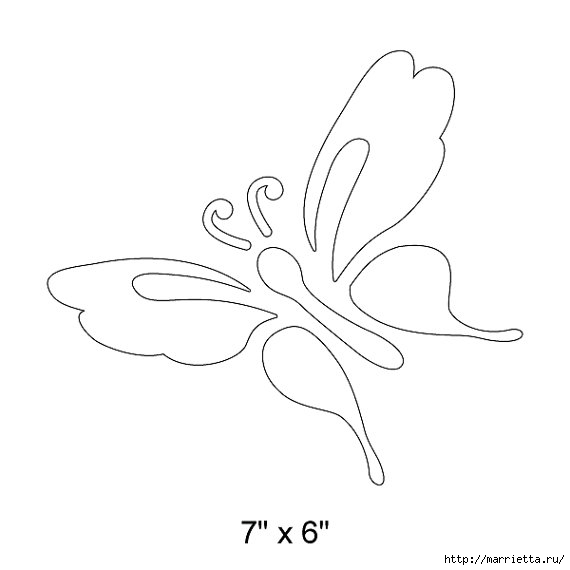
We determine what form the application will have. Draw a sketch of the idea first on paper, and then distribute the outlines of the future composition on the wall with thin chalk. The lines should be barely visible and easily removed.
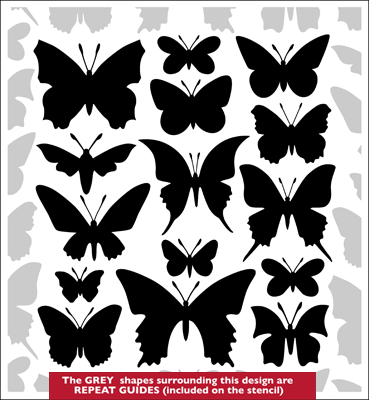
If nothing worthwhile comes to mind, you can search inInternet, there are a lot of options for ready-made templates: the simplest to the bizarrely intricate. According to the invented or selected sketch, in the future it will be necessary to make blanks of various sizes for the direct production of appliqué elements.
Good advice:
- if you decide to stop at butterflies with carved ornate wings, think about the fact that there should be a lot of elements, will you get tired of exercising with scissors or a knife;
- the final look of the application will be more dynamic and voluminous if your butterflies are not strictly symmetrical, and their sides are slightly different.
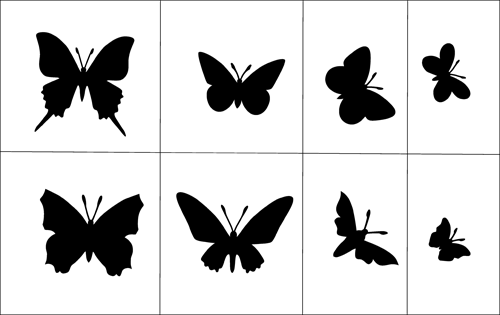
After you decide on the size of the decoration and the required number of butterflies, make the necessary stencils. Choose the right color. Do not forget that the shade of the butterfly wings should be combined with the color of the existing interior, but not merge with it.
Material selection
For the manufacture of insects, a wide variety of materials can be suitable. Take, for example, plain paper or cardboard, ordinary or vinyl self-adhesive film, pieces of fabric. If you make butterflies out of rigid cardboard, then you will get quite flexible and at the same time resistant specimens that will hold any shape. This material is durable and holds its shape well. When making a composition from fibrous paper or film, you can create the effect of movement by fixing butterflies only in the center of the body. Freely floating wings will flutter from air currents, creating the illusion of flight. Let's analyze all the features of the materials in order.
Paper
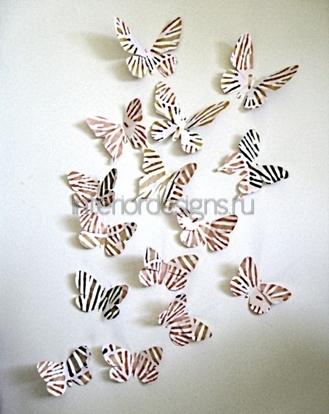
It is an easily accessible material from whichthe easiest way to make blanks, if necessary, it is not difficult to decorate it. Both white and colored paper are available at any office supply store. No matter how much material you need, you will end up spending less to purchase it than other options. If you are not attracted to monochrome butterflies, you can make them from the color pages of old glossy magazines. Paper templates are easy to stick to any surface.
Origami
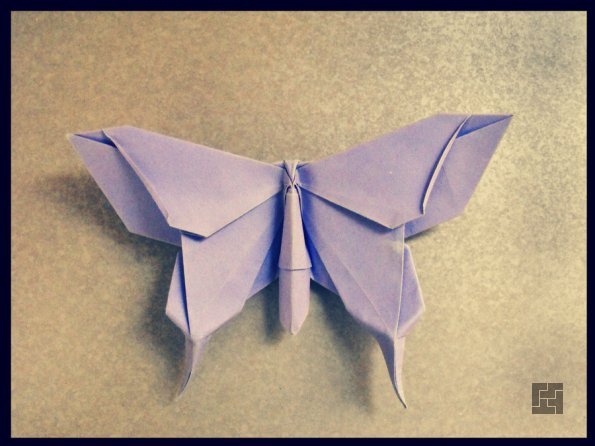
If you stick with origami butterflies, you won't have to cut anything. Folding a butterfly out of paper is not at all difficult. There are several options for doing this work, which can be found in detail at the master classes, which are offered in abundance on the network.
How to create a paper butterfly using the origami technique, see the video tutorial:
Cardboard
![]()
Cardboard butterfly will be stronger and more reliable. Such specimens will be more difficult to manufacture, but they will allow you to create a certain shape and volume. Cardboard wings and their parts can be folded and rounded. To do this, you must first moisten the workpiece and bend it under the weight of the load. The shape you need will remain after the material dries. Fixing crafts from this material should be more reliable, as it is heavier in weight.
Film
![]()
You can take a thick multi-colored polyethylene film and a special self-adhesive vinyl film - this is an ideal material for decorating. If the film is glossy, then the made butterfly, in addition to its beautiful shape and color, will please the eye with tints and reflections when the lighting is on. The process of cutting out the film itself is simple. Ordinary color film is attached like paper, and it will be enough to separate the protective layer from vinyl to attach the product to the right place. If you remove only part of the protective layer at the base of the butterfly, then it will twitch its wings from the movement of air in the room.
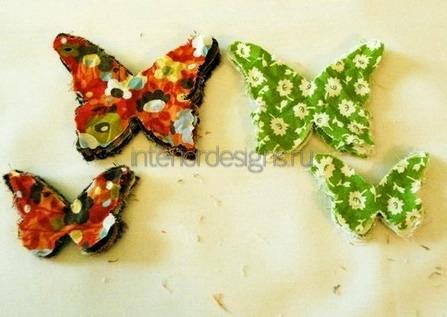
Textile
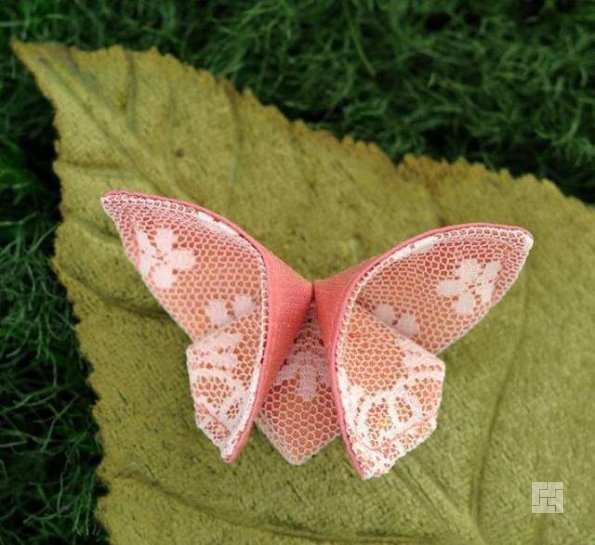
Fabric material is preferable in cases where the walls are pasted over with plain liquid wallpaper, draped or fastened to be made on a soft base . Butterflies made of fabric are very “warm” in appearance and fit almost any interior design. Most often, such blanks are completely glued to the surface. But if your plans are to create a three-dimensional picture, then you cannot do without PVA glue diluted with water, and for a very thin fabric - a soapy solution. The cut fabric templates are soaked in the desired liquid. While the fabric is wet, you need to give them the necessary shape and leave it like that until it dries completely.
Options for mounting butterflies on the wall
Choose the fastener method according to your own preferences, based on what material was used to create them.
Glue

You can use ordinary PVA and wallpaper glue. Add glue to products very carefully in small quantities - the excess protruding beyond the edges is immediately evident. Blanks can be glued as a whole, and only the middle part.
pins
![]()
Fastening can be done using a wide variety of pins. Some of them, by the way, have beautiful heads - a variety of decorations, small "pearl" balls. The needle will easily enter plastic or wooden lining, drywall or cork.
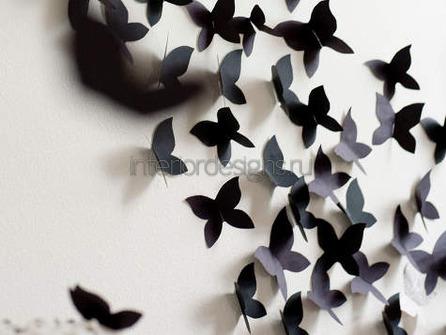
Go to wallpaperbutterflies on a pin can be attached as follows:using pliers or pliers, bend the pin at a right angle, like lettersat "G". The butterfly is carefully glued to it in the middle (it is better to use Moment glue). Now you can attach in the right place without driving the pin all the way into the wall. The shadow on the wall, cast by a butterfly on an invisible needle, will add to the reality of the created illusion of flight.
Styrofoam pieces
Pins are not necessary to attach butterflies to wallpaper. The carved insects are bent at the base for a more natural look. If the wings are raised, the application will become more voluminous and lively. The butterfly is glued to one side of the foam piece, the second side is attached in the same way to the wall. But Styrofoam, which is a fragile material, can break, leaving pieces on the wall that will not be easy to remove. Keep this in mind and use this method in those places near which there is no movement, and the chances of breaking the structure are minimal.
Suspension on threads
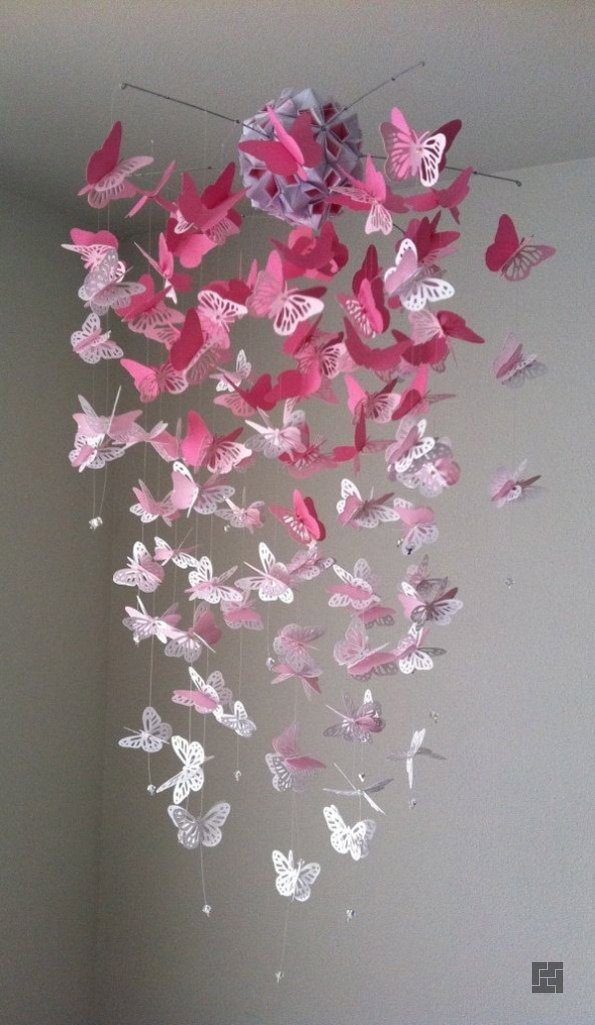
If you decide to make butterflies using the origami technique, then finished decorative elements can be hung from the cornice under the ceiling or from the ceiling itself using thin threads or a colorless fishing line. This design solution will allow you to create a three-dimensional structure.
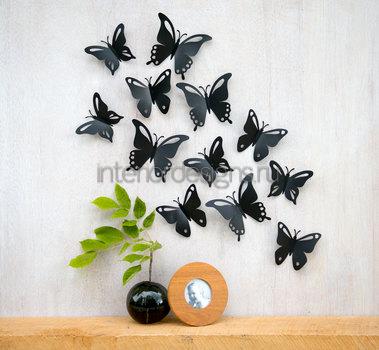
Decorating walls with butterflies with your own hands will take a long time and patience to implement the idea, but the result will bring vivid emotions to your everyday life. Choose the option you like and join the exciting creative process. A three-dimensional picture of paper butterflies can diversify the design without high costs, but what beauty will await you at home!
DIY decorations for various rooms can emphasize the individuality of the owners of the house. At the same time, you can give style and showiness to the interior. Various motives are used for this. Various decorative butterflies harmoniously fit into the interior of the bedroom or children's room. Having shown imagination and creativity, you can create various wall decorations for such a motif.
To make decor in the form of butterflies yourself, you do not need special knowledge or skills. Therefore, almost everyone can bring gentle beauty to the design of the room.
General principles
There are many ways to transform an existing interior. Butterflies are associated with summer and youth. They carelessly flutter from flower to flower. They are light and beautiful creatures. It is not surprising that they can decorate a variety of interiors, adding style and grace to the design.
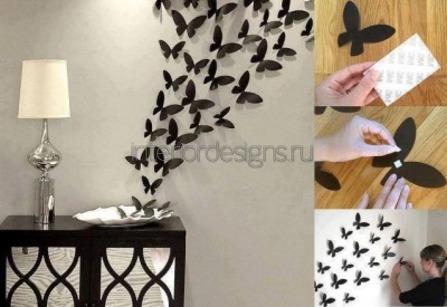
Decorative butterfly stickers sold in specialized stores. However, it is much more interesting to create compositions with such motifs on your own. In this case, you can show imagination. Butterflies are applied to walls, ceilings and other interior elements with paint or their three-dimensional figures are created.
You don't have to be good at drawing. Templates can be found in various sources and printed on a printer. You can create a decorative panel on one or all walls, the ceiling in the room. There are many approaches to creating butterflies from different materials.
Where to begin?
Any decorative decorations should fit into the general style of the interior. Butterflies can be made from various materials. The overall impression of the panel depends on their choice. Moth figurines can be made of hard, durable materials, such as cardboard. They will keep their shape well, allowing you to create clear pictures. Such types of jewelry are considered the most durable. 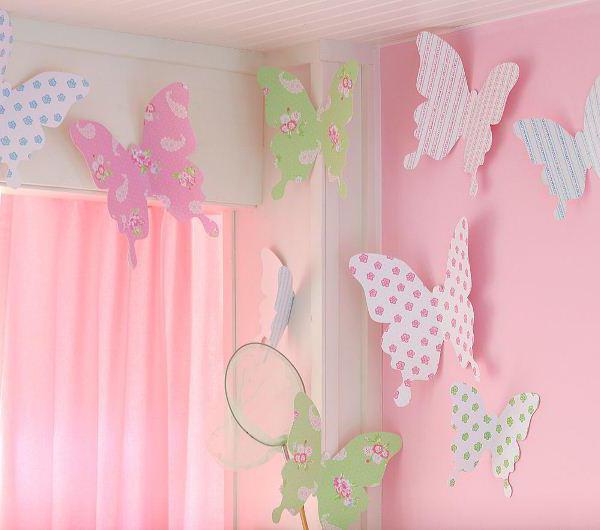
If you use light paper or even film, corrugated paper, butterfly figures will be light and delicate. If you fasten them only in the center, this will allow the wings of the moths to flutter from the slightest breath of wind. Such a composition will be incredibly light and airy.
The color scheme of the room must be taken into account when choosing the colors of the decor material. It will depend on this whether the butterflies will harmoniously fit into the existing interior. Each moth must be clearly visible. Therefore, it is better to give preference to contrasting shades.
Decor configuration
making decorative butterflies on the wall, you should take into account a number of tips from professional designers. First of all, they recommend making figures of moths of different sizes. This will bring some dynamism to the created panel.
It is better if the wings are not mirror identical. In the manufacture of figures, one should be guided only by the reception of horizontal symmetry. The top and bottom wings are best made in different sizes. 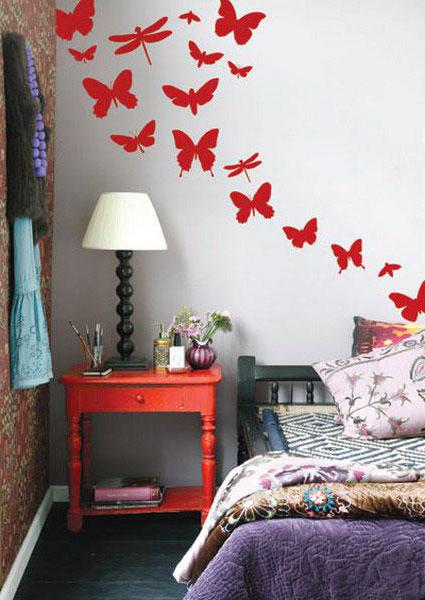
When choosing a blank for a butterfly from various sources, you should not give preference to intricate figures that have a large number of details. Cutting ruffles will be extremely inconvenient, and the decorative effect may not meet expectations. One composition will require many butterflies. Therefore, it is better to give preference to a simple configuration.
Composition formation
Before you make a decorative butterfly or a whole group of them, you need to consider their location in the room. First you need to evaluate the pattern of wallpaper or other wall decoration. In places where the composition harmoniously fits into the interior, you can place several moths.
The composition may look like a flock of butterflies, which smoothly moves from one corner of the room to another. Their concentration may be stronger in the center or on one side. The chaotic distribution of the figurines creates a stylistic effect of unique beauty. It is initially recommended to draw it on a piece of paper. 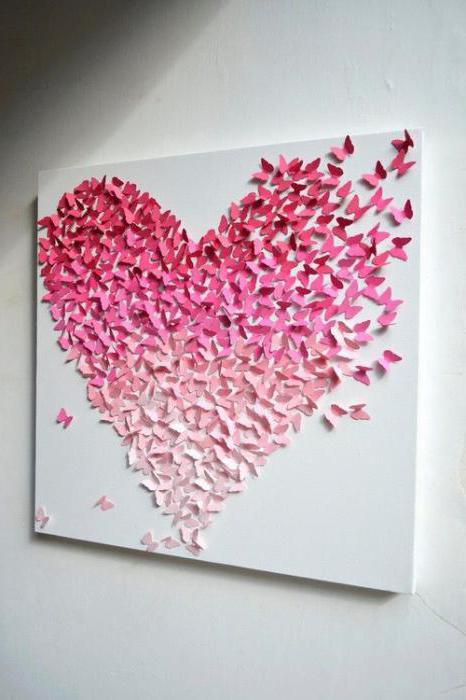
Also, a group of butterflies can form a certain shape. For example, it can be a flower or a heart. There are no limits for imagination in this direction. The intended pattern should be marked on the surface of the wall with light lines. They should be barely visible. It is best to use a thin simple pencil. It can then be wiped off the surface.
Paper and cardboard
Decorative butterflies, as mentioned above, can be created from various materials. Cardboard and paper are very popular. It will be very easy to cut moth figures from the latter. Coloring the wings of such butterflies will also be easy. This is one of the most inexpensive ways to decorate the interior. 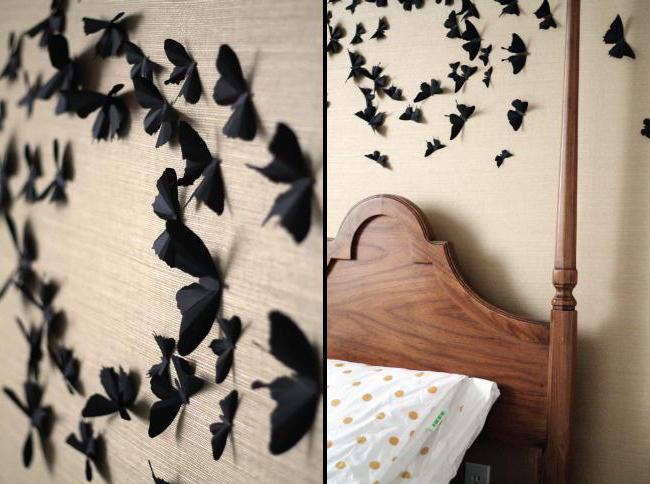
You can purchase white or colored paper. It is also possible to use the pages of glossy magazines or newspapers. It all depends on the style of the interior. They are grouped by color. Paper butterflies are easy to attach to the wall.
Butterflies made of cardboard are known for greater reliability. These are strong, dense figures. They are quite difficult to cut. However, it will be much easier to form different bends of the wings from them. At the same time, the workpiece is dipped in water, and then it is fixed in the desired position. After drying, the material takes on the desired shape. These moths need a secure mount.
Film and fabric
Can be created from film or fabric. In the first case, a special vinyl material or a wide range of "self-adhesive" is used. Moths will have a glossy texture. If you create the right lighting in the room, their wings will reflect the glare. The room will be elegant and bright.
The production of figurines from film is fully consistent with the technology in which cardboard is used. If the material has a special adhesive layer on the reverse side, the butterfly can be fixed on the wall simply. To make the moth flutter, the wings are not glued to the base. Only in the center of the workpiece is the protective layer removed.
Fabric butterflies look original. The blanks are completely glued to the base of the wall. If you want to make the fabric dense, able to keep its shape, it is impregnated with a mixture of water and PVA glue. For very thin materials, a soapy solution is used. The composition is applied to the fabric, the workpiece is fixed in the desired position. After drying, the butterfly will take the desired shape.
Making paper butterflies
By creating decorative butterflies for the interior certain instructions must be followed. Before starting work, it is necessary to prepare the required materials and tools. First of all, you will need colored, white paper or wallpaper trimmings. The template is printed on the printer. You will also need cardboard, a pencil, scissors and glue. 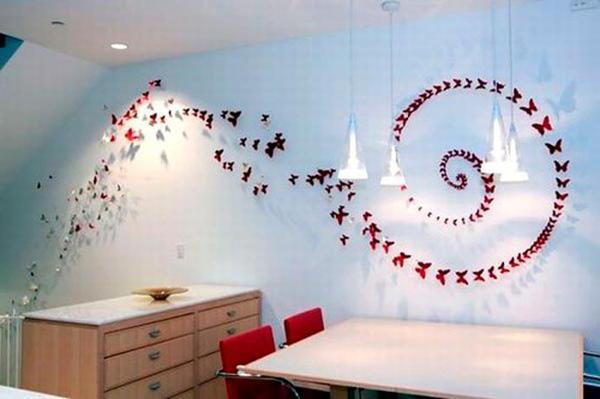
First, several butterfly patterns of different sizes are printed on the printer. They are cut out and applied to a sheet of thick cardboard. The contour must be circled with a simple pencil. Next, you need to create a stencil. The inner material of the butterfly is cut out. It turns out a blank for figurines of moths.
On the reverse side of colored paper or wallpaper, you need to draw a lot of butterflies using a stencil. They are cut out and slightly bent in the center. This will create a fluttering effect.
Mount type
DIY decorative butterflies on the wall can be fixed different ways. You can use glue for this. Paper and cardboard are firmly attached to the base with PVA. To do this, glue is applied to the center of the butterfly or over its entire surface. Next, the workpiece is pressed against the surface. It is necessary to ensure that the glue does not protrude beyond the edges of the wings. When applying PVA on the reverse side of the butterfly, you need to control its amount. Surplus is immediately removed. If the glue is applied only in the center, in this place the butterfly is pressed tightly against the wall with a finger. This allows you to clearly fix it on the surface.
Pins can also qualitatively and quickly fix the moths in the places provided for them. This option is not suitable for painted or plastered walls. But for other types decorative finishes pins will be the best solution. If desired, the butterfly can be moved. At the same time, there are practically no traces left on the wallpaper.
Butterflies can be hung with threads from a cornice or ceiling. You can also use thin fishing line for this. Butterflies that will be hung in this way must be made of cardboard. Moths folded according to the origami method will also look spectacular with this method of fastening.
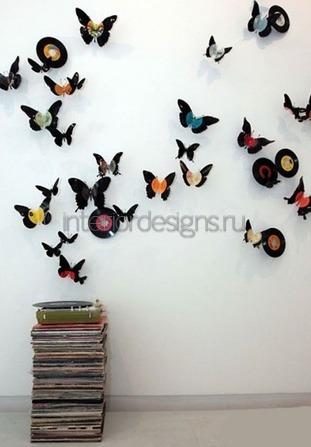
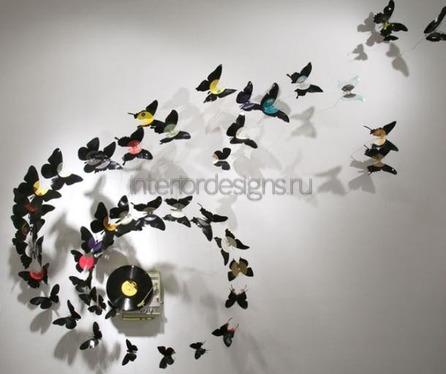
Moths from a vinyl record
Original decorative butterflies made from vinyl records. Making them is easy enough. In addition to the plates, you will need to prepare white and black chalk or pencils, moth patterns and scissors. 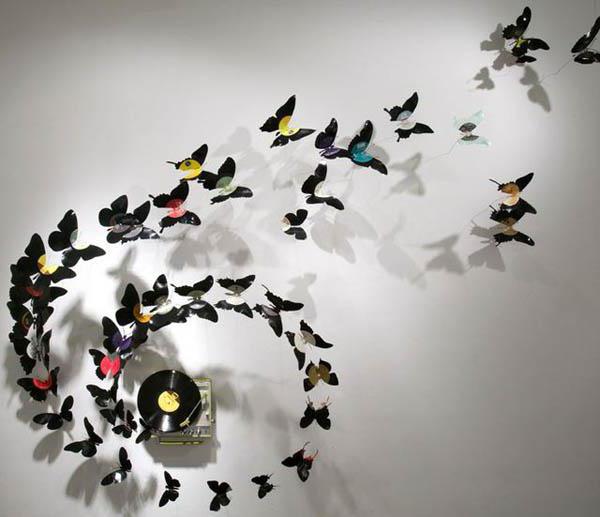
Using a template and crayons, you need to apply the form to the center of the plate. White chalk is used on the black field, and black on the label. Next, you need to put a plate with a drawn butterfly on the foil. She is sent to a preheated oven (upper compartment) for 45 seconds. During this time, the material will become soft.
With sharp scissors you need to cut out the moth. In this case, the material will quickly cool and harden. It will need to be sent to the oven several times. After the butterfly is ready, its wings need to be bent a little.
Other decor options
They can decorate not only the wall. Having shown imagination, they can decorate the ceiling, chandelier, cornice, etc. There is a technology for creating butterflies using origami. They will also look original in the interior.
From paper, cardboard blanks, you can create a beautiful chandelier. Moths seem to envelop the ceiling. In this case, you can choose any color for staining. It is correlated with the chosen colors in the interior.
White paper butterflies can be painted acrylic paints. On the fabric, you can make an additional finish with beads and rhinestones. It all depends on the imagination of the master, as well as the availability a large number free time.
Having considered the basic approaches to creating decorative moths, everyone will be able to decorate the interior of their home with these motifs.
When all the repairs in the house are finally completed, the most exciting time comes: the time to restore beauty! Wall decor with butterflies is one of the most fashionable trends in interior decoration. Butterflies, also called winged flowers, fit perfectly into any type of room, giving it airiness and extraordinary charm. In addition, according to popular beliefs, these moths - albeit artificial ones - bring joy, love and good luck to every home. Therefore, it is not surprising that many owners spare no time to create original wall panels with their own hands.
How and from what are such panels created? Let's take a look together.
Materials for making butterflies at home
You can create stencils of winged flowers at home from ordinary stationery, cardboard, thickened plastic film and fabric.
Decor with paper butterflies is the easiest and most affordable option for decorating walls. Paper is easy to process: you can cut a template of any shape from it, give it a natural asymmetry. In addition, stationery can be bought at any store, in unlimited quantities and in any color. This allows you to fantasize without limits: combine butterflies of one or more colors and formats in one composition.

Cardboard ornament is more durable, but less malleable. Cardboard is a fairly durable material that retains its shape well. To cut a moth of the required shape, you will have to work hard. The result of painstaking work will delight you with the elegance of the curves and the originality of the positions.

Decorating walls with butterflies made of thickened film (or vinyl film) is a real pleasure. From the film, you can cut a stencil of absolutely any shape and fix it on the wall with ordinary glue. The combination of moths with a matte and glossy surface will help to make the composition more expressive. Glossy elements will shimmer like a chameleon when changing lighting.
Special stencils made of vinyl film have a self-adhesive backing; to attach the ornament, it is enough to remove the protective layer - an unusual panel is ready! You can not glue the whole moths to the wall, but create the effect of "fluttering wings". To do this, the film is glued to plain paper, which is used as a rigid base, the wings are bent and the butterfly is fixed in the bend of the wings. The slightest breath of air - and the butterflies flap their wings together. A unique spectacle!
Fabric butterflies will be appropriate on the walls, in the design of which fabric elements have already been used (for example, draperies or liquid wallpaper imitating fabric). The fabric ornament looks very warm and cozy.
Methods for attaching stencils
You can attach the finished stencil to the wall with glue, special pins or foam. PVA glue or wallpaper mix is the perfect fixative for butterflies made of any material. Despite the ease of use, it is necessary to dose the amount of glue applied to the base so that it does not protrude beyond the edges of the template.
Pins are a more sophisticated way of attaching templates. This is because to fix it on the wall, you will need to bend the pin at an angle of 90 degrees with pliers (or pliers), and then put the bent part under the wallpaper or other finish. It is easiest to glue the hairpin to the stencil itself. For greater decorativeness, it is better to choose studs with beautiful heads made of stones or beads.
Finally, you can use pieces of foam to decorate the walls with butterflies. Fixing the foam to the wall, like the moth to the foam, is done using glue. This method of fastening is only suitable for light paper ornaments, since heavier items will quickly fall off.
Stages of creating decor with butterflies
Before you start cutting out butterfly patterns, you should decide on the pattern of the future application. To do this, look at the wall and evaluate how much free space can be allocated for the panel, and then fantasize. For an idea, you can take finished projects, but your own application will look more impressive. As soon as you decide on a drawing, fix it first on paper, and then on the wall with a chalk or pencil.
The next stage is the development of the design of butterfly patterns, the choice of colors and manufacturing materials. Remember: such an unusual ornament should be a bright spot against the background of the interior, but at the same time, it should harmoniously fit into the environment. Depending on the allotted space on the wall, the number of elements in the composition can vary from 10 to infinity.
Next, you can start creating templates. It is better to cut moths with a clerical knife. The shape of the moth does not have to be symmetrical; on the contrary, a certain asymmetry adds volume and dynamism to the application. The last step is to directly attach the butterflies to the wall.