- Dismantling of old windows.
- Installation of new ones.
In most cases, a package solution is offered:
- Dismantling of old windows.
- Installation of new ones.
- Installation of slopes and window sills.
It is clear that the main criterion by which potential customers evaluate the offer is the price. That is why the advertisement indicates the cost of the cheapest slopes from GVL or drywall. Due to banal savings, most of the customers stop at them.
Choice of materials
Let's start by discussing the features of different materials. It is clear that in the end, everything will be decided by the budget allocated for the repair of the window opening and your aesthetic preferences; however, some misconceptions are worth dispelling.
slopes
In most cases, a package solution is offered:
- Dismantling of old windows.
- Installation of new ones.
- Installation of slopes and window sills.
It is clear that the main criterion by which potential customers evaluate the offer is the price. That is why the advertisement indicates the cost of the cheapest slopes from GVL or drywall. Due to banal savings, most of the customers stop at them.
attachment_3348" align="aligncenter" width="496"]  attachment_3348" align="aligncenter" width="496"] an style="text-decoration: underline;">Meanwhile, this solution has several significant drawbacks.
- GVL and drywall quite easily miss on impact. However, it is just as easy to repair with any gypsum putty.
- If contaminated with grease (which is quite real in the kitchen), you will need to re-paint the slope.
- Due to the different coefficients of thermal expansion with plastic and the hygroscopicity of gypsum, cracks will inevitably appear at the junction of slopes and frames.
Tip: If this happens, protect the slope and frame with masking tape and go over the joint with white silicone caulk.
Smooth out the ridges and unevenness of the sealant easily with a damp finger.
An alternative is plastic sandwich panels. The installation of PVC window sills and slopes is also often offered when replacing windows. In addition to the easy-to-clean surface, the sandwich panels are equipped with a 10 mm layer of expanded polystyrene, which will prevent slopes from freezing and the appearance of condensate, fungus and mold.
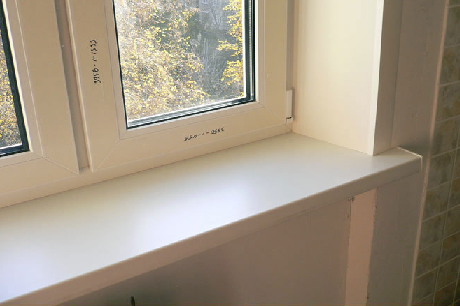
Windowsill A traditional part of the package offer is a PVC window sill. As a budget solution - not bad; however, let's be a little capricious in this case too. What are the alternatives? In addition: the stone window sill should be in harmony with the surroundings. In combination with a PVC window and paper wallpaper, it often looks like an alien element. Cutting a hard plastic surface is much more difficult than drywall. If this nevertheless happened, liquid plastic for repairing plastic windows will help to hide the defect (for example, the German Cosmofen Plus). It is also often used by professionals to connect the slopes and the window sill to the frame. A traditional part of the package offer is a PVC window sill. As a budget solution - not bad; however, let's be a little capricious in this case too. What are the alternatives? In addition: the stone window sill should be in harmony with the surroundings. In combination with a PVC window and paper wallpaper, it often looks like an alien element. i-6=""> Window sill
Windowsill
 i-10=""> Mounting
 Usually window sills are installed together with ebbs and other structural elements. However, there are times when a separate installation of these elements is necessary. For example, when replacing due to mechanical damage, during repairs and a radical change in the interior, or simply in a new building, the developer left the installation of window sills and slopes at the discretion of the buyer.
Installation of a window sill on PVC windows
The plastic window sill is very convenient for operation, durable and easy to clean. Window profiles are sold with a length of 4050 - 6000 mm, a width of 110-600 mm, a thickness of 18 - 22 mm. For the ends and docking profiles, a wide variety of plugs, including decorative ones, have been developed. Installing a window sill on PVC windows is easy. Usually, a stand profile is provided under the plastic windows. It is already the frame of a double-glazed window: on the outside, an ebb is attached to it, on the outside - a window sill. Sloping of slopes is also not always necessary.
Initially, you need to determine the size of the workpiece. Even if the workpiece is purchased longer than necessary, it can always be adjusted in length using a conventional saw or jigsaw. When calculating the width, it is important that the structure does not block the convective flow of warm air from the battery up to the window. If this condition is not taken into account, condensation will fall on the windows, and the flow of cold air from the window panes will go into the room.
Next, the PVC window sill is installed in the groove of the double-glazed window frame. Carefully leveled. Bars are usually used as spacers. The window sill below has a groove - "dovetail". It provides reliable fixation of the window sill. After leveling, the gap between the bottom of the window opening and the window sill itself is filled (for this purpose, it is better to take frost-resistant foam with a lower expansion coefficient). When working with foam, it must be borne in mind that, expanding, it is able to squeeze the entire structure up. To do this, the window sill is either pressed from above with a heavy thing for a day, or the central space under it is not foamed, leaving an empty space. If necessary, then read our next article.
Plaster slopes installation of plastic slopes
Finishing slopes of plastic windows
Slopes are made of three types: plaster, plasterboard and plastic.
Plaster
Slopes are the most economical, but also the dirtiest option. They need constant painting, at least once a year, they can turn yellow (depending on paintwork) in the sun. The main thing for independent work on finishing slopes on plastic windows- do not cut the mounting foam. It has a structure of cells that are not closed inside, which, when cut, will absorb moisture from the air and get wet. Which will lead to the appearance of cold bridges, blowing the assembly seam.
The surface of the wall can be reinforced plaster mesh, work is easier to produce with ready-made plaster mixtures.
The main task is to level the surface and form a smooth, even surface. From above, the slope can be painted with any paint in accordance with the color scheme of the interior.
Plasterboard
Options, like plastering, can be considered dirty work that requires careful sheathing of furniture in the room. For finishing with plasterboard slopes of plastic windows, it is necessary to carefully measure the dimensions. For ease of installation, guides are used to which drywall sheets are attached with self-tapping screws. A heater (for example, basalt) is inserted into the space between the sheets and the window opening. The glue is applied to the front edge of the window opening - the slope must be smeared to a depth of 10 cm. It must be done without voids so that the glue lies in a continuous strip. Then you need to wait until the glue sets and proceed to the finish.
Plastic
Plastic slopes are the most durable, easy-to-care and maintenance option. They are sold directly by systems, which includes a panel, guides, decorative overlays.
Before installing the panel, the window opening is leveled, and a wooden rail is attached to the wall. As a result, the slopes are even. The joints of the panels with the window opening are treated with sealant. Thermal insulation is provided by insulation or foam, which makes slopes an order of magnitude warmer than plaster ones.
Thus, the installation of window sills and slopes must be treated with all care and seriousness.
Submit your application Free master callIncorrect installation of slopes can damage the mounting seam, which may later lead to the need to replace it, and errors in installing the window sill can cause a violation of convection in the room and a stream of cold air from the window will blow into the room all the time, and the glass will fog up.
Installation of slopes and window sills - mandatory work on finishing the window opening. At the Moscow Window Service company, masters with extensive experience do this.
Specialists perform the installation of plastic window sills not only for aesthetics - Decoration Materials protect the structure from freezing, accumulation of moisture, the formation of bacteria. That is why it is important to turn to a reliable master, otherwise you risk getting damp walls, drafts, mold.
How are slopes installed?
When installing, it is important to calculate how thick the foam layer should be - this will prevent deformation of the sandwich panels. In addition, during the installation of slopes, insulation is laid to protect the PVC structure from freezing, profiles are applied as a finish, joints are filled with liquid plastic: it is invisible, does not darken, does not turn yellow, and does not lend itself to mold.
How are window sills installed?
First of all, the measurer comes and determines what the size of the product will be. It depends on the width of the wall: from 300 mm to 600 mm in panel and brick houses, respectively. After the manufacture of the plastic window sill, installation is carried out in compliance with all the rules. Firstly, it is important to leave gaps of at least 10 mm on the sides, and secondly, you need to firmly seat the structure on a layer of mounting foam so that it can withstand the weight of a person. Slots are sealed with liquid plastic or silicone. If the product protrudes strongly above the batteries, gratings are installed to prevent the circulation of warm air in the room from being disturbed.
Prices for installation of slopes and window sills
| N p/p |
Name | Unit. | price, rub. includes material and turnkey installation |
| 1 | DANKE Standart 100 mm | p.m. | 1400 |
| 2 | DANKE Standart 150 mm | p.m. | 1900 |
| 3 | DANKE Standart 200 mm | p.m. | 2300 |
| 4 | DANKE Standart 250 mm | p.m. | 2500 |
| 5 | DANKE Standart 300 mm | p.m. | 3000 |
| 6 | DANKE Standart 350 mm | p.m. | 3500 |
| 7 | DANKE Standart 400 mm | p.m. | 4000 |
| DANKE Standart 450 mm | p.m. | 4500 | |
| 9 | DANKE Standart 500 mm | p.m. | 5000 |
| 10 | DANKE Standart 550 mm | p.m. | 5500 |
Five standard work steps
- Placing an order on the site.
- Departure of the master for measurement within an hour after the appeal.
- Installation of window sills.
- Drawing up a contract-guarantee.
- Payment for services.
Operating procedure
You make an application on the site
Our masters come to you
We do the work
Registration of the contract-guarantee and payment
We provide guarantees for services: 5 years - for the materials used, 1 year - for the work performed. So, within 12 months after the installation of the slopes, the master will come and eliminate the errors free of charge.
In order for you to take advantage of the warranty service, the specialist will leave a special sticker with a barcode on the window. It will be enough to report this code to the manager, and the specialist will eliminate the malfunction for free.
Advantages of ordering the installation of slopes and window sills with us
- You can choose a convenient time for installation: teams work seven days a week: from 7:00 to 24:00.
- The master measurer arrives free of charge within one hour and names the exact price. By calling a professional, you will receive an installation that is in accordance with the rules and does not need alterations.
- You can be sure of the quality of the services provided. We have our own production, 30 professional mobile teams in Moscow and the Moscow Region, where experienced craftsmen with at least 10 years of experience work. In addition, we give guarantees for the installation of slopes.
- Regular customers receive discounts from 5 to 20%.
- You do not have to spend energy on cleaning, since after the installation of the slopes there is no dirt and debris left.
In order to place an order for the installation of slopes and window sills, just call or go to the website, fill out an application and wait for the arrival of the master. By phone you can also specify the price and get a free consultation.
- Installation of window sills: features
- Internal and external facing of slopes
- Exterior finish
- The nuances of interior decoration
- Basic finishing materials
- Some characteristics of the material
The process of installing windows is often associated with certain difficulties, so all work on installing the structure is carried out by qualified craftsmen. But the individual details of the opening can be done by yourself. By installing slopes and window sills on your own, this allows you to significantly save money and carry out the work clearly and measuredly.
After installing the window structure, it is necessary to make its lining. Slopes and window sill give the window a finished look.
As happens in practice, after the installation, these parts of the windows take on an unsightly appearance. Of course, the cladding process can be postponed for another time, but the external indicators of the opening will not decorate the room at all. In combination with the new design, it will look like an ugly stain. Therefore, the design of window sills and slopes must be carried out immediately.
Such activities are often combined with the implementation of repair work in the rooms. However, it is worth remembering that polyurethane foam quickly collapses when exposed to the sun, high temperatures, cold, so it is necessary to deal with this matter as early as possible. And such troubles can entail an additional call of a specialist due to changes in the external structures of the opening. The wind will walk in the room, and the air temperature will noticeably decrease.

The first step is to install window sills. To do this, holes are drilled at the slopes, after which they proceed to their lining. But first about the tools for the job:
- screwdriver;
- roulette;
- level;
- a hammer;
- electric drill and others.
Installation of window sills: features
It is known that the bulk of the population installs plastic window sills. And this material is very afraid of mechanical damage, for this reason, you should be especially careful in the process. In almost all cases, manufacturers wrap this element of the opening in a film, which should be disposed of after the installation work is completed.
The window sill is fixed with glue or a special solution, sometimes they resort to screw fastening. This part of the opening should be approximately 20 cm larger than the window itself. The protruding element should be 7 cm or less. Do not forget about the distance between the window sill and heating radiators.

After that, this part of the opening is installed. Before installation, it is necessary to remove excess of the previous mortar and residual materials from the surface. You can determine the window sill in a perpendicular position relative to the window, and it is also possible to fix it with an inclination to the other side of it. In this case, the possible moisture that appears near the opening will flow down without lingering on it.
The installation of window sills is inextricably linked with the calculation of its length, after which the recesses into which it is inserted are fixed on its basis. After that, the resulting gaps are sealed with mounting foam. As soon as it dries, it is necessary to get rid of the excess by cutting off the protruding parts.
Further installation of window sills continues. The next step is to plaster the surface at the bottom of the window. For this, tile adhesive is taken. As a preparation of the base for further wallpapering, it is necessary to treat the surface with acrylic primer. Putty will help make the surface smooth, such a base will be necessary for painting the walls. As soon as the above measures are carried out, the protective film is removed from the window sills, and plastic plugs are installed on the sides of the structure. After that, the installation of slopes begins.
Back to index
Internal and external facing of slopes
Back to index
Exterior finish

Cracks and irregularities must be covered with a special solution.
External finishing of slopes is carried out much easier than interior work. To do this, the walls near the window are cleaned of construction debris. An excess amount of foam is cut off with a knife; there should be no differences with the base of the wall. Possible gaps are smeared, for this you can use tile adhesive.
Further installation is associated with repeated surface treatment with a primer. Subsequent actions are associated with the use of plaster and putty. Do not forget that the materials for the design of slopes must correspond to outdoor work. After that, the plane is leveled, enamel is applied to it or decorative plaster. With the external design of the slopes, it is necessary to familiarize yourself with the instructions attached to the materials so that there are no unpleasant nuances in the future.
The installation of slopes is associated with the subsequent scraping of the base. Such an undertaking may seem rather difficult. For this, builders often use a reinforced mesh, on top of which the composition is applied. Existing gaps and visible wall defects should be covered up. Such manipulations will protect the window structure from the penetration of moisture, insects into the cracks, the influence of heat and frost, which does not have the best effect on the atmosphere of the room.
Back to index
The nuances of interior decoration

The installation of internal slopes is a special responsibility, because it is carried out in the room and will always be in front of your eyes. For this reason, preference should be given to better types of materials, and installation work very carefully.
The order of their installation is the same as in the previous version. To begin with, the plane is cleansed, getting rid of the old and useless bases. The excess amount of mounting foam is cut off with a knife, then the slopes are determined in their place. The presence of voids and gaps on the surface of the walls gives grounds for covering them with any solution or fabric for thermal insulation. Then installation work is carried out, measures are taken to level the surface and subsequent painting. PVC windows are cleaned of film, dust and washed.
Plastic windows are becoming more and more popular these days. Not the last role in this is played by a small cost compared to eurowindows made of wood. Some owners prefer to install window sills and slopes on their own - this saves a significant amount. Such work is not particularly difficult for a person with at least minimal building skills.
Provides reliable sealing and thermal protection.
And slopes are the final operations when installing plastic windows. The installation steps are quite simple and do not require any special building skills. When installing plastic windows, the installation of slopes and window sills is not necessary (provided that thermal insulation is carried out correctly), but to create beautiful interior these elements are important.

The installation of the window sill is carried out so that it does not protrude too much. So it does not create obstacles to the warm air coming from the battery.
After the PVC window is put in place, you can proceed to the installation of the window sill. It should protrude slightly from the opening, while as if leaning against the wall. These protrusions should not have a width greater than the starting slope bar - it will need to be installed later. Installation does not require special tools or serious skills to carry out the work. To saw off window sills to the desired length, you can take a simple saw or an electric jigsaw. During this operation, you must be careful and cut, trying not to exert much pressure on the window sill.
When installing window sills, it is necessary to take into account the properties of the material from which they are made.
The service life of the construction of plastic windows also depends on how qualified and competent the installation will be.
It also takes into account how correct the installation of the window itself is. In places where warm and cold air come into contact, condensation can form - moisture will be absorbed into the wood from which the window sill is made, which, of course, does not contribute to its durability. To prevent this from happening, the window sill must be separated from the walls and thermally insulated. If these conditions are met, it can be avoided that the window sill will freeze and collapse.
Window sills must be fixed with mounting foam. It will perfectly fasten the window sill to the slope surface, fill the voids and serve as a good heat-insulating material.
To prevent condensation, the window sill must be separated from the walls and thermally insulated.
The installation of a window sill for plastic windows should be carried out so that it does not protrude too much. So it will not create obstacles to the warm air coming from the battery. In panel-type houses, plastic window sills are usually installed, the width of which is about 25 cm. If the window sill is purchased with wider dimensions, it is easy to cut it from the back. The prepared part will need to be brought into the window sill space by about 1 cm, fixed with wedges - made of plastic or wood. To properly fit the window sill to the required size, you will need to measure the length between the walls at the window, at the outer edge of the opening, from the window to the wall. The finished element should be slightly narrower than the width of the window opening - it is more convenient to install it, but really only a little - if the measurement is incorrect, the slopes will not rest against the window sill, but will sink lower. When sawing window sills, absolute symmetry should be achieved on both sides for those parts that protrude beyond the opening.
Back to index
Sequence of work
Before you start the installation, you need to prepare everything for work. The space under the window is cleaned - it is necessary to completely remove debris and possible pollution, after cleaning the surface is slightly moistened. If installing with a vapor barrier, the piece of material must be wider than the opening. The vapor barrier tape with a narrow part is glued to the frame, wide, after laying the foam layer, to the opening.
After that, you can start filling the gap. Window sills are filled with mounting foam. Foam should be poured in lines, as tightly as possible, so as not to leave empty space. Sometimes they don’t pay much attention to the resulting gaps, believing that when expanding, the foam will completely clog the remnants. When filling a seam with more than 5 cm with foam, it should first be filled with foam by about half, after 15 minutes the procedure must be completed - fill everything to the end. Space should be provided so that the foam can expand - for this purpose it is necessary to foam only three-quarters.
Wooden bars are placed along the edge of the window for support. Their thickness is selected in such a way that the window sill can enter the space under the window, and there would be no gap left. To make the installation more even, the bars must be arranged strictly horizontally or with a slope towards the room. After that, you can fill the space that remains between the bars with foam. A very large layer of foam cannot be attributed to good options - this will contribute to the fact that the window sill simply arches. The space can be insulated with a material of the appropriate purpose, or at least a thin layer of foam can be applied to the surface. Now you can carefully lay the window sill on the bars. The installation of the window sill is almost complete; it remains only to fill the last gaps with foam and place a load with sufficient weight on top for about a day to counteract the foam.
Back to index
Slope installation

Slopes - located outside or inside the room.
The turn of the final stage has come - this is the installation of slopes. Slopes - window openings located outside or inside the room along the perimeter of the window. This element should be classified as decorative - their purpose is to hide the fasteners of joints and frames. The installation of plastic windows is completed with the device of slopes. Slopes are not so difficult to install, in combination with a window they have excellent thermal insulation, sound insulation, and are durable and simple in operation. The interior of the room with them looks more beautiful, complete.
To design a window in this way, you will need plastic panel. AT panel houses where the slopes are narrow, a simple unvarnished plastic panel is perfect; in brick houses it is better to use sandwich panels. You will need other tools for the device slopes:
- plastic strips - U-shaped, F-shaped;
- wooden lath approximately 15 mm thick;
- stapler with staples;
- perforator;
- level;
- material for insulation;
- knife, scissors for cutting metal;
- fasteners;
- white silicone.

Tools for installing slopes: perforator, level, insulation material, white silicone, stapler with staples.
Until the installation of slopes is completely completed, it is not necessary to remove the protective elements from the plastic - this way it will be possible to keep the parts clean and tidy. First, a rail is attached along the outer edge of the perimeter of the slopes - using a drill and self-tapping screws. To get straight lines, you should use the level. With this design, hardness is imparted to the plastic. When building a support for plastic, it is not necessary to perfectly dock the rails - later they will still be hidden.
When using self-tapping screws, a starting strip is stuffed along the edge of the window. Then a plastic panel will be inserted into it. It is necessary to ensure that the starting strip fits as best as possible. Now it's time to attach the F-band. It is measured exactly according to the dimensions of the slope, and the remaining "tail" is simply cut off.
On both sides at the top of the planks will overlap. But it is very easy to remove with metal scissors. The starting bar is attached to the rail with a stapler using staples. It should be fastened to the bottom strip - plastic will then be inserted into this space. If necessary, such a strip can also cover damaged wallpaper. The next step is to cut the plastic panel exactly to size. It must be stuck first into the starting far bar, and then into the near one, while a layer of insulation should be laid inside. It turns out in this way an airtight space in which heat is stored. If the joints are uneven, you can repair them using white silicone.
Showcase Loggia Body