Decoupage cutting board. Master class for beginners from Daria (Sweet corner)
Materials:
1. Wooden decorative cutting board.
2. Abrasive skin.
3. Round file.
4. White primer (white paint).
5. Napkin.
7. Synthetic brushes.
8. PVA glue (or decoupage glue).
9. Acrylic paints.
10. Patina.
11. Lacquer matte.
Work process:
1. We skin the board.

2. We process the hole of the board with a round file.

3. Prime the surface (either white primer or white acrylic paint). I have soil. You can use a brush, you can use a sponge. We wait until it dries (or dry it with a hairdryer).

4. Sand again to make a completely flat surface for gluing the napkin (aligning the waves from the brush, if any).

5. We select a napkin (motive).

6. Carefully cut off the edges of the napkin (motive).

7. Separate the top layer of the napkin from the two bottom ones.

8. We take water and a brush and start gluing the napkin to the board with water first.

9. We drip water into the center of the napkin.

10. Constantly picking up water on the brush, smooth the napkin from the center to the edges - so that wrinkles do not appear. To do this, we hold the napkin from the edges with our hands so that it is, as it were, in weight, and does not lie on the board. Water must be taken sparingly, but not so that it flows.

11. When we smooth the napkin with water, we can start gluing on the glue.

12. We drip glue on a napkin and also level the glue from the center to the edges with a brush. We are waiting for complete drying.

13. We select acrylic paints that match in color to those on the napkin.

14. In this case, in addition to acrylic paint, I have green and brown patinas. We begin to tint the edges with a sponge in the desired colors, and for a single background, you can also go on a napkin. I like to apply the patina gently with my finger.
Decorative kitchen board "May roses". Step by step instructions with photos.
Marakova Polina, 10 years old, student of the 4th grade of secondary school No. 7 of the city of Salsk, Rostov Region.
Supervisor: Ivashchenko Victoria Nikolaevna, teacher of additional education, MBU DO Children's Children's School named after. N.I. Filonenko, Salsk, Rostov region.
Description of work: The master class is designed for children of primary, middle and senior school age, teachers and parents.
Purpose: Gift, interior decoration.
Target: creation of a decorative interior decoration - a kitchen board "May roses".
Tasks:
- learn how to create interior decoration using the "direct decoupage" technique;
- improve the skills of working with the necessary materials, as well as the tool - scissors, observing the rules of safety;
- develop individual creative abilities, artistic taste;
- cultivate diligence, perseverance, accuracy in work.
Materials, tools:
round wooden board
acrylic paints,
decoupage card, three-layer napkin,
acrylic lacquer,
brushes, scissors.
Progress:
Decorating wood products using the "direct decoupage" technique is a real pleasure. The exception is no cutting boards, available in a wide range in any hardware store. In children's creativity, it is preferable to use well-crafted boards with a perfectly polished surface.

The board must be primed with thinned white acrylic paint. We work with a brush in one direction so that the surface of the board is sufficiently saturated with paint.

Since it was decided to decorate the board using the "decoupage" technique in addition to the tea house, we will use the rest of the decoupage card with roses.

We glue the floral fragment using acrylic varnish, as usual with direct decoupage, that is, we act with a brush over the selected fragment of the decoupage card.


We find a napkin with bright butterflies. We tear out the elements with the image of butterflies from the napkin and carefully stick them on the board.


Since the decorative board will be a pair of the previously made tea house, the sides must be painted over with green acrylic paint (the roof of the house is green) with a slight approach to the front. We cover with several layers of acrylic varnish. You can use the board from the back.


Now the set "May roses" is ready. By the way, when the work was completed, Polina decided that the board was DECORATIVE and would be in the kitchen solely as a decoration.
Such a technique as decoupage gives a lot of room for creativity. With its help, you can give a completely new look to old things or your individual style, which you will not find in stores. The technique of creativity here is very simple, it consists in cutting the drawing and transferring it to various surfaces, after varnishing the drawing resembles a real artistic painting.
Today we will practice this technique and transform the ordinary cutting board, an item that is easy to find in every home.

Most cutting boards are wooden, which is convenient for a beginner, wood is the most convenient material for creativity, convenient and comfortable, it is easy to prepare for work.


Also, the board is a flat object, without sharp volumetric rolls, there is no problem to glue any part of the drawing without creases. A decoupage cutting board is a simple craft option perfect for a beginner.

Instructions for beginners or how to choose materials
Glue: it can be used both special for decoupage and PVA, in the second case, you need to understand that over time it can turn yellow and for things that you plan to use for a long time this is a big minus. On the other hand, for beginners, it will obviously cost less than professional glue, which is selected for certain surfaces.

Acrylic paint - always white, other colors at your discretion.


Brushes: For glue and paints, it is better to have a separate one, it is good to have several brushes of different sizes. They should always be cleaned immediately, otherwise, when the glue dries, even with a cleaner, difficulties may arise, in general, it is best to periodically wash the brushes with soap or an inexpensive shampoo.

Sponge or sponge: A sponge is essentially the same sponge, only attached to a brush stick, you can build such a device yourself.

Sandpaper or sandpaper: it is best to have several types for different materials.

Primer: for leveling surfaces.


Lacquer: Acrylic lacquer is usually used, it is best in a spray can, it is more convenient to work with.

Preliminary preparation of working materials
Cutting board, wooden
We sand the board with coarse sandpaper or sandpaper so that the surface is as smooth as possible and without roughness. You also remove dirt and dust accumulated on the board, if it is not new, which has managed to soak into the top layer of wood.

For a better leveling of the surface, you can treat it with a primer. If you have not worked with a primer, remember that the movement of the brush should be such that you drive the primer between the fibers of the wood of the board, trying to fill all the free space inside.

IMPORTANT! If a drawing was depicted on the board, it must be removed with sandpaper, if the drawing is cut out, it must be laid with a primer.


Drawing for drawing
Drawing selection. You should think about how the transformed piece of furniture will be combined with the surrounding space, the same kitchen and household utensils.

For example, in this master class, the decoupage of a cutting board is made in the Provence style, neutral enough to go with the usual classic kitchen. But if you have a brighter interior made in a certain theme, you might want to choose something closer to it.

Check the location of the details of the picture and choose the best one. In the process, it will be unpleasant if you suddenly did not calculate in advance and some detail suddenly did not fit. It's better to check everything in advance. Also keep in mind that the paper is retracted by 0.5-0.8 cm, and the position of the pattern may change.

Master class "How to make a decoupage cutting board"
With the help of a sponge, if you don’t have one, a soft sponge for washing dishes will serve as a substitute, paint the board where the drawing will be located with white paint. No need to smear the sponge on the board, gently trample the paint into the wood with it. A sponge is needed so that the painting is the most accurate and no bubbles form on the surface.


Apply 2 layers of paint in this way, wait for the paint to dry, then smooth out the bumps with sandpaper. Before gluing the napkin, remove unnecessary lower two layers from it. We knead the sizing mixture: glue and water, in appearance you should get something similar to liquid sour cream. Then lay the drawing on the board, dip the brush into the glue solution and drip onto the center of the drawing.


In the photo you can see an almost finished decoupage cutting board. It remains only to fix the work with varnish. It is best to do this from a distance and in several layers. Please note that if you plan to use the board not as an interior item and will wash it, it is best to use yacht varnish, not acrylic.


Subtleties
Cutting board decoupage - despite the simplicity of the material, it requires attention for beginners. To avoid defects, do not forget:
- Remove excess glue, when they dry they will leave marks and will definitely ruin the drawing.
- Each layer of work, no matter what it is, paint, acrylic contours or another layer of drawing, glued on top, requires fixing with varnish.

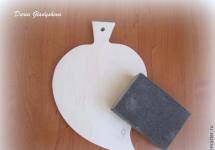
Photo of decoupage cutting board


Any creative process is always fascinating in itself. If you want to create a unique decorative item for your home with your own hands or make a gift for a loved one, then a beautiful decoupage of a wooden cutting board will be the most suitable option.
Materials for decoupage boards
Using decoupage technique, it is possible to create truly unique things that will be distinguished by their individuality and originality. When answering the question of how to make decoupage boards with your own hands, you should first mention all the necessary materials for this process.


Any novice master should purchase a set of tools in the form of:
- the wooden board itself (by the way, you can use a used item that will become new after registration);
- glue: both special decoupage glue and ordinary PVA are selected (minus PVA is the yellowness that appears over time);
- acrylic water-based varnish - sold in stores building and finishing materials. If the board is decorative, any lacquer is suitable, if in the future it is used in everyday life, it is worth choosing a yacht or parquet type of lacquer that has improved performance properties;
- acrylic snow-white paint;
- acrylic paints for artistic painting of different colors;
- napkins or any images you like (magazine clippings, printed pictures, etc.);
- scissors, brushes, sponges, sandpaper.

Stages of creating a decoupage cutting board
Thanks to a detailed decoupage master class, the process of creating a unique beautiful board for the kitchen will not become something complicated. All work will take about 2-3 days. Working with wood is pleasant and convenient.

As a picture for a board, you can use themed drawings in the form of vegetables, fruits, dishes, or choose original unusual images: a world map, a chessboard, a newspaper page, etc.


Step-by-step decoupage for beginners includes several main steps:
- Sanding the workpiece.
- Ground surface grinding.
- Pasting the image on the board.
- Product varnishing.

Decoupage the board with napkins
Following the instructions for decoupage of a cutting board, you will be able to get a high-quality original piece of furniture. For decoupage, you can choose any multilayer napkins. Only the top thin layer should be transferred to the board.

So, the decoupage process begins with the preparation of the board. An even wooden product is covered with the first layer of acrylic paint with a brush along the fibers. If during the process the wood fibers begin to separate from moisture, then after drying they must be sanded.


After the first layer has dried, a second one is applied, but with a sponge, so that no streaks are visible. Again, everything dries well. To speed up the process, you can connect a hot air dryer.

When the product is completely dry (about 24 hours), you can proceed to the imposition of a fragment of a napkin with a pattern. Before this, the desired pattern should be carefully torn out of the napkin. You can transfer the napkin to the surface of the board in several ways (wet, dry), the main thing is that there are no wrinkles and air bubbles.

For beginners, the dry method is suitable: the prepared fragment is applied to the board and, using a brush dipped in an adhesive solution, begins to gently stick. In this case, you should not rush, so as not to tear the napkin.

If the folds are still formed, then you can smooth them out with an ordinary spoon or a rubberized roller. After removing all wrinkles and bubbles, you can leave the product to dry.

After the workpiece has dried, it is time to draw the contours of the image. Also, using colored acrylic paints and a sponge, you can create blurry edges. To do this, with wet movements, the paint is applied with a sponge to the right places.


The “splash” on the surface looks very impressive, as in the photo of the decoupage of the cutting board. To create such an effect, an ordinary toothbrush is dipped in the paint of the desired shade and, after running a finger over it, the droplets scatter over the surface.

As soon as the paint dries, the process of varnishing the product begins. The selected varnish is applied to the entire surface of the board in several layers, while each of them must dry well. Now the cutting board is completely ready for use as a full-fledged kitchen item.

Decoupage is considered a very budget type of creativity. It is possible to purchase all the necessary materials and tools in specialized needlework departments, in ordinary hardware stores, and in online purchases. The main thing is to love your work and enjoy the creative process.

Photo of decoupage cutting board